How to Make a Vaulted Ceiling in SketchUp
Creating a vaulted ceiling in SketchUp is a relatively simple process that allows you to add architectural interest and elegance to your designs. Vaulted ceilings are often found in traditional and modern architectural styles, adding a sense of grandeur and spaciousness to a room. This article will guide you through the steps of creating a vaulted ceiling in SketchUp, providing clear instructions and helpful tips to achieve professional results.
1. Setting Up the Foundation
Before you begin creating your vaulted ceiling, it's essential to properly set up the foundation of your model. This includes defining the walls, floor, and any other structural elements that will be affected by the vaulted ceiling. Start by drawing the floor plan of your room, ensuring that the walls are accurately drawn and positioned. You can use the Line tool or Rectangle tool to create the walls, and the Push/Pull tool to extrude them to the desired height.
Once you have defined the walls, you can proceed to create the vaulted ceiling itself. There are different methods for achieving this, but the most common and intuitive approach involves using a series of planes and then using the Intersect with Model command to trim them to the correct shape. This method ensures that the ceiling will integrate seamlessly with the existing walls of the room.
2. Creating the Vaulted Ceiling Plan
To create the vaulted ceiling plan, begin by drawing a rectangle on top of the walls, representing the overall shape of the ceiling. Next, using the Line tool, draw a series of diagonal lines across the rectangle, forming a series of triangles. These triangles will define the shape of the vaulted ceiling. Adjust the angles and positions of these lines to achieve the desired aesthetic, ensuring that the lines converge at a central point. The more triangles used, the more detailed and intricate the vaulted ceiling will appear.
Once you have drawn the desired number of lines, select all of them and use the Follow Me tool to extrude them upwards. This will create a series of triangular planes that form the base of the vaulted ceiling. Ensure that the planes are extruded to a height sufficient to clear the top of the walls, leaving enough space for the ceiling itself.
3. Defining the Vaulted Ceiling Shape
After creating the initial planes, it is time to refine the shape of the vaulted ceiling. The Intersect with Model command is crucial for this step. With the vaulted ceiling planes selected, use this command to intersect them with the existing walls and floor of the room. This will trim the planes to the exact shape of the room, ensuring that the ceiling fits seamlessly within the space.
Once the planes have been intersected, you can further refine the shape of the vaulted ceiling by using the Push/Pull tool. You can use this tool to push or pull certain points of the ceiling to create a more intricate and aesthetically pleasing design. For example, you can create a more pronounced arch by pulling the center point of the ceiling upwards, or you can create a subtle curve by pushing the edges of the ceiling downwards.
4. Adding Details and Finishing Touches
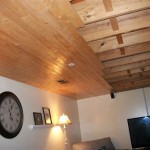
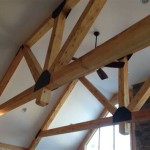
With the basic shape of the vaulted ceiling established, you can now add details and finishing touches to complete the design. This might involve adding decorative elements, such as moldings or beams, or incorporating skylights to create a sense of openness and natural light. You can use SketchUp's various tools to create these details, including the Line tool, Arc tool, and Rectangle tool.
To create moldings, use the Line tool to draw the outline of the molding on the edges of the vaulted ceiling. Then, use the Push/Pull tool to extrude the outline to a desired depth, creating a three-dimensional molding. For beams, create rectangular shapes using the Rectangle tool, and then extrude them using the Push/Pull tool. Position the beams strategically on the vaulted ceiling to create a visually appealing design.
Finally, you can use materials and textures to complete the visual appeal of your vaulted ceiling. SketchUp offers a wide range of materials and textures to choose from, allowing you to realistically simulate the appearance of real-world materials, such as wood, stone, or plaster. Experiment with different materials and textures to find a combination that complements the overall design and provides a visually engaging finish for your vaulted ceiling.

Modeling A Classical Vaulted Ceiling In Sketchup Quick Tutorials

Vaulted Ceiling 3d Warehouse

Modeling A Classical Vaulted Ceiling In Sketchup Quick Tutorials

Sketchup Groin Vault Pointed Arch Tutorial 拱頂

Sketchup For Interior Design How To Make A Vaulted Ceiling With

Sketchup For Interior Design How To Make A Vaulted Ceiling With

Barrel Vaulted Ceiling 3d Warehouse

Intersect Faces For Vaulted Ceiling Sketchup Shorts

Sketchup For Interior Design How To Make A Vaulted Ceiling With

Draw A Coffered Ceiling In Sketchup
Related Posts