How To Make A Vaulted Ceiling In Sketchup
Creating a vaulted ceiling in SketchUp can add a touch of elegance and spaciousness to your virtual room. Whether you're a professional designer or a hobbyist, mastering this technique will enhance your modeling skills and allow you to create more visually appealing designs.
In this guide, we'll walk you through the essential steps to create a vaulted ceiling in SketchUp. We'll cover everything from drawing the initial lines to adding details and finishing touches. So, grab your mouse and let's get started!
1. Draw the Basic Shape
Begin by creating a rectangle on the floor plan of your room. This rectangle will represent the footprint of your vaulted ceiling.
Next, use the Push/Pull tool to extrude the rectangle upwards. Adjust the height of the extrusion to determine the height of your vaulted ceiling.
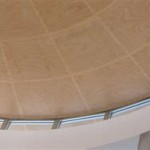
2. Create the Vaulted Curve
To create the vaulted curve, select the top face of the extruded rectangle and click on the Arc tool.
Draw an arc that spans the width of the rectangle. The radius of the arc will determine the curvature of your vaulted ceiling. Adjust the arc's shape until you achieve the desired shape.
3. Connect the Curve to the Side Walls
Use the Follow Me tool to connect the arc to the side walls of the room.
Click on the arc and then select the side wall faces. The arc will automatically follow along the wall, creating a curved connection between the ceiling and the walls.
4. Add Thickness to the Ceiling
To give your vaulted ceiling some thickness, offset the arc upwards by a small distance.
Select the top face of the extruded rectangle and offset it inwards to create the ceiling's thickness.
5. Add Details and Finishing Touches
Once the basic shape of your vaulted ceiling is complete, you can start adding details and finishing touches.
Consider adding trim around the edges of the ceiling, or adding recessed lighting for a more modern look. You can also add textures or materials to the ceiling to enhance its realism.
Conclusion
Creating a vaulted ceiling in SketchUp is a straightforward process that can transform the look and feel of your virtual room.
By following the steps outlined in this guide, you'll be able to create beautiful and realistic vaulted ceilings that will add a touch of elegance and spaciousness to your designs.

Modeling A Classical Vaulted Ceiling In Sketchup Quick Tutorials

Vaulted Ceiling 3d Warehouse

Modeling A Classical Vaulted Ceiling In Sketchup Quick Tutorials

Sketchup Groin Vault Pointed Arch Tutorial 拱頂

Sketchup For Interior Design How To Make A Vaulted Ceiling With

Sketchup For Interior Design How To Make A Vaulted Ceiling With

Barrel Vaulted Ceiling 3d Warehouse

Intersect Faces For Vaulted Ceiling Sketchup Shorts

Sketchup For Interior Design How To Make A Vaulted Ceiling With

Draw A Coffered Ceiling In Sketchup
Related Posts