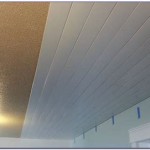
A wood plank ceiling is an attractive and eye-catching feature that can add a unique touch to any room. Whether you’re looking to give your living room a rustic vibe or you want to bring a classic, timeless look to your bedroom, a wood plank ceiling is a great option. Installing a wood plank ceiling isn’t too difficult, but it does require some skill and planning.
Choosing The Right Materials
The first step in installing a wood plank ceiling is to choose the right materials. There are a variety of options available, including real wood, engineered wood, and even vinyl. Real wood is the most expensive option, but it has a natural beauty and character that can’t be replicated with other materials. Engineered wood is a great choice for those looking for a cheaper option that still has a natural look. Vinyl is the most affordable option, but it is not as durable as the other two.
Tools and Preparation
Once you’ve chosen the materials for your wood plank ceiling, you’ll need to gather the necessary tools and prepare the area. You’ll need a tape measure, a saw, a drill, screws and nails, a level, and a hammer. You’ll also need to make sure the area is clean and free of any debris. Make sure all the walls and ceilings are level, and use a level to check your work as you go. It’s important to get the measurements right, so make sure to double-check them before you start.
Installation Process
Now that you’ve prepared the area, you’re ready to begin installing the wood plank ceiling. Start by measuring the space and cutting the planks to the correct length. Once the planks are cut, you’ll need to nail or screw them into the ceiling joists. If you’re using real wood, make sure to use screws instead of nails to ensure a secure fit. Once the planks are in place, use a level to make sure the ceiling is even. If you’re using vinyl planks, you may need to use adhesive to keep the planks in place.
Finishing Touches
Once all the planks are in place, it’s time to add the finishing touches. You may need to caulk any gaps between the planks, and you may also want to apply a stain or sealant to protect the wood. If you’re using real wood, you may want to consider adding a coat of polyurethane to give it a glossy finish. Once you’ve finished, you’ll have a beautiful wood plank ceiling that will last for years to come.


Related Posts