How to Create a Faux Tray Ceiling: A Guide
Faux tray ceilings are elegant architectural features that add depth and visual interest to any room. They emulate the look of traditional tray ceilings without the need for extensive construction or complex molding. In this guide, we will delve into the essential aspects of crafting a faux tray ceiling, empowering you to achieve a stunning visual enhancement in your home.
Materials and Tools
Before embarking on your faux tray ceiling endeavor, gather the necessary materials and tools:
- Crown molding (width and height based on desired ceiling dimensions)
- Paintable or decorative trim
- Caulk
- Wood glue
- Nail gun
- Circular saw or miter box
- Sander
- Measuring tape
- Level
Planning and Measuring
Once you have your materials ready, it's time to plan and measure the ceiling. Determine the desired height of the faux tray and the dimensions of the inner rectangle. Use a measuring tape to mark the perimeter of the inner rectangle on the ceiling, ensuring it is centered and level.
Creating the Inner Border
The first step is to create the inner border of the faux tray. Cut the crown molding to the length of the rectangle's sides and miter the corners. Apply wood glue to the molding and secure it to the ceiling along the marked perimeter. Repeat this process for the other three sides.
Installing the Ceiling Treatment
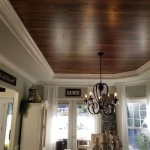
Next, choose a ceiling treatment for the center of the faux tray. This could be decorative tile, wallpaper, or paint. Install the treatment as per its specific instructions, ensuring it is centered within the inner border.
Adding the Outer Border
To complete the look, install the outer border of the faux tray. Cut the crown molding to the desired height and miter the corners. Attach the molding to the ceiling around the outside of the inner border, securing it with nails or wood glue.
Finishing Touches
Finally, fill any gaps or imperfections with caulk and sand them smooth. Paint the faux tray ceiling in your desired color to match the décor of your room. Allow the paint to dry completely, and enjoy the sophisticated elegance of your newly created faux tray ceiling.
Additional Tips
- Consider using lightweight materials for the center ceiling treatment to minimize stress on the ceiling.
- If you are not confident in your DIY skills, consult a professional contractor for assistance.
- Faux tray ceilings can be customized to suit your personal style and décor. Experiment with different crown molding profiles and ceiling treatments to create a unique look.
- Regularly clean and maintain your faux tray ceiling to ensure its longevity and aesthetic appeal.

How To Create A Faux Tiered Ceiling

Creating A Faux Tray Ceiling Bedroom Diy

Ez Tray Ceiling System Ceilings Made Easy

How To Make A Tray Ceiling Beautiful Focal Point Design Build

Faux Coffered Ceiling Confessions Of A Serial Do It Yourselfer

Faux Coffered Ceiling Confessions Of A Serial Do It Yourselfer

Faux Tray Ceiling Design

How To Make A Modern Tray Ceiling With Led Lights

How To Add Diy Wood Beams Around A Tray Ceiling Thrifty Decor And Organizing

How To Create A Faux Tiered Ceiling Diy Paint
Related Posts