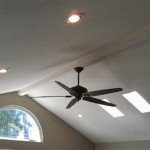
How To Cut Crown Molding For Vaulted Ceilings
Crown molding adds a touch of elegance and sophistication to any room. However, installing crown molding on vaulted ceilings presents a unique set of challenges compared to standard flat ceilings. The angles involved are more complex, requiring precise measurements and cuts to ensure a seamless and visually appealing finish. This article provides a comprehensive guide on how to accurately cut crown molding for vaulted ceilings, covering the necessary tools, measurements, cutting techniques, and installation tips.
Understanding Vaulted Ceiling Geometry
Before beginning the installation process, a thorough understanding of the ceiling’s geometry is paramount. Vaulted ceilings are characterized by their sloping planes that meet at a central ridge. The angle at which these planes converge significantly impacts the angle required for cutting the crown molding. Unlike a standard 90-degree corner, the intersecting angles on a vaulted ceiling are typically greater. These angles can vary depending on the pitch of the roof and the overall design of the structure.
The key to successful crown molding installation on vaulted ceilings lies in accurately determining the spring angle of the molding. The spring angle refers to the angle at which the crown molding sits against the wall and ceiling. This angle is typically 45 degrees for standard crown molding, but it can vary. Knowing the spring angle is vital for calculating the correct miter and bevel settings on the miter saw. A common method for finding the spring angle involves using a protractor or a combination square to measure the angle formed by the back of the crown molding when it is held in place against a flat surface.
Furthermore, the wall angle, which is the angle formed where two walls meet in the corner, also needs to be determined. In a standard room, this angle is 90 degrees. However, in rooms with non-square corners, this angle may deviate. This deviation significantly impacts the required miter and bevel settings. For vaulted ceilings, the "ceiling angle," which is the angle formed between the two ceiling planes, is critical for calculating the compound miter cuts.
To calculate the necessary angles accurately, utilize a construction calculator or an online miter angle calculator specifically designed for crown molding. These tools require inputting the wall angle and the spring angle to provide the correct settings for the miter saw. Always double-check the calculations to minimize the risk of errors and wasted material.
Essential Tools and Materials
Proper tools and materials are crucial for achieving professional-looking results when cutting and installing crown molding on vaulted ceilings. The following is a list of essential items:
- Crown Molding: Choose a style and material that complements the room's décor. Consider paint-grade or stain-grade options depending on the desired finish.
- Miter Saw: A miter saw, preferably a compound miter saw, is essential for making accurate angle cuts. A compound miter saw allows for both miter and bevel adjustments, necessary for creating the complex angles required for vaulted ceilings.
- Measuring Tape: A high-quality measuring tape is crucial for accurate measurements.
- Protractor or Angle Finder: These tools are used to measure the angles of the walls and ceilings. Digital angle finders provide the most accurate readings.
- Construction Calculator or Online Miter Angle Calculator: These tools help calculate the correct miter and bevel angles based on the measured wall and ceiling angles.
- Safety Glasses: Always wear safety glasses to protect your eyes from debris when cutting.
- Dust Mask: A dust mask protects against inhaling sawdust, especially when working with MDF or other composite materials.
- Wood Glue: Wood glue is used to reinforce joints and create a stronger bond.
- Nail Gun and Finish Nails: A nail gun speeds up the installation process and provides a secure hold. Use finish nails to minimize the appearance of nail holes.
- Caulk: Caulk is used to fill gaps and create a seamless finish. Choose a paintable caulk for best results.
- Wood Filler: Wood filler is used to fill nail holes and imperfections in the molding.
- Sandpaper: Sandpaper is used to smooth out wood filler and create a smooth surface for painting or staining.
- Paint or Stain: Choose a paint or stain that matches the room's décor.
- Paint Brush or Sprayer: Use a high-quality paint brush or sprayer to apply the finish.
Cutting Techniques for Vaulted Ceiling Crown Molding
Accurate cutting is the most critical aspect of installing crown molding on vaulted ceilings. The process involves making compound miter cuts, which are cuts that combine both a miter angle and a bevel angle. Understanding how to set the miter saw correctly is essential for achieving seamless joints.
First, accurately measure the angles of the walls and ceilings using a protractor or angle finder. Record these measurements carefully. Next, use a construction calculator or an online miter angle calculator to determine the correct miter and bevel settings for the miter saw. Input the wall angle and the spring angle into the calculator, and it will provide the necessary settings.
Once the miter and bevel angles are determined, adjust the miter saw accordingly. Ensure the saw is securely locked at the correct settings before making any cuts. Before cutting the actual crown molding, practice on scrap pieces to verify the accuracy of the angles. This step can save time and prevent costly mistakes.
When cutting the crown molding, position it in the miter saw in the same orientation as it will be installed on the wall. This is crucial for ensuring that the angles are cut correctly. For inside corners, the molding should be cut with the back side facing down and the front side facing up. For outside corners, the molding should be cut with the back side facing up and the front side facing down. This orientation is often referred to as the “nested” position.
Make slow, deliberate cuts, allowing the saw blade to smoothly pass through the material. Avoid forcing the saw, as this can cause the molding to splinter or crack. After each cut, check the fit of the molding against the wall and ceiling. Minor adjustments may be necessary to achieve a perfect fit. Use a block plane or sanding block to fine-tune the angles if needed.
For longer runs of crown molding, it may be necessary to join two or more pieces together. Use a scarf joint, which is a angled overlapping joint, to join the pieces. This type of joint is less visible than a butt joint and provides a stronger bond. Apply wood glue to the scarf joint and clamp the pieces together until the glue dries. After the glue has dried, sand the joint smooth.
Installing crown molding on vaulted ceilings requires patience and attention to detail. By accurately measuring the angles, setting the miter saw correctly, and making precise cuts, a professional-looking finish can be achieved.
Installation and Finishing
After cutting the crown molding, the next step is to install it securely to the walls and ceiling. Proper installation ensures that the molding remains in place and maintains its aesthetic appeal.
Start by pre-fitting the crown molding pieces to ensure they fit snugly against the walls and ceiling. Make any necessary adjustments before applying adhesive or fasteners. Apply a bead of construction adhesive to the back of the molding to provide additional support and prevent gaps.
Position the crown molding against the wall and ceiling, aligning it carefully with the marked guidelines. Use a nail gun with finish nails to secure the molding in place. Drive the nails at an angle into the wall studs and ceiling joists for maximum holding power. Space the nails approximately 12 to 16 inches apart.
For corners, apply wood glue to the mitered joints before attaching the molding. This will create a stronger bond and prevent the joints from separating over time. Use clamps to hold the corners together until the glue dries. Remove any excess glue with a damp cloth.
After the crown molding is installed, fill any nail holes and imperfections with wood filler. Allow the wood filler to dry completely, then sand it smooth with fine-grit sandpaper. Remove any dust with a tack cloth.
Finally, apply a coat of primer to the crown molding. This will help the paint or stain adhere evenly and provide a uniform finish. Allow the primer to dry completely, then apply two coats of paint or stain, following the manufacturer's instructions. Lightly sand between coats for a smoother finish.
Caulk any gaps between the crown molding and the walls or ceiling. This will create a seamless, professional look and prevent drafts. Choose a paintable caulk that matches the color of the trim. Apply the caulk evenly and smooth it with a wet finger or a caulk smoothing tool.
The final step is to inspect the installation for any imperfections. Touch up any areas that need attention, such as nail holes, gaps, or uneven paint. With careful attention to detail, a stunning crown molding installation on vaulted ceilings can be achieved.

Install Crown Molding Cathedral Vaulted Ceiling

Installing Crown Moulding On A Sloped Ceiling Doityourself Com Community Forums

Install Crown Molding Cathedral Vaulted Ceiling

Installing Crown Molding Around A Cathedral Ceiling Fine Homebuilding

Installing Crown Moulding On A Sloped Ceiling Doityourself Com Community Forums

How To Install Crown Molding On A Vaulted Cathedral Ceiling Without Transition Piece

How To Install Crown Molding On Vaulted Or Cathedral Ceilings The Joy Of Moldings

Installing Crown Moulding Part Two Canadian Woodworking

How To Cut A Vaulted Sloped Cathedral Up Crown Molding Corner The Easy Way With Creative

How To Cut A Crown For Vaulted Ceilings Quora
Related Posts