Can I Spray Paint A Ceiling Fan?
Spray painting a ceiling fan can revitalize a tired fixture and update a room's aesthetic. However, the process requires careful planning and execution to achieve a professional-looking result. This article outlines the necessary steps, considerations, and potential pitfalls associated with spray painting a ceiling fan.
Preparing the Work Area
Proper preparation is crucial for a successful outcome. This involves protecting the surrounding area and creating a suitable environment for painting:
- Cover the floor and any furniture beneath the fan with drop cloths or plastic sheeting.
- If possible, remove the fan from the ceiling. This allows for easier access and more thorough coverage.
- If removal is not feasible, carefully mask the ceiling area around the fan base with painter's tape.
- Work in a well-ventilated area, preferably outdoors or in a garage with open doors.
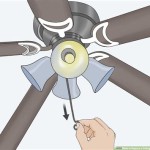
Disassembling the Fan
Disassembling the fan simplifies the painting process and allows for more even coverage. While the exact process varies depending on the model, the general steps remain consistent:
- Turn off the power to the fan at the breaker box.
- Remove the light kit and any attached shades or globes.
- Detach the fan blades from the motor housing.
- Remove any decorative elements, such as pull chains or finials.
- Label screws and small parts to facilitate reassembly.
Cleaning and Priming the Fan Components
Cleaning and priming are essential for ensuring paint adhesion and a smooth, even finish. This involves removing existing dirt, grease, and any loose paint:
- Wash all fan components with a mild detergent and warm water. Rinse thoroughly and allow to dry completely.
- Lightly sand any rough surfaces or peeling paint with fine-grit sandpaper.
- Apply a thin, even coat of metal primer to all surfaces to be painted. This will help the paint adhere properly and prevent rust.
- Allow the primer to dry completely according to the manufacturer's instructions before applying paint.
Choosing the Right Spray Paint
Selecting the appropriate spray paint is critical for achieving a durable and aesthetically pleasing finish. Consider the following factors:
- Use a paint specifically designed for metal surfaces.
- Choose a paint that is compatible with the existing finish of the fan (e.g., oil-based over oil-based, or use a suitable primer for different types).
- Opt for a rust-resistant paint, especially for outdoor or bathroom fans.
- Consider the sheen level. Flat or matte finishes can hide imperfections, while satin or gloss finishes offer a more polished look.
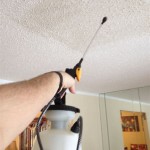
Applying the Spray Paint
Applying the spray paint correctly is essential for a smooth, professional-looking finish. This requires patience and attention to detail:
- Shake the spray paint can vigorously for the recommended time.
- Hold the can approximately 10-12 inches away from the surface and apply thin, even coats.
- Avoid overspraying, which can cause drips and runs.
- Allow each coat to dry completely before applying the next.
- Apply multiple thin coats rather than one thick coat for better coverage and durability.
- Use smooth, sweeping motions to ensure even distribution of the paint.
Reassembling the Fan
Once the paint has fully cured, the fan can be reassembled. This process should be done carefully to avoid damaging the freshly painted surfaces:
- Refer to the labels and instructions created during disassembly to ensure proper placement of all components.
- Handle the painted parts gently to avoid scratches or fingerprints.
- Ensure all screws and connections are securely tightened.
- Reinstall the light kit and any other removed components.
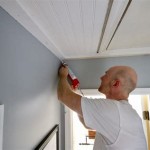
Safety Precautions
Safety should be a primary concern throughout the entire process. Observe the following precautions:
- Always wear a respirator or mask to avoid inhaling paint fumes.
- Wear protective gloves to prevent skin contact with paint and chemicals.
- Work in a well-ventilated area to minimize exposure to fumes.
- Dispose of paint and other materials properly according to local regulations.
Troubleshooting
Occasionally, issues may arise during the painting process. Here are a few common problems and their solutions:
- Drips and runs: If drips occur, allow the paint to dry completely, then lightly sand the affected area and reapply a thin coat.
- Uneven coverage: Ensure the spray paint can is shaken thoroughly and held at the correct distance. Apply multiple thin coats for optimal coverage.
- Orange peel texture: This can be caused by applying the paint too thickly or in cold temperatures. Try thinning the paint or warming the can in lukewarm water.
By following these steps and precautions, a ceiling fan can be successfully spray painted, providing a cost-effective way to update and enhance a room's décor.

Update A Ceiling Fan Using Spray Paint

Upcycling A Ceiling Fan With Spray Paint Happy Frugal Mama

Another Ceiling Fan Makeover And How Not To Paint A Nani S Notebook

Another Ceiling Fan Makeover And How Not To Paint A Nani S Notebook

Update A Ceiling Fan Using Spray Paint

Fixes Spray Paint Edition

How To Update A Ceiling Fan Without Removing It Savvy Apron

Spray Paint Ceiling Fan

Ceiling Fan Makeover 100 Room Challenge The Palette Muse

Sometimes It 39 S The Simple Things In Life Like Changing Out A Ceiling Fan I Am Not Of Fans Painting Painted
Related Posts