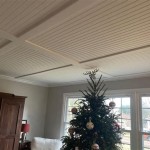
Installing a tongue and groove porch ceiling is an easy way to add character and charm to your outdoor space. A tongue and groove porch ceiling is easy to install and can be used to create a unique and stylish look. In this guide, we’ll explore the process of installing a tongue and groove porch ceiling and provide tips and tricks to ensure it is installed correctly.
Choosing Your Materials
When it comes to selecting the right materials for a tongue and groove porch ceiling, there are a few things to consider. First, you’ll need to choose the type of wood you’d like to use. Popular choices include cedar, redwood, and pine. Each type of wood has its own unique characteristics, so it’s important to consider how the wood will look and how it will hold up over time.
Next, you’ll need to choose the size of the tongue and groove boards. These boards come in a variety of sizes, so it’s important to select the right size for your needs. The size of the boards will depend on the width of the porch ceiling you are trying to create.
Preparing the Ceiling
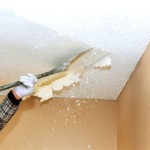
Once you have selected the materials for your tongue and groove porch ceiling, it is time to begin preparing the ceiling. Before you begin installation, it’s important to make sure that the area is clean and free of debris. If there are any nails or screws that are sticking out, be sure to remove them.
You’ll also need to make sure that the ceiling is level. It’s best to use a leveler to ensure the ceiling is even. This is important to ensure that the tongue and groove boards fit together properly when installed.
Installing the Boards
Now that the ceiling is prepared, it’s time to begin the installation process. You’ll start by installing the first board at one end of the porch ceiling. Make sure that the tongue of the board is facing outward and that the groove is facing the wall. Use a small amount of adhesive to secure the board in place.
Next, you’ll need to fit the second board into the groove of the first board. Again, make sure that the tongue of the board is facing outward and that the groove is facing the wall. Once the board is in place, you can use a mallet to gently tap it into place.
Continue this process until all of the boards have been installed. Once all of the boards are in place, you can use a caulk gun to seal the seams between the boards. This will help to ensure that the tongue and groove boards are securely fastened together and will create a waterproof seal.
Conclusion
Installing a tongue and groove porch ceiling is a great way to add charm and character to your outdoor space. By following the steps outlined in this guide, you can easily install a tongue and groove porch ceiling that will last for years to come.


Related Posts