Paint For Ceiling: A Guide To Ensuring Professional Finishes
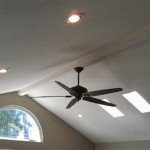
Ceilings, often overlooked, play a crucial role in a room's overall aesthetic. A poorly painted ceiling can detract from even the most meticulously decorated space. Conversely, a professionally finished ceiling enhances the room's ambiance, creating a sense of completeness and sophistication. This guide outlines the necessary steps and considerations for achieving professional-looking ceiling paint jobs.
Key Considerations Before Starting
Proper preparation is paramount for a successful ceiling paint project. Overlooking these initial steps can lead to unsatisfactory results and necessitate costly rework.
- Assess the Ceiling's Condition: Inspect the ceiling for any damage, such as cracks, peeling paint, or water stains. Address these issues before painting.
- Choose the Right Paint: Select a ceiling-specific paint. These paints are typically formulated to minimize splatter and offer better coverage. Consider a flat or matte finish to hide imperfections.
- Gather Necessary Tools and Materials: Assemble all required tools, including paint rollers, brushes, trays, drop cloths, painter's tape, and safety glasses.
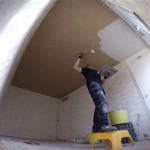
Preparing the Room and Ceiling
Protecting the surrounding area from paint spills and splatters is crucial. This preparation work ensures a clean and efficient painting process.
- Clear the Room: Remove furniture and other items from the room, or cover them with drop cloths.
- Protect Flooring and Fixtures: Cover the floor with drop cloths or plastic sheeting. Use painter's tape to mask off light fixtures, wall edges, and trim.
- Clean the Ceiling: Dust or wash the ceiling to remove any dirt, cobwebs, or loose debris that could interfere with paint adhesion.
Priming the Ceiling (If Necessary)
Primer creates a uniform surface for the paint to adhere to, resulting in a more consistent and durable finish. Determining whether primer is needed is an essential step.
- New Drywall: Unprimed drywall requires a primer coat to seal the surface and ensure proper paint adhesion.
- Stained Ceilings: Use a stain-blocking primer to cover water stains, smoke damage, or other discolorations.
- Significant Color Change: If painting over a dark color with a lighter one, primer can help achieve the desired color in fewer coats.
Painting Techniques for a Smooth Finish
Applying the paint correctly is essential for achieving a professional-looking result. The right techniques ensure even coverage and minimize streaks.
- Cutting In: Use a brush to paint a 2-3 inch border around the edges of the ceiling where the roller cannot reach.
- Rolling the Paint: Apply the paint in smooth, overlapping strokes, maintaining a wet edge to prevent lap marks. Work in manageable sections to ensure consistent coverage.
- Multiple Coats: Most ceilings require at least two coats of paint for optimal coverage and color saturation. Allow each coat to dry completely before applying the next.
- Roller Techniques: Utilize a "W" or "M" rolling pattern to distribute the paint evenly and avoid roller marks.
Addressing Common Ceiling Painting Challenges
Ceiling painting can present certain challenges. Understanding these issues and their solutions can help achieve a more professional outcome.
- Lap Marks: These visible lines occur when paint dries before overlapping the next stroke. Maintain a wet edge and work in manageable sections to avoid lap marks.
- Roller Stipple: Textured bumps left by the roller can be minimized by using a high-quality roller cover and applying even pressure.
- Drips and Splatters: Avoid overloading the roller with paint. Use a drop cloth to catch drips and clean up splatters immediately with a damp cloth.
Post-Painting Cleanup and Considerations
Proper cleanup is the final step in a professional painting project. Careful attention to these details ensures a tidy and finished look.
- Remove Painter's Tape: Carefully remove the painter's tape while the paint is still slightly wet to prevent pulling up dried paint.
- Clean Tools and Equipment: Clean brushes and rollers thoroughly with the appropriate solvent according to the paint manufacturer's instructions.
- Dispose of Materials Properly: Dispose of paint cans, drop cloths, and other materials according to local regulations.
- Ventilation: Ensure adequate ventilation until the paint is completely dry to minimize fumes.

Tips On How To Paint Ceilings Like A Pro Capital Painter

Ceiling Paint What To Know Before You Buy Forbes Home

Yescolours Blog How To Paint A Ceiling The Ultimate Guide

9 Rules For Painting Ceilings A Perfect Finish Paintenance Melbourne

How To Paint A Ceiling Diy Guide

Complete Guide To Painting A Ceiling Best Tips Homeadvisor

Ceiling Painting Dos And Don Ts Trico

9 Ceiling Paint Colour Design Ideas Beautiful Homes

How To Paint A Ceiling The Expert Guide Decorating Livingetc

The Best Ceiling Paint Guide 6 Designer Approved Color Picks Gatheraus
Related Posts