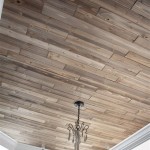
Molding For Ceiling: A Comprehensive Guide
Moldings are decorative architectural features that can add depth, character, and a touch of sophistication to any room. The ceiling is often overlooked as a space for molding, but it can be a great place to experiment with different styles and create a unique and eye-catching look.
In this guide, we will cover everything you need to know about molding for ceilings, including what it is, the different types of molding, the installation process, and some tips and tricks for making the most of this versatile decorative element.
What is Ceiling Molding?
Ceiling molding is simply a type of molding that is installed on the ceiling, typically around the perimeter of the room or to highlight a specific area.
Types of Ceiling Molding
There are many different types of ceiling molding, each with its own unique style and purpose.
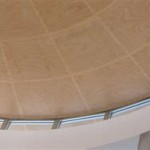
- Crown Molding: This is the most common type of ceiling molding, and it is characterized by its curved profile, which resembles a crown.
- Cornice Molding: This type of molding is similar to crown molding, but it is larger and more ornate, often featuring intricate details.
- Chair Rail Molding: This type of molding is typically used to divide a wall into two sections, but it can also be used on ceilings to create a visual break.
- Picture Rail Molding: This type of molding is used to create a place to hang pictures, and it can also be used to add a decorative touch to a ceiling.
Installation Process
The installation process for ceiling molding is relatively straightforward, but it does require some precision. Here are the steps involved:
- Measure and cut the molding.
- Apply adhesive to the molding.
- Place the molding on the ceiling.
- Secure the molding with nails or screws.
- Caulk and paint the molding.
Tips and Tricks
Here are a few tips and tricks to help you make the most of your ceiling molding:
- Use a level to ensure that the molding is straight.
- Use a miter saw to cut the molding at a 45-degree angle for a seamless fit.
- Caulk all the joints between the molding and the ceiling to prevent gaps.
- Paint the molding to match the ceiling or to create a contrasting look.
With a little planning and effort, you can use ceiling molding to transform the look of any room. So what are you waiting for? Get started today!

A Comprehensive Guide To Home Interior Trim And Moulding

A Comprehensive Guide To Home Interior Trim And Moulding

Diy Guide To Decorative Mouldings

Enhance Your Ceiling With Beautiful Medallions A Complete Guide Crown Molding

The Ultimate Guide To Choosing Modern Style Moulding Crown Casing Base Kuiken Brothers

Mastering Complex Crown Molding Fine Homebuilding

A Comprehensive Guide To Home Interior Trim And Moulding

Inside Crown Corners Fine Homebuilding

Ultimate Guide To The Types Of Mouldings Van Dyke S Rers

Pvc Trim Moulding Installation Guide A Comprehensive Step By Tutorial Boardway Plastic Sheet Foam Board Manufacturer
Related Posts