1.
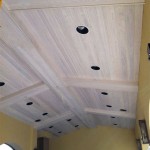
Installing a tongue and groove ceiling is a great way to improve the look of any room. This easy-to-follow guide will walk you through the entire process, from preparation to completion. With some careful planning and attention to detail, you can give your room a fresh, new look in no time!
Preparation
Before you begin, it is important to ensure that your ceiling is properly supported. Make sure that you have a framing system in place to support the weight of your new ceiling. If you are installing the tongue and groove ceiling on an existing ceiling, you should also make sure that it is in good condition and free from any damage.
Once you have determined that your ceiling is properly supported, you can begin the installation process. To do this, you will need to measure the area of the ceiling and purchase the appropriate number of tongue and groove boards. You should also purchase the necessary tools and materials, such as a power saw, drill, screws, nails, and a ladder.
Installation
Once you have all of the necessary materials, you can begin the installation process. Start by cutting the boards to the desired size. Make sure to measure carefully, as any inaccuracies during this step can lead to problems later. Once the boards are cut, you can begin to attach them to the ceiling. To do this, you will need to use a power drill to drill pilot holes into the ceiling and then use screws or nails to secure the boards in place.
Once the boards are securely attached, you should use a rubber mallet to ensure that the boards fit tightly together. This will help to ensure that the ceiling looks seamless and professional. After the boards are firmly in place, you can use a caulk gun to seal any gaps or cracks. This will help to keep your ceiling looking great for years to come.
Finishing Touches
Once the installation is complete, you can add the finishing touches to your new tongue and groove ceiling. This can include painting or staining the boards to match the color of your room. You can also add trim or crown molding to the edges of the ceiling to give it a more finished look. With these steps, you can transform your room with a beautiful, new ceiling!


Related Posts


