How To Wire A Ceiling Fan With Light Kit
Installing a ceiling fan with a light kit can be a great way to improve both the comfort and style of your home. However, it's important to do the job correctly so that it's both safe and effective. Here are the essential steps on how to wire a ceiling fan with a light kit:
Step 1: Gather Your Tools and Materials
Before you get started, you'll need to gather a few tools and materials. These include:
- Ceiling fan with light kit
- Screwdriver
- Wire strippers
- Electrical tape
- Wire nuts
- Drill
- Mounting bracket
Step 2: Turn Off the Power
Before you do any electrical work, it's important to turn off the power to the circuit that you'll be working on. You can do this by flipping the circuit breaker or removing the fuse.
Step 3: Mount the Bracket
The first step to installing the ceiling fan is to mount the mounting bracket to the ceiling. The mounting bracket will come with instructions on how to do this. Typically, you'll need to drill a few holes in the ceiling and then insert the mounting bracket into the holes. Once the mounting bracket is in place, you can tighten the screws to secure it.
Step 4: Connect the Wires
Next, you need to connect the wires from the ceiling fan to the wires from the electrical box. The wires from the ceiling fan will be color-coded, and the wires from the electrical box will also be color-coded. Connect the black wire from the ceiling fan to the black wire from the electrical box. Connect the white wire from the ceiling fan to the white wire from the electrical box. Connect the ground wire from the ceiling fan to the ground wire from the electrical box. Use wire nuts to secure the connections, and then wrap the connections with electrical tape.
Step 5: Install the Ceiling Fan
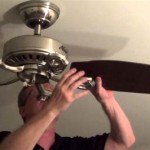
Once the wires are connected, you can install the ceiling fan. To do this, simply lift the ceiling fan into place and attach it to the mounting bracket. Once the ceiling fan is in place, you can tighten the screws to secure it.
Step 6: Install the Light Kit
The final step is to install the light kit. To do this, simply attach the light kit to the ceiling fan. Once the light kit is in place, you can insert the light bulbs and turn on the power.
Step 7: Check Your Work
Once the ceiling fan is installed and the light kit is in place, it's important to check your work to make sure that everything is working properly. Turn on the ceiling fan and make sure that it's running smoothly. Turn on the light kit and make sure that the lights are working properly. If everything is working properly, then you're done!
Installing a ceiling fan with a light kit is a relatively simple project that can be completed in a few hours. By following these steps, you can ensure that the job is done correctly and safely.

Wiring A Ceiling Fan And Light With Diagrams Ptr

Wiring A Ceiling Fan And Light With Diagrams Ptr

Wiring A Ceiling Fan And Light With Diagrams Ptr

Wiring A Ceiling Fan And Light With Diagrams Ptr

Wiring A Ceiling Fan And Light With Diagrams Ptr

Wiring Diagram For Ceilingfanslight Remotecontrolceilingfans Bladelessceilingfan Kidsceilingfan Ceiling Fan Light Kit Switch

Wiring A Ceiling Fan And Light With Diagrams Ptr

Ceiling Fan Light Kit Installation How To

Ceiling Fan Switch Wiring Electrical 101

How To Install A Ceiling Fan Light Kit
Related Posts

