How To Remove Hampton Bay Flush Mount Ceiling Fan Blades in Singapore
Removing the blades from a Hampton Bay flush mount ceiling fan is a common task for cleaning, replacement, or general maintenance. This guide provides step-by-step instructions for safely and effectively removing these blades, addressing considerations specific to the Singaporean climate and housing types.
Safety Precautions
- Always turn off the power to the ceiling fan at the circuit breaker before attempting any work.
- Use a stable ladder or step stool to reach the fan securely. Avoid overreaching or unstable footing.
- Have a helper hold the ladder or step stool if possible.
- Cover the floor beneath the fan with a drop cloth or old sheet to protect it from falling debris or tools.
- Wear safety glasses to protect eyes from dust and debris.
Gather Necessary Tools
- Screwdriver (Phillips head is most common, but check your fan’s specific screws)
- Small ladder or step stool
- Drop cloth or old sheet
- Safety glasses
- Possibly a blade iron/wrench (if screws are resistant)
- Optional: Dust brush or damp cloth for cleaning
Locate the Blade Screws
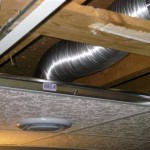
Hampton Bay flush mount ceiling fans typically secure their blades with screws located near the motor housing. These screws are usually found on the top side of the blades, where they connect to the blade brackets or blade arms. Some models may have decorative caps covering these screws. If so, carefully pry these caps off using a small flathead screwdriver or a similar tool. Be mindful of potential brittle plastic in Singapore's humid climate, which can crack easily.
Loosen and Remove the Blade Screws
Using the appropriate screwdriver, carefully loosen and remove the screws securing each blade. Keep a firm grip on the screwdriver to avoid slippage, which could damage the screw heads or the surrounding fan components. In Singapore's humid environment, screws may be more susceptible to corrosion. If a screw is resistant, try using a blade iron/wrench for added leverage, being careful not to strip the screw head. As you remove each screw, keep it in a safe place to avoid losing them.
Detach the Blade from the Fan
Once all the screws are removed, gently lower the blade away from the motor housing. Some blades may have a locking mechanism that requires a slight twist or push to disengage. Refer to your fan's manual if you encounter any resistance. Be cautious as you detach the blade, ensuring it doesn't fall and cause damage or injury. The weight distribution on the fan may shift once a blade is removed, so maintain a secure grip.
Repeat for Remaining Blades
Repeat the loosening, removing, and detaching process for each of the remaining blades. It’s recommended to remove one blade at a time to maintain the fan's balance and prevent accidental damage. Consistent methodical removal is crucial, especially if you plan to reattach the same blades later.
Cleaning the Blades (Optional)
With the blades removed, this is an ideal opportunity to clean them. In Singapore's tropical climate, ceiling fan blades can accumulate dust, grime, and even mold. Use a dust brush, damp cloth, or a mild cleaning solution to wipe down the blades. Avoid using harsh chemicals that might damage the blade finish. Ensure the blades are completely dry before reattaching them to prevent mold growth.
Storing the Blades
If you are not immediately reattaching the blades, store them in a safe, dry location. Laying them flat is generally the best option to prevent warping or bending. Cover them with a cloth or protective material to prevent dust accumulation and potential damage while in storage in Singapore’s humid environment.
Reversing the Process for Reinstallation
To reattach the blades, simply reverse the removal process. Align the blade with the mounting bracket or blade arm and secure it with the screws. Ensure the screws are tightened securely, but avoid over-tightening, which could damage the blades or the fan. Double-check the alignment and secure fit of each blade before turning the fan back on.

How To Take Down A Ceiling Fan Hampton Bay

How To Remove A Ceiling Fan The Home Depot

How To Remove Hampton Bay Ceiling Fan No S

How To Remove A Ceiling Fan The Home Depot

How To Remove A Ceiling Fan The Home Depot

How To Replace A Ceiling Fan Diy Step By Guide

How To Remove A Ceiling Fan The Home Depot

How To Take Down Or Remove A Ceiling Fan 2 Best Ways

How To Remove A Ceiling Fan The Home Depot

How To Install The 52 In Blair Ceiling Fan By Hampton Bay
Related Posts