How to Make a False Ceiling in SketchUp
Creating a realistic and detailed false ceiling in SketchUp is a valuable skill for architects, designers, and anyone involved in visualizing interior spaces. A false ceiling, also known as a dropped ceiling, can add visual interest, improve acoustics, and incorporate lighting fixtures and other elements. This article will guide you through the process of modeling a false ceiling in SketchUp, highlighting key techniques for achieving a professional and accurate representation.
1. Setting up the Foundation
Before you dive into modeling the false ceiling itself, it's essential to establish a solid foundation for your project. This involves creating the basic structure and layout of the room where the ceiling will be installed. Follow these steps:
- Create the Room: Begin by drawing the floor plan of the room. Use the Line tool to create the walls, and remember to maintain accurate dimensions.
- Define the Ceiling Height: Select the "Push/Pull" tool and extrude the floor plan upwards to create the basic ceiling. Ensure the height corresponds to the desired ceiling height in your project.
- Add Structural Elements: If your design includes support beams or columns for the false ceiling, model them now. This will give you a clear understanding of the structural components that will influence the false ceiling's design.
2. Modeling the False Ceiling
With the basic room structure in place, you can start modeling the false ceiling itself. This process involves creating the shape and defining the materials.
- Outline the Shape: Use the "Line" or "Rectangle" tool to draw the outline of the false ceiling. This outline should be positioned slightly below the existing ceiling.
- Extrude the Shape: Utilize the "Push/Pull" tool to give the outlined shape thickness. This thickness represents the depth of the false ceiling.
- Create Cutouts and Shapes: If the design includes cutouts for lighting fixtures or other elements, use tools such as "Intersect with Model" and "Subtract" to carve these shapes out of the false ceiling.
3. Adding Materials and Textures
Once the false ceiling's structure is complete, it's time to add materials and textures to enhance its visual realism. SketchUp offers a wide range of materials and textures, allowing you to accurately portray the ceiling's appearance.
- Apply Materials: Select the false ceiling component and navigate to the "Materials" panel. Choose a material that matches the desired finish, whether it's painted drywall, wood paneling, or a specific type of tile.
- Adjust Material Properties: Once a material is applied, you can adjust its properties. This includes color, texture, reflectivity, and other parameters.
- Use Textures for Detail: For more intricate details, consider using textures. SketchUp provides a library of pre-made textures, or you can import your own. Textures can help enhance the realism of the ceiling's surface.
4. Incorporating Lighting and Accessories
Integrating lighting fixtures and other accessories is crucial for completing the false ceiling design and creating a realistic representation.
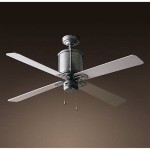
- Place Lighting Fixtures: Model the lighting fixtures you wish to use. Consider the size, shape, and style of the fixtures to ensure they blend seamlessly with the ceiling design.
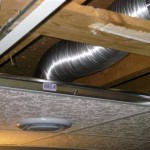
- Position Accessories: Add any other accessories, such as speakers, smoke detectors, or air vents. Ensure these elements are placed accurately and appropriately within the false ceiling model.
5. Refinement and Rendering
While modeling the false ceiling, it's essential to refine the design and ensure accuracy throughout. The final step involves rendering the final model, creating a visually compelling representation.
- Check for Accuracy: Carefully review the model for any inconsistencies or errors. Ensure dimensions are precise and all components are positioned correctly.
- Refine Details: Pay attention to details such as edges, transitions, and shadows. Adjust materials and textures to achieve a realistic and visually appealing outcome.
- Render the Model: Utilize SketchUp's rendering capabilities or third-party rendering software to create a high-quality image of the false ceiling. Experiment with lighting, shadows, and camera angles to achieve the desired visual effect.

How To Make False Ceiling In Sketchup V Ray

Sketchup Beginners False Ceiling Tutorial I How To Make In Jsdesign Ii

How To Make False Ceiling In Sketchup V Ray

19 How To Make False Ceiling In Sketchup Basic Model Hindi

How To Make Rectangular False Ceiling In Sketchup Vray

How To Make False Ceiling And Strip Light In Sketchup Vray Pixologic Interior

3 Ways To Make Pop Ceiling Lights I V Ray For Sketchup

How To Make False Ceiling In Sketchup V Ray

How To Make Rectangular False Ceiling In Sketchup Vray

False Ceiling In Sketchup Deepakverma Dp
Related Posts