How to Make a Ceiling in SketchUp
Creating a ceiling in SketchUp is a straightforward process that can greatly enhance the realism and detail of your 3D models. Whether you're designing a residential home, commercial building, or any other structure, adding a ceiling can provide a sense of enclosure and completeness.
Step 1: Draw the Ceiling Perimeter
Begin by drawing the perimeter of the ceiling. Use the Rectangle tool to create a rectangle that defines the boundaries of the ceiling. Make sure the rectangle is positioned at the desired height from the floor.
Step 2: Extrude the Rectangle
Once you have drawn the ceiling perimeter, select the rectangle and use the Push/Pull tool to extrude it upward to create the ceiling surface. You can specify the height of the ceiling by entering a value in the measurements box.
Step 3: Add Thickness
To give the ceiling some thickness, use the Offset tool. Select the ceiling surface, click on the Offset tool, and enter a small distance (e.g., 4 inches) to create a parallel plane above the existing surface. This will represent the thickness of the ceiling.
Step 4: Create the Core
To give the ceiling structure, create a core for it. Use the Rectangle tool to draw another rectangle inside the ceiling perimeter, but slightly smaller in size. Extrude this rectangle upward to the same height as the ceiling thickness.
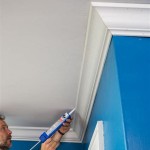
Step 5: Add Trim
To enhance the appearance of the ceiling, you can add trim around the edges. Use the Line tool to draw lines along the perimeter of the ceiling, where the trim will be placed. Then, use the Push/Pull tool to extrude the lines upward to create the trim elements.
Step 6: Assign Materials
Finally, assign materials to the different parts of the ceiling. Select the ceiling surface, core, and trim, and choose appropriate materials from the SketchUp library or your own custom materials. This will give the ceiling a realistic appearance.
Tips for Creating Realistic Ceilings
Here are some additional tips for creating realistic ceilings in SketchUp:
- Use textures and bump maps to add depth and detail to the ceiling surface.
- Add lighting fixtures to the ceiling to create a more realistic scene.
- Create shadows and reflections around the ceiling to enhance the sense of realism.
- Consider the scale and proportions of the ceiling in relation to the rest of the model.

Sketchup Beginners False Ceiling Tutorial I How To Make In Jsdesign Ii

How To Make False Ceiling In Sketchup V Ray

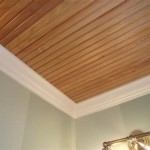
Making A Wavy Wood Ceiling In Sketchup

How To Make Ceiling In Sketchup False Design Easy Fast Create

How To Make Rectangular False Ceiling In Sketchup Vray

Draw A Coffered Ceiling In Sketchup

Draw A Coffered Ceiling In Sketchup

How To Make Ceiling In Sketchup False Design Easy Fast Create

How To Make Ceiling In Sketchup False Design Easy Fast Create

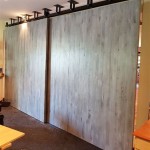
Making Of Wave Fabric Ceiling With Sketchup
Related Posts