How to Make a Faux Tray Ceiling
A faux tray ceiling, also known as a coffered ceiling, is a visually appealing architectural feature that can add depth, dimension, and a touch of elegance to any room. While traditional tray ceilings involve complex structural modifications, creating a faux tray ceiling is a DIY-friendly project that can be achieved with basic carpentry skills and readily available materials.
This article provides a step-by-step guide on how to make a faux tray ceiling. It will cover the essential materials, tools, and procedures involved. By following these instructions, you can transform your ceiling into a stunning focal point without the need for extensive structural alterations.
1. Planning and Preparation
Before starting the project, it is crucial to plan and prepare the area. This involves measuring the ceiling space, determining the desired tray shape and size, and gathering the necessary materials and tools.
Measure the length and width of the area where the faux tray ceiling will be installed. Decide on the desired shape and size of the tray. Common shapes include square, rectangular, or circular. Consider the room's overall design and the desired aesthetic effect when making these choices.
Create a detailed drawing or sketch of the tray design, including the dimensions and any intricate details. This will serve as a visual guide throughout the project. It is also helpful to create a materials list and a detailed step-by-step plan to ensure a smooth and efficient construction process.
2. Framing the Tray
The foundation of a faux tray ceiling is its frame. This section explains how to construct the frame using wood studs or molding.
Begin by installing furring strips around the perimeter of the ceiling area where the tray will be installed. These strips will create a raised platform for the faux tray. Use screws or nails to secure the furring strips to the existing ceiling joists.
Next, build the frame of the tray itself. Depending on the shape and size of the tray, this may involve cutting and assembling wood studs or molding. Use a level and plumb bob to ensure that the frame is square, level, and plumb.
For square or rectangular trays, cut wood studs or molding to the desired dimensions and assemble them to form the frame. For circular trays, use a jig saw to cut the molding into curved pieces and assemble them to form the desired shape.
Secure the frame to the furring strips using screws or nails. Make sure the frame is securely attached and can support the weight of the finishing materials.
3. Finishing the Tray
Once the frame is completed, the next step is to finish the faux tray. This involves adding trim, molding, and other decorative elements to create the desired aesthetic effect.
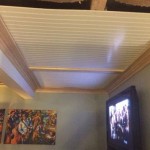
If desired, install decorative molding around the perimeter of the tray. This can add a touch of sophistication and elegance to the design. Choose a molding style that complements the overall design of the room.
Consider adding crown molding to the edge of the tray where it meets the main ceiling. This adds a distinct architectural element and can help to create a more defined look.
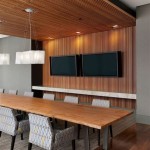
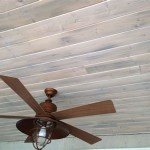
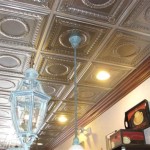
To create a more elaborate design, you can incorporate decorative elements like ceiling medallions, beadboard panels, or decorative stencils. These elements can add visual interest and personality to the tray ceiling.
4. Painting and Finishing Touches
The final step is to paint and finish the faux tray ceiling. This includes preparing the surface, applying paint, and adding any final touches.
Before painting, ensure that the surface is clean and free of debris. Sand the wood to smooth out any imperfections and create a uniform surface for the paint. Prime the surface with a primer designed for wood. This will help the paint adhere properly and create a smooth, even finish.
Apply the paint in thin, even coats using a brush or roller. Let each coat dry completely before applying the next coat. Choose a paint color that complements the overall design of the room and enhances the aesthetic effect of the faux tray ceiling.
Once the paint is dry, consider adding finishing touches to enhance the look of the faux tray ceiling. Install decorative lighting fixtures, such as recessed lighting or pendant lights, to highlight the tray's design. You can also add decorative accents, like wallpaper borders or textured paint, to create a unique and personalized look.

How To Create A Faux Tiered Ceiling

Creating A Faux Tray Ceiling Bedroom Diy

Ez Tray Ceiling System Ceilings Made Easy

How To Make A Tray Ceiling Beautiful Focal Point Design Build

Faux Coffered Ceiling Confessions Of A Serial Do It Yourselfer

Faux Coffered Ceiling Confessions Of A Serial Do It Yourselfer

Faux Tray Ceiling Design

How To Make A Modern Tray Ceiling With Led Lights

How To Add Diy Wood Beams Around A Tray Ceiling Thrifty Decor And Organizing

How To Create A Faux Tiered Ceiling Diy Paint
Related Posts