How To Install a Heat Vent in a Drop Ceiling
Installing a heat vent in a drop ceiling can significantly improve the comfort and efficiency of a room by ensuring proper air circulation. Drop ceilings, also known as suspended ceilings, offer an accessible space for running ductwork and integrating vents without the need for extensive structural modifications. This article provides a detailed guide on how to install a heat vent in a drop ceiling, covering preparation, installation steps, and essential considerations.
Before embarking on the installation process, it is crucial to understand the components involved and the tools required. The core components include the heat vent itself, the flexible ductwork connecting the vent to the main duct system, and the necessary hardware for securing the vent to the ceiling grid. Common tools include a utility knife, measuring tape, drill, screwdriver, duct tape, and safety glasses. The specific requirements may vary depending on the type of vent and the existing HVAC system.
Safety should always be a primary concern when working with HVAC systems and ceiling structures. Disconnecting the power to the HVAC unit is recommended before beginning any work on the ductwork. Wearing safety glasses will protect against debris and dust. If the drop ceiling contains asbestos, professional abatement is necessary before any modifications are made. Handling asbestos without proper equipment and training is extremely dangerous and potentially life-threatening.
1. Preparation and Planning
The first step in installing a heat vent in a drop ceiling is thorough preparation. This involves assessing the existing HVAC system, selecting the appropriate vent, and carefully planning the vent's location. Accurate planning minimizes errors and ensures a seamless installation.
Begin by inspecting the existing ductwork. Identify the main duct that will supply air to the new vent. Ensure that the duct is accessible within the drop ceiling space. Check for any existing obstructions, such as lighting fixtures, wiring, or other ductwork. These obstacles may necessitate adjustments to the vent's location or duct routing.
The selection of the vent itself is also crucial. Consider the size and style of the vent in relation to the room's dimensions and aesthetic preferences. Round and square vents are common options, each offering different airflow characteristics. The vent's size should be adequate to distribute heat effectively throughout the room. Consult HVAC professionals or online resources to determine the appropriate vent size based on the room's square footage and heating requirements.
Next, plan the location of the vent. Ideally, the vent should be positioned to maximize air circulation and minimize drafts. Avoid placing the vent directly above seating areas or in close proximity to thermostats, as this can lead to inaccurate temperature readings and inefficient heating. Consider the room’s layout and identify areas where heat is most needed. Mark the intended location on the drop ceiling tile to ensure accurate placement during installation.
Once the location is determined, assess the distance between the main duct and the vent location. This measurement is important for selecting the correct length of flexible ductwork. Allow for some extra length to accommodate bends and turns in the duct routing. Flexible ductwork is typically available in various diameters, so ensure the chosen diameter matches the outlet on the main duct and the inlet on the vent.
Finally, gather all the necessary tools and materials. Having everything readily available will streamline the installation process and minimize interruptions. This includes the vent, flexible ductwork, duct tape, utility knife, measuring tape, drill with appropriate drill bits, screwdriver, safety glasses, and gloves. Consider using a stud finder to identify the location of ceiling joists, which can provide additional support for the vent.
2. Installation Process
With the preparation complete, the next step is the actual installation of the heat vent. This involves cutting the opening in the drop ceiling tile, connecting the flexible ductwork, and securing the vent to the ceiling grid.
Begin by carefully removing the drop ceiling tile where the vent will be installed. Place the tile on a flat, stable surface to prevent damage during cutting. Using a measuring tape and a pencil, mark the outline of the vent on the tile. Ensure the outline is accurate and centered to avoid unsightly gaps or misalignments.
Using a utility knife, carefully cut along the marked outline. Make multiple shallow passes to gradually cut through the tile. This technique minimizes the risk of tearing or splintering the tile. A drywall saw can also be used for a cleaner, more precise cut. Once the opening is cut, test-fit the vent to ensure it fits snugly but not too tightly. Adjust the opening as needed until the vent fits properly.
Next, connect the flexible ductwork to the main duct. This may involve cutting an opening in the main duct using a utility knife or metal snips. Ensure the opening is the correct size and shape for the flexible duct collar. Attach the flexible duct to the main duct using duct tape and/or clamps. Ensure the connection is airtight to prevent air leaks and energy loss. Use high-quality duct tape specifically designed for HVAC applications, as standard tapes may lose adhesion over time.
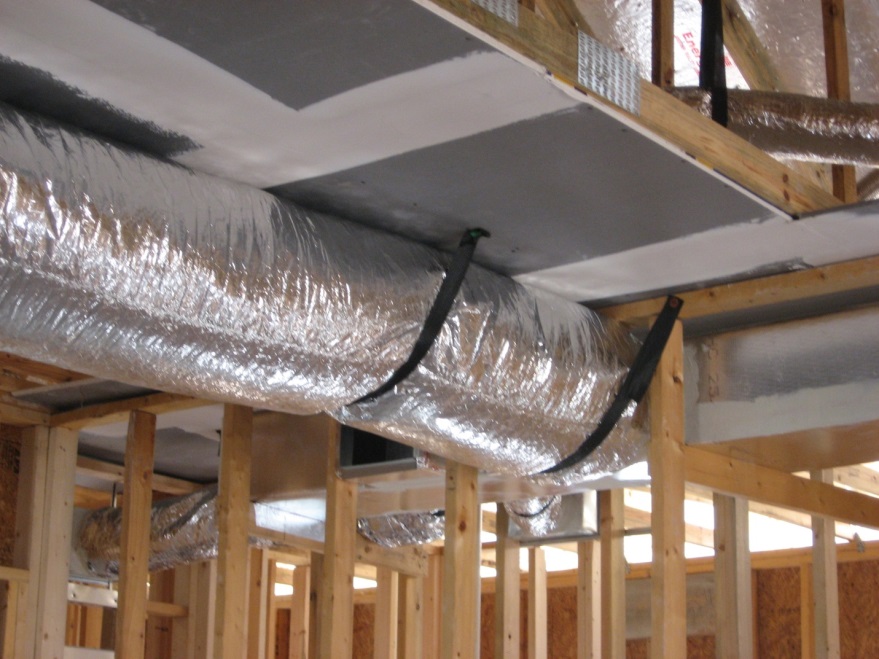
Route the flexible ductwork from the main duct to the opening in the drop ceiling. Avoid sharp bends or kinks in the ductwork, as these can restrict airflow. Support the ductwork with straps or hangers as needed to prevent sagging and ensure proper airflow. Secure the other end of the flexible ductwork to the vent using duct tape and/or clamps. Again, ensure the connection is airtight to prevent leaks.
Carefully lift the drop ceiling tile with the vent attached and insert it back into the ceiling grid. Ensure the tile is properly aligned and seated in the grid. Secure the vent to the ceiling grid using screws or clips, depending on the vent's design. Some vents may have built-in clips that attach directly to the grid, while others may require screws. Tighten the screws or clips until the vent is securely fastened to the grid. Avoid over-tightening, as this can damage the tile or the vent.
Once the vent is securely installed, inspect the connections and ductwork one last time. Ensure that all connections are airtight and that the ductwork is properly supported. Remove any debris or tools from the drop ceiling space. Restore power to the HVAC unit and test the new vent to ensure it is functioning correctly. Check for proper airflow and adjust the vent's louvers to direct the air as desired.
3. Important Considerations and Troubleshooting
Even with careful planning and execution, unforeseen issues can arise during the installation process. Being aware of potential problems and knowing how to troubleshoot them can save time and frustration.
One common issue is insufficient airflow. This can be caused by several factors, including undersized ductwork, restricted airflow in the main duct, or leaks in the connections. Start by inspecting the ductwork for kinks or obstructions. Ensure that the flexible ductwork is not compressed or blocked. Check the connections for leaks and seal any gaps with duct tape.
If the airflow is still insufficient, consider increasing the diameter of the flexible ductwork. A larger duct can accommodate a greater volume of air, improving airflow to the vent. Another option is to add a booster fan to the main duct to increase airflow. However, this may require professional installation and electrical work.
Another common issue is excessive noise. This can be caused by vibrations in the ductwork or the vent itself. Ensure that the ductwork is properly supported and that there are no loose connections. Tighten any screws or clips that may be causing vibrations. Consider adding sound-dampening material around the ductwork to reduce noise transmission.
If the vent is not distributing heat evenly, adjust the louvers to direct the airflow. Experiment with different louver settings to find the optimal configuration for the room. Consider adding a second vent to improve air circulation in larger rooms. Ensure that the vent is not blocked by furniture or other objects, as this can restrict airflow.
If the drop ceiling tile is damaged during installation, it can be easily replaced. Drop ceiling tiles are readily available at most home improvement stores. Simply remove the damaged tile and replace it with a new one. Ensure that the new tile matches the existing tiles in terms of size, color, and texture.
Finally, it is important to comply with all local building codes and regulations when installing a heat vent. Consult with a building inspector or HVAC professional to ensure that the installation meets all requirements. Failure to comply with building codes can result in fines or other penalties.
Installing a heat vent in a drop ceiling can be a straightforward project with careful planning and attention to detail. By following the steps outlined in this guide and addressing any potential issues, it is possible to improve the comfort and efficiency of a room with a well-installed heat vent. Remember to prioritize safety and consult with professionals when needed to ensure a successful installation.

How Do I Extend A Register From Overhead Duct To Drop Ceiling Doityourself Com Community Forums

How Do I Extend A Register From Overhead Duct To Drop Ceiling Doityourself Com Community Forums

Hvac Best Vent Size For Replacing Drop Ceiling Register With Boot Drywall Using 8 Duct Home Improvement Stack Exchange

Ducts In Dropped Ceilings Building America Solution Center

How Do I Extend A Register From Overhead Duct To Drop Ceiling Doityourself Com Community Forums

Installing Ceiling Drops For A Dropped Or Suspended
Ducts In Dropped Ceilings Building America Solution Center

Boxing Ductwork For A Dropped Ceiling Fine Homebuilding

Replacing A Heat Vent Register

Ducts In Dropped Ceilings Building America Solution Center
Related Posts


