How to Install Drop Ceiling Light Covers
Drop ceiling light covers, also known as ceiling tile light covers, are essential for protecting and enhancing the aesthetics of your drop ceiling lighting fixtures. They serve multiple purposes, including shielding the light source from dust and debris, preventing glare, and adding a decorative touch to the overall ceiling design. Installing these covers is a relatively straightforward process that can be completed with basic tools and some basic knowledge of electrical safety.
This guide will provide a step-by-step explanation of how to install drop ceiling light covers, ensuring a smooth and successful installation. We will cover essential tools, safety precautions, and the installation process itself, providing clear instructions for a seamless experience.
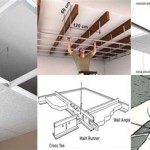
Essential Tools and Materials
Before embarking on the installation process, it is crucial to gather all the necessary tools and materials. Having everything ready will streamline the process and minimize interruptions.
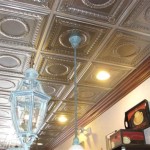
- Drop Ceiling Light Covers: Ensure you have the correct size and style of covers for your fixtures. Consider the existing design and choose covers that complement the overall aesthetic.
- Screwdriver: A Phillips head screwdriver is typically required for securing the covers to the fixture.
- Wire Strippers: If you need to connect wires, a pair of wire strippers will be necessary to strip insulation from the wires.
- Voltage Tester: Always use a voltage tester to confirm that the power is off before working on any electrical components.
- Safety Glasses: Protecting your eyes is essential, so wear safety glasses throughout the installation process.
Safety Precautions
Safety should always be prioritized when working with electrical components. Failure to follow proper safety precautions can lead to serious injury or electrical shock.
- Turn Off Power: Before starting any work on the fixture, always turn off the power at the circuit breaker. Double-check the power is off using a voltage tester.
- Ground Fault Circuit Interrupter (GFCI): If working in a wet or damp location, use a GFCI outlet for added safety.
- Wear Insulated Gloves: When working with electrical wires, always wear insulated gloves to protect yourself from electric shock.
- Avoid Contact with Water: Never work on electrical components with wet hands or in wet conditions.
Installation Process
Once you have gathered the necessary tools and materials and ensured safety measures are in place, you can proceed with the installation process.
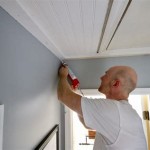
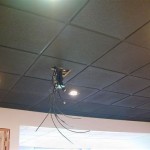
- Remove Existing Covers: If there are existing light covers, carefully remove them. Some covers may be held in place by screws or clips. Unscrew the covers and gently pull them down.
- Prepare the Fixture: Clean the fixture of any dust or debris using a damp cloth. Inspect the fixture for any loose or damaged components, and replace them if necessary.
- Install the New Covers: Align the new light covers with the fixture and gently push them into place. Ensure the covers are securely positioned and flush against the ceiling.
- Secure the Covers: Most light covers have screws or clips for securing them to the fixture. Tighten the screws or clip the covers into place using your screwdriver.
- Turn on Power: Once the new covers are securely installed, carefully turn the power back on at the circuit breaker. Check that the lights are working correctly and that the covers are securely in place.
Troubleshooting
If you experience any issues during the installation process, it is essential to troubleshoot the problem and resolve it before proceeding. Here are some common troubleshooting tips:
- Check the Wiring: If the lights are not working, ensure that the wiring connections are secure and properly connected to the fixture.
- Inspect the Switch: If the lights are not turning on, check the light switch and ensure it is in the "on" position and working properly.
- Verify Bulb: Make sure the light bulbs are properly installed and functioning correctly. Replace any faulty bulbs.
- Check for Loose Connections: Ensure all connections are secure and tight. Any loose connections can cause electrical problems.

Light Installation In A Ceiling Tile

Accessing Drop Ceiling Neon Lights

How To Install A Drop Ceiling 14 Steps With Pictures Wikihow

Accessing Drop Ceiling Neon Lights

Drop Ceiling Installation How To Install A Homeserve Usa

Drop Ceiling Tiles Installation Tips Diy Family Handyman

Installing Woodhaven Planks And Hiding Drop Ceiling Grid Sawdust Girl

How To Open Twist Off The Cover Of Some Really Stupid Awkward Flush Mounted Ceiling Light Dome Fittings Fixtures Replace Change Bulb My Technical Blog

Installing Flush Mount Llight Fixture Into Drop Ceiling Refinish Paint House Remodeling Decorating Construction Energy Use Kitchen Bathroom Bedroom Building Rooms City Data Forum

How To Install Recessed Lights In A Drop Ceiling The Home Depot
Related Posts