How To Install Crown Molding On Uneven Ceiling Corners
Installing crown molding can dramatically enhance a room's aesthetics, but uneven ceiling corners can present a significant challenge. The irregularity of the surface makes achieving a seamless and professional finish difficult. However, by employing specific techniques and tools, one can successfully overcome this obstacle.
1. Assessing the Ceiling Corners
Before beginning the installation process, it is crucial to assess the unevenness of the ceiling corners. This can be done using a level, a straight edge, or a combination of both. Identify the degree of variation and record the measurements. This information will guide you in determining the most appropriate approach for installing the crown molding.
For minor imperfections, shims or a flexible molding material might be suitable. However, for more pronounced discrepancies, a combination of techniques, including cutting the molding to match the contours of the ceiling, might be necessary.
2. Preparing the Ceiling and Molding
Once the ceiling corners have been assessed, the next step involves preparing both the ceiling and the molding. Any existing imperfections on the ceiling should be addressed. This may involve spackling, sanding, or applying a primer. Ensure that the surface is clean, dry, and free of dust or debris.
Similarly, the crown molding should be prepared prior to installation. If necessary, cut the molding to the desired lengths and miter the ends at 45-degree angles for a clean join at the corners. Consider sanding the edges of the molding to ensure a smooth finish.
3. Utilizing Shims and Compound Miter Cuts
Shims are thin pieces of wood or plastic that can be used to level out the crown molding against an uneven surface. When dealing with minor irregularities, shims can be strategically placed behind the molding at the affected areas. This helps to create a consistent gap between the molding and the ceiling, ensuring a level appearance despite the unevenness.
For more significant disparities, compound miter cuts can be employed. Instead of cutting the molding at a standard 45-degree angle, the miter saw can be adjusted to create a slightly steeper or shallower angle, depending on the specific contour of the ceiling corner. By altering the miter angle, the molding can be cut to precisely fit the uneven surface.
4. Mastering the Installation Techniques
The installation process will vary depending on the severity of the unevenness and the chosen approach. Generally, crown molding is attached to the ceiling using either adhesive or nails. Adhesive may be a preferable option for minor imperfections, while nails are often used for more significant unevenness.
If using adhesive, apply a bead of construction adhesive to the back of the molding and press it firmly against the ceiling. Allow the adhesive to cure completely before proceeding to the next step. When using nails, predrill holes in the molding to prevent splitting and secure the molding with finishing nails.
5. Finishing Touches
Once the crown molding has been installed, it is essential to finish the project to achieve a professional and aesthetically pleasing result. This involves filling any gaps or holes with wood filler or spackling, sanding the molding smooth, and painting or staining it to match the desired decor.
Pay close attention to the miter joints and ensure that they fit flush with each other. For a seamless look, carefully blend the wood filler with the surrounding surface, feathering the edges to prevent noticeable transitions.

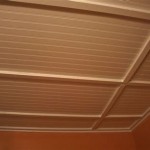
Installing Crown Moulding On A Sloped Ceiling Doityourself Com Community Forums

How To Install Crown Molding On A Vaulted Cathedral Ceiling Without Transition Piece

How To Put Up Crown Molding On An Uneven Ceiling Ehow

Installing Crown Moulding On A Sloped Ceiling Doityourself Com Community Forums

Using Corner Blocks For A Diy Crown Molding Installation All About The House

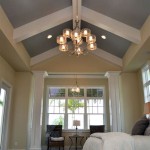
Crown Moulding On Angled Ceilings

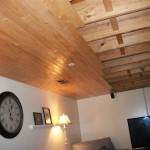
How To Cut A Vaulted Sloped Cathedral Up Crown Molding Corner The Easy Way With Creative

Installing Crown Molding On Crooked Walls Ron Hazelton

How Corner Blocks Can Help You Attach Crown Molding When Have Uneven Ceilings Or Walls

How To Install Crown Molding Young House Love
Related Posts