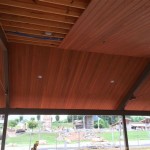
How To Install Crown Molding On An Angled Ceiling
Installing crown molding adds a touch of elegance and sophistication to any room. However, installing crown molding on an angled ceiling, such as in an attic or under a staircase, presents unique challenges compared to installing it on a standard 90-degree wall. This article provides a comprehensive guide to successfully installing crown molding in a room with angled ceilings, ensuring a professional and aesthetically pleasing result.
Before embarking on the project, meticulous planning and preparation are crucial. This includes accurately measuring the room, selecting the appropriate molding, gathering the necessary tools, and understanding the angles involved. Failure to properly prepare can lead to inaccurate cuts, wasted material, and a less-than-perfect finished product.
Essential Preparation Steps
The initial phase involves a series of crucial steps to ensure a smooth and accurate installation process. These steps primarily focus on understanding the specific dimensions and angles of the space, which will directly influence the methods used for cutting and fitting the molding. A thoughtful approach at this stage will save significant time and resources later during the installation.
First,
measure the room accurately
. Use a quality measuring tape to determine the length of each wall where the crown molding will be installed. Pay close attention to corners, as these will require precise cuts. For angled ceilings, measure the angle of the ceiling where it meets the wall. A protractor or angle finder can be invaluable for this task. Take multiple measurements at different points along the angled ceiling to account for any inconsistencies or variations in the angle. Record all measurements carefully, noting which wall each measurement corresponds to. These measurements will be used to calculate the correct angles for cutting the crown molding.Next,
select appropriate crown molding
. Choose a molding style and size that complements the room's dimensions and aesthetic. Consider the height of the ceiling and the size of the room when selecting the molding. Larger rooms can generally accommodate larger moldings, while smaller rooms may benefit from more delicate designs. When selecting the material, consider factors such as cost, durability, and ease of installation. Common materials include wood, MDF (medium-density fiberboard), and polyurethane. Wood provides a classic look and can be stained or painted, but it is more susceptible to moisture damage and requires more precise cutting. MDF is a more affordable alternative that is less prone to warping but may not be as durable as wood. Polyurethane is lightweight, moisture-resistant, and easy to cut, making it a good choice for DIY projects. Calculate the total length of crown molding needed, adding extra for waste and mistakes. Always purchase slightly more molding than calculated to avoid running short during the installation.After material selection,
gather the necessary tools and materials
. A miter saw with a sharp blade is essential for making accurate cuts. A compound miter saw, which allows for both miter and bevel cuts, is highly recommended for angled ceilings. Other essential tools include a coping saw (for creating coped joints), a stud finder, a level, a measuring tape, a protractor or angle finder, a pencil, safety glasses, a dust mask, construction adhesive, a nail gun or hammer and nails, wood filler, sandpaper, and paint or stain (if desired). A crown molding jig can also be helpful for holding the molding at the correct angle while cutting. Ensure all tools are in good working condition before starting the project. Sharpen the saw blade if necessary to ensure clean, accurate cuts. Organize the tools and materials in a convenient location to avoid wasting time searching for them during the installation process.Finally,
understand the angles and cuts required
. Installing crown molding on an angled ceiling necessitates a clear understanding of the angles involved and how to calculate the correct miter and bevel settings for the miter saw. The angle of the ceiling will directly impact the angles required for the corner cuts. Common corner cuts include inside corners and outside corners. Inside corners are where two walls meet to form an interior angle, while outside corners are where two walls meet to form an exterior angle. For angled ceilings, the miter and bevel angles will need to be adjusted to accommodate the ceiling angle. There are online calculators and charts available that can assist in determining the correct miter and bevel angles based on the ceiling angle. Alternatively, a process of trial and error, using scrap pieces of molding, can be employed to fine-tune the cuts. Practice cutting scrap pieces of molding to get a feel for the miter saw and the angles involved before cutting the actual crown molding. This will help minimize mistakes and ensure accurate cuts.Cutting Crown Molding for Angled Ceilings
Cutting crown molding for angled ceilings requires a precise approach to ensure seamless joints. This process goes beyond simple 45-degree cuts, often necessitating compound miter cuts (both miter and bevel angles) based on the specific ceiling angle. Understanding the correct orientation of the molding on the miter saw and utilizing accurate angle calculations are essential for achieving a professional-looking finish.
First,
determine the correct miter and bevel angles
. Use an angle finder or protractor to measure the angle of the ceiling. Divide this angle in half to determine the angle for each piece of molding. For example, if the ceiling angle is 135 degrees, each piece of molding will need to be cut at a 67.5-degree angle. Consult a miter saw angle chart or use an online calculator to determine the corresponding miter and bevel settings for the miter saw. These charts and calculators take into account the spring angle of the crown molding (the angle at which it sits against the wall) and the ceiling angle to provide the correct settings. If using an online calculator, input the ceiling angle and the spring angle of the molding to obtain the miter and bevel angles. Double-check the calculations to ensure accuracy. Incorrect angles will result in gaps and misaligned joints.Next,
set up the miter saw
. Adjust the miter and bevel settings on the miter saw according to the calculated angles. Ensure the saw is properly calibrated and that the blade is sharp. A dull blade can cause splintering and tear-out, resulting in a less-than-perfect cut. Use a test piece of scrap molding to verify the accuracy of the settings before cutting the actual crown molding. Make a test cut and check the fit against the corner. Adjust the miter and bevel settings as needed until the test piece fits perfectly. Secure the miter saw to a stable surface to prevent movement during cutting. Wear safety glasses and a dust mask to protect eyes and lungs from debris.Third,
cut the molding accurately
. Place the crown molding on the miter saw table with the bottom edge against the fence and the top edge against the table. Ensure the molding is oriented correctly based on whether you are cutting an inside or outside corner. For inside corners, the molding should be placed with the back side facing up and the spring angle facing down. For outside corners, the molding should be placed with the back side facing down and the spring angle facing up. Use a crown molding jig to help hold the molding at the correct angle. Make a slow, controlled cut, allowing the saw blade to do the work. Avoid forcing the blade through the molding, as this can cause splintering and inaccurate cuts. Cut slightly long and then fine-tune the fit with a coping saw if needed. After cutting each piece, label it to indicate its location and orientation (e.g., "Left Inside Corner," "Right Outside Corner"). This will help prevent confusion during installation.Finally,
cope inside corners (optional)
. Coping inside corners is a technique that involves cutting away the back of one piece of molding to create a profile that matches the contour of the adjacent piece. This creates a tight, seamless joint that is less likely to open up over time due to expansion and contraction. To cope an inside corner, cut one piece of molding square (at a 90-degree angle). Then, use a coping saw to carefully remove the material from the back of the other piece of molding, following the profile of the first piece. Test the fit frequently, removing small amounts of material until the two pieces fit perfectly together. Coping requires practice and patience, but the results are worth the effort. A coped joint provides a professional-looking finish that is superior to a simple mitered joint.Installation and Finishing Touches
The final phase of crown molding installation involves securing the cut pieces to the walls and ceiling, filling nail holes and gaps, and applying the final coat of paint or stain. Proper execution of these steps is crucial for achieving a polished and professional appearance. Attention to detail during this phase will ensure the longevity and aesthetic appeal of the crown molding.
First,
attach the molding to the walls and ceiling
. Use a stud finder to locate the wall studs and ceiling joists. Mark the locations of the studs and joists with a pencil. Apply construction adhesive to the back of the crown molding, being careful not to apply too much. Position the molding against the wall and ceiling, aligning it with the marked locations. Secure the molding to the studs and joists using a nail gun or hammer and nails. If using a nail gun, use appropriately sized nails to prevent them from protruding through the molding. If using a hammer and nails, pre-drill pilot holes to prevent the molding from splitting. Space the nails approximately 12-16 inches apart. Ensure the molding is level before securing it in place. Use a level to check the alignment and make adjustments as needed. For long lengths of molding, use temporary supports to hold it in place while the adhesive dries. These supports can be removed after the adhesive has set. When installing crown molding on angled ceilings, pay particular attention to the corners. Use clamps to hold the corners together while the adhesive dries.Next,
fill nail holes and gaps
. After the molding is installed, inspect it for nail holes, gaps, and imperfections. Use wood filler to fill any nail holes and gaps. Apply the wood filler with a putty knife, pressing it firmly into the holes and gaps. Allow the wood filler to dry completely according to the manufacturer's instructions. Once the wood filler is dry, sand it smooth with fine-grit sandpaper. Be careful not to sand away the surrounding wood or molding. Use a damp cloth to remove any sanding dust. For large gaps, consider using caulk instead of wood filler. Caulk is more flexible and can better accommodate movement caused by expansion and contraction. Apply the caulk smoothly and evenly, using a wet finger to smooth the bead.Finally,
paint or stain the molding
. After the wood filler and caulk have dried and been sanded, the crown molding is ready for painting or staining. If painting, apply a primer to the molding to ensure proper adhesion of the paint. Use a high-quality paint that is appropriate for wood. Apply the paint in thin, even coats, allowing each coat to dry completely before applying the next. If staining, use a wood stain that complements the existing woodwork in the room. Apply the stain with a brush or rag, following the manufacturer's instructions. Wipe off any excess stain. Allow the stain to dry completely before applying a clear coat of varnish or polyurethane to protect the finish. Apply the varnish or polyurethane in thin, even coats, allowing each coat to dry completely before applying the next. Lightly sand between coats with fine-grit sandpaper to create a smooth finish.By meticulously following these steps, even those with limited experience can successfully install crown molding on an angled ceiling, enhancing the aesthetic appeal and value of the living space.

Crown Moulding On Angled Ceiling Sawdust Girl

Installing Crown Moulding On A Sloped Ceiling Doityourself Com Community Forums

Crown Molding On Angled Ceilings Makely

Crown Moulding On Angled Ceiling Sawdust Girl

Installing Crown Moulding Part Two Canadian Woodworking

Installing Crown Molding Around A Cathedral Ceiling Fine Homebuilding

How To Install Crown Molding On Vaulted Or Cathedral Ceilings The Joy Of Moldings

Install Crown Molding Cathedral Vaulted Ceiling

Installing Crown Moulding On A Sloped Ceiling Doityourself Com Community Forums

Install Crown Molding Cathedral Vaulted Ceiling
Related Posts

