How To Install Beadboard Ceiling on a Porch
Installing beadboard on a porch ceiling significantly enhances its aesthetic appeal, offering a classic and sophisticated look while also potentially increasing the property's value. This project, while achievable for experienced DIY enthusiasts, requires careful planning, precise measurements, and a thorough understanding of carpentry techniques. This article provides a detailed guide on how to properly install beadboard on a porch ceiling, covering everything from preparation to finishing touches.
Before commencing any physical work, it is crucial to assess the existing porch structure. Factors such as the condition of the framing, the levelness of the joists, and any pre-existing electrical wiring must be carefully evaluated. This preliminary assessment will dictate the necessary preparations and potential modifications needed to ensure a successful beadboard installation.
Proper ventilation is another critical consideration, especially in humid climates. If the space above the porch ceiling is enclosed, ensure adequate ventilation to prevent moisture buildup, which can lead to mold growth and structural damage. This may involve installing vents or modifying the existing structure to allow for airflow.
Key Point 1: Planning and Preparation
The initial stage of any construction project is meticulous planning. This is especially important when installing beadboard, as accurate measurements and material calculations are essential for preventing costly errors and minimizing waste. Furthermore, proper preparation of the worksite ensures a smooth and efficient installation process.
Gathering Materials and Tools: Create a comprehensive list of all necessary materials. This typically includes beadboard panels (available in various materials such as wood, MDF, or PVC), furring strips (if needed), construction adhesive, nails or screws, wood filler, primer, paint, and caulk. The choice of materials will depend on the desired aesthetic, budget, and the environmental conditions of the porch. Wood beadboard provides a classic look, but requires more maintenance and is susceptible to moisture damage. PVC beadboard is more resistant to moisture and rot, making it a better option for humid climates. MDF beadboard offers a cost-effective alternative but is less durable than wood or PVC.
Essential tools include a measuring tape, level, pencil, safety glasses, dust mask, circular saw or miter saw, jigsaw (for intricate cuts), nail gun or drill, stud finder, caulk gun, sandpaper, and paintbrushes or rollers.
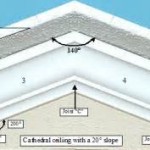
Measuring and Calculating Beadboard Needs: Accurately measure the area of the porch ceiling. It is advisable to draw a scaled diagram of the ceiling, marking all dimensions. This diagram will assist in visualizing the layout and calculating the number of beadboard panels required. Account for waste due to cuts and potential errors by adding approximately 10% to the calculated quantity.
Preparing the Substrate: Inspect the existing ceiling joists for any signs of damage, such as rot or insect infestation. Replace or repair any damaged sections before proceeding. Ensure the joists are level; if not, use shims to create a flat and even surface for the beadboard. If the existing ceiling is not directly attached to the joists, furring strips may be necessary. Furring strips are thin pieces of wood that are attached perpendicular to the joists, providing a solid and level surface for the beadboard. Attach the furring strips at regular intervals (typically 16 or 24 inches apart), using screws to ensure a secure connection.
Acclimatizing the Beadboard: Allow the beadboard panels to acclimatize to the environment of the porch for several days before installation. This will prevent warping or cracking due to changes in temperature and humidity. Store the panels flat in a dry, well-ventilated area.
Safety Precautions: Prioritize safety throughout the project. Wear safety glasses and a dust mask to protect your eyes and respiratory system from debris. Use appropriate safety equipment when operating power tools, and follow all manufacturer's instructions. If working at heights, use a sturdy ladder or scaffolding and ensure it is properly secured.
Key Point 2: Installing the Beadboard Panels
The installation process requires precision and attention to detail. Starting with a well-planned layout and employing proper installation techniques will result in a professional-looking and durable beadboard ceiling.
Planning the Layout: Before installing the first panel, carefully plan the layout. Determine the direction of the beadboard and consider the aesthetic impact of full versus partial panels. Ideally, start with a full panel along the most visible edge of the porch and work your way across. This ensures that any partial panels are located in less conspicuous areas.
Cutting the Panels: Use a circular saw or miter saw to cut the beadboard panels to size. Ensure the cuts are clean and straight, using a guide to prevent splintering. A jigsaw may be necessary for intricate cuts around light fixtures or other obstructions.
Applying Adhesive and Fasteners: Apply a bead of construction adhesive to the back of the beadboard panel, following the manufacturer's instructions. Press the panel firmly against the furring strips or existing ceiling, ensuring it is properly aligned. Use a nail gun or drill to secure the panel to the furring strips or joists, driving nails or screws through the beadboard and into the underlying structure. Space the fasteners at regular intervals (typically 6-8 inches apart) to ensure a secure hold. Concealed fasteners, such as brad nails, offer a cleaner aesthetic.
Working Around Obstructions: When encountering light fixtures, outlets, or other obstructions, carefully measure and cut the beadboard panel to fit around them. Use a jigsaw for making curved or irregular cuts. Consider using escutcheon plates to cover any gaps between the beadboard and the obstruction.
Installing Subsequent Panels: Align the tongue-and-groove edges of the adjacent panels and press them firmly together. If necessary, use a rubber mallet to gently tap the panels into place. Secure the panels with adhesive and fasteners, as described above. Maintain consistent spacing between the fasteners and ensure they are driven straight into the underlying structure.
Dealing with Seams: At the end of each row, you may need to cut a partial panel to fit the remaining space. Ensure the cut is accurate and that the panel is properly aligned with the adjacent panels. Use wood filler to fill any gaps or imperfections along the seams. Sand the filler smooth after it has dried.
Key Point 3: Finishing and Painting
The finishing touches are crucial for achieving a polished and professional look. Filling nail holes, caulking seams, and applying a high-quality paint finish will enhance the beauty and durability of the beadboard ceiling.
Filling Nail Holes and Seams: Use wood filler to fill all nail holes and any gaps or imperfections along the seams. Allow the filler to dry completely, following the manufacturer's instructions. Sand the filler smooth, using fine-grit sandpaper. Remove all dust and debris before proceeding.
Caulking Seams and Edges: Apply a bead of caulk along all seams and edges where the beadboard meets the walls or trim. Use a caulk gun to apply the caulk evenly and smoothly. Wipe away any excess caulk with a damp cloth. The purpose of caulking is to seal any gaps, preventing moisture intrusion and creating a seamless appearance.
Priming the Beadboard: Apply a coat of high-quality primer to the beadboard. Primer helps to seal the wood surface and improve the adhesion of the paint. Choose a primer that is compatible with the type of beadboard you are using (e.g., wood, MDF, or PVC). Apply the primer evenly, using a paintbrush or roller. Allow the primer to dry completely before proceeding.
Painting the Beadboard: Apply two coats of high-quality exterior paint to the beadboard. Choose a paint color that complements the overall aesthetic of the porch. Apply the paint evenly, using a paintbrush or roller. Allow each coat of paint to dry completely before applying the next coat. Consider using a paint with a mildew-resistant finish, especially in humid climates.
Adding Finishing Touches: Consider adding decorative trim around the perimeter of the beadboard to create a more finished look. This can include crown molding, baseboard, or other types of trim. Attach the trim using nails or screws, and fill any nail holes with wood filler. Paint or stain the trim to match the beadboard.
Installing Light Fixtures: If you removed any light fixtures during the installation process, reinstall them according to the manufacturer's instructions. Ensure the wiring is properly connected and that the fixtures are securely mounted.
Maintaining the Beadboard Ceiling: Regularly inspect the beadboard ceiling for any signs of damage, such as cracks, peeling paint, or moisture damage. Repair any damage promptly to prevent further deterioration. Clean the beadboard ceiling periodically with a mild soap and water solution. Avoid using harsh chemicals or abrasive cleaners, as they can damage the finish.
By following these steps carefully, one can successfully install beadboard on a porch ceiling, creating a beautiful and durable outdoor space. Remember that proper planning, preparation, and attention to detail are essential for achieving a professional-looking result.

How To Install A Wood Plank Ceiling Young House Love

Porch Progress Adding The Beadboard Ceiling Southern Hospitality

On The Porch Installing A Beadboard Ceiling House With

Beadboard Porch Ceiling Well She Tried

How To Install A Beadboard Porch Ceiling This Old House

How To Install A Beadboard Ceiling Pine And Prospect Home

How To Install A Beadboard Ceiling Pine And Prospect Home

Install A Beadboard Porch Ceiling Extreme How To

Screen Porch Bead Board Ceiling Concord Carpenter

Why Beadboard On The Ceiling Is Nothing At All Like Dancing Space Between
Related Posts