How To Hang A Sheet From The Ceiling
Hanging a sheet from the ceiling can serve a variety of purposes, from creating a temporary room divider to constructing a makeshift photography backdrop, or even designing a themed space for a party. The method used to hang the sheet depends on several factors, including the type of ceiling, the weight of the sheet, and the desired permanence of the installation. This article outlines various approaches for hanging a sheet from the ceiling, emphasizing the necessary tools, techniques, and safety precautions.
Assessing the Ceiling and Sheet
Before attempting to hang anything from the ceiling, a thorough assessment of both the ceiling material and the sheet is necessary. Understanding the ceiling’s composition is crucial because different materials possess varying load-bearing capacities and require specific types of fasteners. Common ceiling materials include drywall, plaster, concrete, and suspended ceiling tiles. Drywall and plaster are generally less robust than concrete and require more delicate fastening methods. Suspended ceiling tiles are the weakest and often require specialized hardware to distribute weight effectively.
The sheet's weight and dimensions also play a significant role in determining the appropriate hanging method. A lightweight cotton sheet will exert less stress on the ceiling than a heavy velvet curtain, for example. Larger sheets may also require more support points to prevent sagging and ensure an even appearance.
Careful consideration should also be given to the desired aesthetic and the purpose of the hanging sheet. A temporary room divider might require a less intrusive method than a permanent backdrop for a home studio. The chosen method should not only be functional but also visually appealing, minimizing any damage to the ceiling.
Methods for Hanging a Sheet
Several methods can be employed to hang a sheet from the ceiling, each with its own advantages and disadvantages. The choice of method depends largely on the factors discussed above: ceiling type, sheet weight, and desired permanence.
1. Using Adhesive Hooks: Adhesive hooks, such as those from brands like Command, provide a relatively non-invasive solution for hanging lightweight sheets. These hooks utilize adhesive strips to attach to the ceiling surface, eliminating the need for drilling or other permanent modifications. This method is best suited for drywall or plaster ceilings and lightweight cotton or polyester sheets.
To install adhesive hooks, first clean the ceiling surface with a damp cloth and allow it to dry completely. This ensures optimal adhesion. Next, peel off the backing from the adhesive strip and press the hook firmly against the ceiling, holding it in place for the recommended duration (usually 30 seconds to one minute). Allow the adhesive to cure for the specified time (typically one hour) before hanging the sheet. Evenly distribute the hooks along the desired length of the sheet to prevent uneven weight distribution. The weight capacity of each hook should be clearly marked on the packaging, and it is crucial to ensure that the combined weight of the sheet does not exceed the total capacity of all the hooks used.
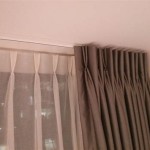
2. Utilizing Tension Rods: Tension rods are best employed when there are parallel walls or structures between which the sheet can be stretched. This method involves placing a tension rod horizontally between the walls and draping the sheet over it. This is particularly effective in smaller rooms or corridors. This approach requires no ceiling modifications, making it a convenient and temporary solution.
To use tension rods, measure the distance between the walls where the rod will be placed. Choose a tension rod that is slightly longer than this measurement. Extend the rod until it is slightly larger than the gap and compress it into place. Ensure the rod is level and securely held by the tension. Drape the sheet evenly over the rod. For wider sheets, consider using multiple tension rods spaced apart to provide adequate support.
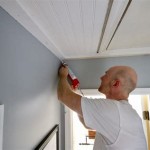
3. Employing Screws or Nails: For heavier sheets or situations requiring a more permanent solution, screws or nails can be used. This method is more invasive and suitable for ceilings that can withstand the structural impact, such as wood or plaster over lath. This method is less suitable for drywall unless using drywall anchors.
When using screws or nails, locate ceiling joists or studs if possible. These provide a stronger point of attachment. Use a stud finder to identify the location of the joists. Drill pilot holes before inserting screws to prevent splitting the wood or damaging the plaster. For drywall ceilings, use drywall anchors. These anchors provide a secure grip in the drywall by expanding within the wall cavity. Hang the sheet using rings, grommets, or loops attached to the sheet and secured to the screws or nails. Space the screws or nails evenly to distribute the weight appropriately.
4. Incorporating Toggle Bolts: Toggle bolts offer a robust solution for hanging heavier sheets from drywall or plaster ceilings. These fasteners consist of a bolt and a wing-like toggle that expands behind the ceiling surface, providing a secure anchor. Installing toggle bolts requires drilling holes in the ceiling, making it a semi-permanent method.
To install toggle bolts, drill holes slightly larger than the diameter of the bolt. Collapse the toggle wings and insert the bolt through the sheet’s hanging mechanism (e.g., a ring or grommet) and then through the hole in the ceiling. Once the toggle wings are fully inside the ceiling cavity, they will spring open, creating a secure anchor. Tighten the bolt to clamp the sheet against the ceiling. Ensure that the toggle wings are fully expanded before tightening the bolt to prevent slippage. Toggle bolts offer a significantly higher weight capacity than adhesive hooks or drywall anchors, making them suitable for heavier fabrics.
5. Utilizing a Suspended Ceiling Grid: If the ceiling is a suspended ceiling (also known as a drop ceiling), specialized clips designed to attach to the metal grid can be used. These clips distribute the weight of the sheet across the grid, preventing damage to individual tiles. This method is relatively non-invasive and allows for easy repositioning of the sheet.
To use suspended ceiling clips, simply attach the clips to the metal grid at evenly spaced intervals. Ensure that the clips are securely fastened and capable of supporting the weight of the sheet. Hang the sheet from the clips using hooks, rings, or other appropriate fasteners. Avoid overloading individual clips, as this can cause the grid to sag or collapse. For heavier sheets, consider using multiple clips per tile to distribute the weight more effectively.
Safety Precautions
Safety should be a primary consideration when hanging a sheet from the ceiling. Improper installation can lead to the sheet falling down, potentially causing injury or damage to property. The following safety precautions should be observed:
- Weight Limits: Always adhere to the weight limits specified for the chosen hanging method. Exceeding these limits can result in failure of the fasteners and pose a safety hazard.
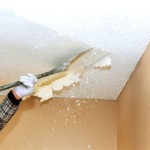
- Ceiling Integrity: Before installing any fasteners, inspect the ceiling for signs of damage, such as cracks or water stains. These may indicate structural weaknesses that could compromise the stability of the hanging sheet.
- Ladder Safety: If using a ladder, ensure it is placed on a stable and level surface. Use a ladder that is tall enough to reach the ceiling comfortably without overreaching. Never stand on the top rung of the ladder.
- Electrical Wiring: Be aware of the location of electrical wiring in the ceiling before drilling or installing fasteners. Avoid drilling into areas where wiring is likely to be present to prevent electrical shock.
- Protective Gear: Wear appropriate protective gear, such as safety glasses and gloves, when drilling or handling fasteners.
Enhancements and Considerations
Beyond the basic mechanics of hanging a sheet from the ceiling, there are several enhancements and considerations that can improve the overall result. These include:
- Lighting: Incorporating lighting behind or in front of the sheet can dramatically alter its appearance and create a more visually appealing effect. This is particularly useful for creating ambient lighting or highlighting specific areas of the room.
- Fabric Choice: The type of fabric used will influence the aesthetics and functionality of the installation. Sheer fabrics can create a soft, diffused light, while heavier fabrics can provide more privacy and sound insulation.
- Draping and Styling: Experiment with different draping and styling techniques to achieve the desired look. Consider gathering the sheet at certain points to create folds or swags, or using tiebacks to create a more tailored appearance.
- Maintenance: Regularly inspect the hanging sheet and fasteners to ensure they are secure and in good condition. Tighten any loose screws or replace damaged adhesive strips as needed. Clean the sheet periodically to remove dust and dirt.
- Acoustic Properties: Depending on the material, a sheet can offer slight improvements to room acoustics by absorbing some sound waves. Thicker, heavier materials will generally perform better in this regard.

Fort Week Part 3 Building Tips Living Room Build A Diy Blanket

How To Hang Tapestries From The Ceiling My Wall Clock

Indoor Tent Ideas Create A Cozy Canopy Retreat

How To Hang Drywall Like A Pro Diy Family Handyman

Amazing Trick To Hang Sheetrock Drywall On A Ceiling By Yourself

How To Hang Fairy Lights On Ceiling

How To Install Ceiling Drywall 12 Steps With Pictures Wikihow

21 Ridiculously Clever Ways To Decorate Your Ceiling

Updated Fabric Ceiling Tutorial Step By Diy Kristen Marie

How To Install Ceiling Drywall 12 Steps With Pictures Wikihow
Related Posts