How To Hang a Light From a Drop Ceiling
Drop ceilings, also known as suspended ceilings, offer versatility in lighting design. Understanding the components of a drop ceiling and the specific considerations for lighting installation ensures a safe and effective outcome. This article outlines the steps involved in hanging a light fixture from a drop ceiling.
Understanding Drop Ceiling Components
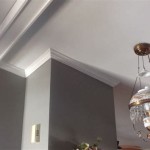
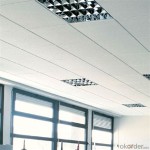
A drop ceiling consists of a grid system suspended from the structural ceiling by wires. This grid comprises main runners, cross tees, and wall angles. Lightweight ceiling tiles rest on the grid, providing a finished look and concealing the space above. Understanding this structure is crucial for safe and proper light fixture installation.
Safety Precautions
Before commencing any electrical work, ensure the power supply to the circuit is turned off at the breaker box. Verify the power is off using a non-contact voltage tester. Using appropriate safety equipment, including gloves and safety glasses, is essential. If working on a ladder, ensure it is stable and positioned correctly.
Choosing the Right Lighting Fixture
Select a lighting fixture appropriate for the drop ceiling environment. Consider factors such as the fixture's weight, dimensions, and intended use. Recessed lighting, also known as can lights, is a popular choice for drop ceilings, offering a sleek and integrated appearance. Other options include surface-mounted fixtures and pendant lights, which hang below the ceiling grid.
Locating the Ceiling Joist
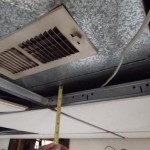
Because drop ceilings are not designed to support significant weight, lighting fixtures must be securely attached to the structural ceiling joists above. Use a stud finder to locate the joists. Mark their location on the drop ceiling tiles for reference. This ensures the fixture will have adequate support.
Installing the Hanging Support
Several methods exist to support the light fixture. One common approach involves using adjustable hanging bars. These bars are attached to the ceiling joist using appropriate fasteners, such as screws or toggle bolts, depending on the joist material. The bars are then adjusted to the correct height to support the light fixture. Another method involves heavy-duty toggle bolts inserted directly through the drop ceiling grid and anchored to the joist above. Ensure the chosen method provides sufficient weight capacity for the specific fixture being installed.
Wiring the Light Fixture
Follow the manufacturer's instructions for wiring the light fixture. This typically involves connecting the fixture's wires to the existing electrical wiring in the ceiling. Ensure correct wire connections and secure them with wire nuts. If working with fluorescent fixtures, ballast compatibility must be considered. LED fixtures often come with integrated drivers, simplifying the wiring process.
Mounting the Light Fixture
Once the wiring is complete, attach the light fixture to the hanging support system. This process varies depending on the fixture type. Recessed lights are typically inserted into a pre-cut opening in the ceiling tile and secured with clips. Surface-mounted fixtures are attached directly to the grid or hanging bars. Pendant lights are suspended from the hanging support, ensuring the cord is not under tension.
Testing the Installation
After securing the fixture, restore power to the circuit and test the light. Ensure the light functions correctly and that all connections are secure. If any issues arise, immediately turn off the power and troubleshoot the problem.
Finishing Touches
Replace any displaced ceiling tiles and ensure they fit snugly within the grid. Clean the area of any debris or dust generated during the installation process. This completes the installation of the light fixture in the drop ceiling.
Variations for Different Fixture Types
While the general process remains consistent, specific adaptations may be necessary depending on the fixture type. Heavier fixtures may require additional support or different mounting hardware. Some fixtures may require specific cutouts in the ceiling tiles. Always consult the manufacturer's instructions for detailed guidance.
Working with Fluorescent Fixtures and Ballasts
When replacing fluorescent fixtures, ensure compatibility between the new fixture and the existing ballast. Incompatible ballasts can lead to malfunction or premature failure of the fixture. In some cases, it may be necessary to replace the ballast along with the fixture. Understanding ballast types and compatibility is essential for a successful installation.

Light Installation In A Ceiling Tile

Diy Recessed Lighting Installation In A Drop Ceiling Tiles Part 3 Super Nova Adventures

How To Install A Rail Mounted Lighting System Track Pendants Dropped Ceiling

Drop Ceiling Installation How To Install A Homeserve Usa

Drywall Suspended Grid Showroom Ceiling Systems How To Install Pictures Of Tips For Installing Drop Ceilings Strictly Racine Wisconsin

5 Drop Ceiling Lighting Ideas

Installing Flush Mount Llight Fixture Into Drop Ceiling Refinish Paint House Remodeling Decorating Construction Energy Use Kitchen Bathroom Bedroom Building Rooms City Data Forum

How To Hang Fairy Lights On Ceiling

Diy Recessed Lighting Installation In A Drop Ceiling Tiles Prep Work Super Nova Adventures Dropped Finishing Basement

Drop Ceiling Tiles Installation Tips Diy Family Handyman
Related Posts