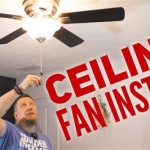
How To Fix a Broken Ceiling Fan Light Chain
A broken ceiling fan light chain is a common household problem that can easily be addressed without necessarily requiring a professional electrician. Understanding the components involved and taking a methodical approach to the repair can restore functionality to the fan's light fixture. This article provides a comprehensive guide on how to fix a broken ceiling fan light chain, covering everything from diagnosis to execution.
Identifying the Problem and Gathering Tools
The initial step involves a thorough assessment of the damage. Identify exactly where the chain has broken. It is often near the pull chain switch inside the light fixture housing, or somewhere along the chain itself. If the chain is broken near the switch, the switch might also be damaged and need replacement. The chain itself may also have experienced metal fatigue causing it to break.
Once the location and nature of the break are clear, gather the necessary tools and materials. A basic toolkit should include:
- A new ceiling fan light chain (available at most hardware stores)
- Small needle-nose pliers
- Wire strippers (if replacing the switch)
- Screwdrivers (both flathead and Phillips head, depending on the fan's design)
- Electrical tape
- A replacement pull chain switch (if needed)
- A ladder or step stool to safely reach the fan
- Safety glasses
- Work gloves
Prior to commencing any work, it is crucial to cut power to the ceiling fan at the circuit breaker. This eliminates the risk of electrical shock during the repair process. Verify the power is off by attempting to turn on the fan and light using other switches. This is a fundamental safety precaution and should not be overlooked.
Repairing a Broken Chain
If the chain is broken somewhere along its length and the switch is functional, the repair is generally straightforward. Here's how to proceed:
1.
Remove the Broken Chain Section:
Using the needle-nose pliers, carefully open the link connecting the broken section of the chain to the remaining chain. Remove the damaged portion. If connecting a completely new chain, remove old remains entirely.2.
Attach the New Chain:
Open the link on the end of the new chain section. Connect it to the existing chain link attached to the fan. Ensure the link is securely closed to prevent the chain from detaching. Pliers can be used to crimp the chain links closed securely.3.
Test the Connection:
Gently pull on the chain to ensure it's securely attached and doesn't come apart. Check the operation of the light by restoring power at the circuit breaker and pulling the chain. If the light turns on and off normally, the repair is complete. If the light still doesn't function, proceed to the next section on replacing the pull chain switch.In cases where the chain breaks very close to the switch, you may be able to shorten the existing chain by removing a few links from the end attached to the fan. However, this should only be done if the remaining chain length is sufficient for comfortable use. If not, replacing the entire chain is the better option.
Replacing the Pull Chain Switch
If the chain broke near the switch, or if the switch itself is malfunctioning (e.g., it doesn't turn the light on or off reliably), the switch needs to be replaced. This is a slightly more complex task, requiring some basic electrical knowledge.
1.
Access the Switch:
After disconnecting power at the breaker, access the switch inside the ceiling fan's light fixture housing. This often involves removing the light cover and possibly some other components. Take note of how the wires are connected to the old switch; a photograph can be helpful for reassembly. Carefully detach the wires from the old switch. This might involve loosening screw terminals or releasing push-in connectors.2.
Install the New Switch:
Connect the wires to the new switch in the same configuration as they were connected to the old switch. The new switch should have screw terminals or push-in connectors for secure wiring. Typically, there will be a black (hot) wire and potentially other colored wires depending on the complexity of the fan's wiring. Ensure the connections are tight and secure to prevent loose wires and potential electrical hazards.3.
Attach the New Chain:
Attach the new ceiling fan light chain to the new switch. Most switches have a small hole or loop where the chain is attached. Use the needle-nose pliers to securely connect the chain to the switch mechanism.4.
Reassemble the Fixture:
Carefully reassemble the light fixture housing, ensuring all wires are neatly tucked away and don't interfere with the fan's operation. Replace the light cover and any other components that were removed.5.
Test the Repair:
Restore power at the circuit breaker and test the new switch and chain. Pull the chain to turn the light on and off. Verify that the light functions correctly and that the chain operates smoothly. If the light still doesn't work, double-check all wiring connections and ensure the switch is properly installed. If all else fails, consult a qualified electrician.Understanding the specific type of switch used in your ceiling fan is crucial. There are single-pole switches, which control one function (like turning the light on and off), and multi-pole switches, which control multiple functions (like dimming or controlling multiple lights). Ensure the replacement switch is compatible with the fan's wiring configuration.
When working with electrical wiring, always prioritize safety. If you are uncomfortable working with electricity, it is best to hire a qualified electrician to perform the repair. Improper wiring can lead to electrical shocks, fire hazards, and damage to the fan motor.
Furthermore, consider the type of light bulbs used in the fixture. Some ceiling fans use incandescent bulbs, while others use LED or CFL bulbs. Ensure the replacement bulbs are compatible with the fixture and the switch. Using the wrong type of bulb can damage the fixture or shorten the lifespan of the bulb.
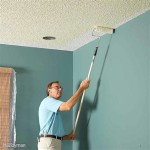
Before fully reassembling the fixture, it's a good idea to test the fan's operation without the light cover in place. This allows you to visually inspect the wiring connections and ensure that nothing is interfering with the fan's movement. Pay attention to any unusual noises or vibrations, which could indicate a problem with the fan motor or blade balance.
Properly managing the wires inside the light fixture housing is essential for safety and functionality. Use electrical tape to insulate any exposed wires or connections. Neatly tuck the wires away from moving parts and sharp edges. Avoid overcrowding the housing with too many wires, as this can create heat and increase the risk of a short circuit.
In some cases, the problem may not be the chain or the switch, but rather a faulty light bulb socket. If the light bulb socket is corroded or damaged, it may not be making proper contact with the bulb. Inspect the socket for any signs of damage and replace it if necessary. Bulb sockets are relatively inexpensive and easy to replace.
Regular maintenance can help prevent future problems with your ceiling fan. Periodically inspect the chain, switch, and wiring for any signs of wear or damage. Clean the fan blades and light fixture regularly to remove dust and debris. Tighten any loose screws or connections. By taking these simple steps, you can extend the lifespan of your ceiling fan and avoid costly repairs.
When purchasing a replacement pull chain switch, consider the quality of the switch. Cheaper switches may be more prone to failure. Invest in a high-quality switch from a reputable brand to ensure long-lasting performance. Look for switches that are UL-listed or ETL-listed, which indicates that they have been tested and certified for safety.
If the ceiling fan is equipped with a remote control, the problem may be related to the remote control receiver unit rather than the pull chain switch. The receiver unit is typically located inside the fan's motor housing. Consult the fan's owner's manual for instructions on troubleshooting the remote control system. In some cases, replacing the remote control batteries or resetting the receiver unit may resolve the issue.
Finally, remember to dispose of the old switch and any other used parts properly. Electrical components should be recycled whenever possible to reduce environmental impact. Check with your local recycling center for information on how to dispose of electrical waste safely.

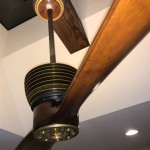
Ceiling Fan Pull Switch Broken Chain Replace Fix Hampton Bay

Diy Pull Chain Fix Ceiling Fan

Ceiling Fan Pull Switch Repair How To With Single Light Fixture

How To Repair Your Ceiling Fan If It Has A Broken Pull Chain For The Light Or Sd Switch Votd

Ceiling Fan Light Repair Home Tutor

4 Ways To Replace A Ceiling Fan Pull Chain Switch Wikihow

How To Easily Repair Or Replace Your Ceiling Fan Chain

Replacing A Broken Pull Chain Switch On Ceiling Fan

Ceiling Fan Pull Chain Switch Replacement Ifixit Repair Guide

Ceiling Fan Light Repair Home Tutor
Related Posts