How to Drop a Ceiling Around a Basement Window
Dropping a ceiling in a basement can significantly improve the aesthetics and functionality of the space. It conceals unsightly ductwork, pipes, and wiring, while also offering opportunities for improved lighting and insulation. A common challenge arises when dealing with basement windows, as their presence requires careful planning and execution to ensure a seamless integration with the dropped ceiling.
This article provides a comprehensive guide on how to drop a ceiling around a basement window, covering the necessary considerations, steps involved, and potential challenges. This approach focuses on a suspended or "drop" ceiling, which involves a grid system suspended from the existing ceiling structure, with tiles or panels placed within the grid.
Planning and Preparation
Before commencing any physical work, meticulous planning is essential. This stage involves assessing the existing conditions, determining the desired drop height, and selecting appropriate materials. Inadequate planning can lead to complications during installation and compromise the final result.
The first step is to accurately measure the dimensions of the basement, including the window opening and any obstructions. This information will be crucial for calculating the amount of materials required and designing the grid layout. Special attention should be paid to the window's protrusion from the wall, as this will influence how the ceiling grid is framed around it.
Next, determine the desired drop height of the ceiling. This height is typically dictated by the lowest-hanging obstruction, such as ductwork or pipes. It's essential to leave sufficient clearance for these elements while also maximizing the headroom in the basement. Consider the finished ceiling height in relation to the window. The goal is to create a visually appealing transition around the window, avoiding an excessively low ceiling that might make the window feel cramped or recessed.
Material selection is another critical aspect of the planning phase. Common materials for a dropped ceiling include: main runners, cross tees, wall angles, suspension wire, and ceiling tiles. The type of ceiling tiles will significantly impact the overall appearance and acoustic properties of the basement. For basements prone to moisture, moisture-resistant tiles are highly recommended. In addition, consider the window frame material when choosing the wall angle. Matching the color or finish can provide a more cohesive look.
Finally, obtain all necessary tools and safety equipment. Essential tools include a measuring tape, level, laser level (optional but highly recommended), drill, hammer, safety glasses, work gloves, and tin snips. Safety glasses are crucial for protecting the eyes from falling debris, while work gloves will prevent cuts and abrasions.
Framing the Window Opening
Framing the window opening within the suspended ceiling grid requires careful measurements and precise cuts. This section outlines the process of creating a clean and professional-looking border around the window.
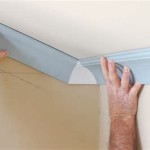
Begin by installing the wall angle around the perimeter of the basement walls at the desired drop height. Use a level to ensure the wall angle is perfectly horizontal. Secure the wall angle to the walls using appropriate fasteners, such as screws or nails, depending on the wall material. The wall angle serves as the support for the edges of the ceiling tiles.
Next, install the main runners, which are the primary support beams of the suspended ceiling grid. Main runners are typically suspended from the existing ceiling structure using suspension wire. Use a laser level or string line to ensure the main runners are aligned and level. The spacing between main runners is determined by the size of the ceiling tiles. For standard 2' x 2' tiles, the main runners are typically spaced 2 feet apart.
When the main runners reach the window opening, it's necessary to create a header that spans the width of the window. This header will provide support for the ceiling tiles above the window. Cut a piece of main runner to the appropriate length and attach it to the adjacent main runners using connectors. Ensure the header is level and securely fastened.
Now, install cross tees between the main runners and the header to create a grid around the window. The spacing between the cross tees is determined by the size of the ceiling tiles. Cut the cross tees to the appropriate length using tin snips. Attach the cross tees to the main runners and the header using connectors. Ensure all connections are secure and level. This framing structure will define the opening around the window and provide support for the ceiling tiles.
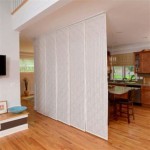
For windows that protrude significantly from the wall, consider creating a small soffit above the window. A soffit is a boxed-out area that extends from the wall to the ceiling. It can conceal the top portion of the window and create a more visually appealing transition between the ceiling and the window. The soffit can be framed using wood or metal studs and then covered with drywall or ceiling tiles.
Installing Ceiling Tiles Around the Window
After the grid system is properly installed, the next step is to install the ceiling tiles. This process involves carefully cutting and fitting the tiles around the window opening to create a seamless finish. Proper fitting of the tiles around the window is essential for achieving a professional appearance.
Start by installing the full-sized ceiling tiles in the areas away from the window. This will provide a stable base for measuring and cutting the tiles around the window opening. Lift each tile into place and gently push it into the grid. Ensure the tiles are properly seated and level.
When you reach the window opening, you will need to cut the ceiling tiles to fit. Accurately measure the dimensions of the opening and transfer those measurements to the ceiling tiles. Use a utility knife or a specialized tile cutter to make clean, precise cuts. It's often helpful to cut the tiles slightly larger than necessary and then gradually trim them down until they fit perfectly.
For tiles that abut the window frame, consider using a sealant or caulk to create a watertight seal. This will prevent moisture from entering the ceiling cavity and potentially damaging the tiles or the framing. Choose a sealant or caulk that is compatible with the window frame material and the ceiling tiles.
If a soffit was constructed above the window, the area inside the soffit can be finished with drywall or ceiling tiles. If using drywall, tape and mud the seams to create a smooth surface. Then, prime and paint the drywall to match the ceiling tiles. If using ceiling tiles, cut the tiles to fit the inside of the soffit and attach them to the framing using construction adhesive.
Pay close attention to the corners where the ceiling tiles meet the window frame. These areas can be particularly challenging to cut and fit. Use a sharp utility knife and take your time to achieve a clean, professional-looking finish. Mitering the corners can provide a more refined appearance.
Addressing Potential Challenges
While the above steps provide a comprehensive guide, various challenges may arise during the process of dropping a ceiling around a basement window. Understanding these potential issues and having solutions in mind can save time and prevent frustration.
One common challenge is dealing with irregular window shapes. Basement windows are not always perfectly square or rectangular. If the window has an unusual shape, it may be necessary to create custom-cut ceiling tiles to fit. Consider using a template to accurately trace the shape of the window onto the ceiling tiles.
Another challenge is dealing with existing obstructions, such as pipes or wiring, that are located near the window. These obstructions may interfere with the installation of the ceiling grid or the ceiling tiles. In some cases, it may be possible to relocate the obstructions. However, if relocation is not feasible, consider building a small box or enclosure around the obstruction to conceal it. The box can be framed using wood or metal studs and then covered with drywall or ceiling tiles.
Moisture is a significant concern in basements. If the basement is prone to moisture, it's essential to take steps to prevent moisture from damaging the ceiling. Use moisture-resistant ceiling tiles and ensure proper ventilation in the basement. Consider installing a vapor barrier above the ceiling to prevent moisture from rising from the floor and walls.
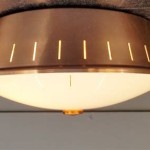
Lighting can be a critical consideration when dropping a ceiling in a basement. The dropped ceiling can create a more intimate and inviting atmosphere. Recessed lighting is a popular choice for dropped ceilings, as it provides ample illumination without taking up valuable headroom. If installing recessed lighting, plan the location of the lights before installing the ceiling grid. Ensure the lights are compatible with the ceiling tiles and that they are properly wired.
Finally, ensure all work is performed in accordance with local building codes and regulations. Check with the local building department to obtain any necessary permits and to ensure the project meets all safety requirements. This proactive step can prevent costly delays and ensure the project is completed safely and legally.

How To Install A Suspended Ceiling Building Window Wells Slopes

How To Install A Suspended Ceiling Building Window Wells Slopes

Finish Around Basement Tilt In Window

Install Drop Ceiling Modern Basement Philadelphia By Ah Contracting Llc Houzz Ie

Finish Around Basement Tilt In Window

Boxed Basement Window

Pic Of Clever Drop Ceiling Solution Fine Homebuilding

Basement Window Boxed In Ceiling Remodel

West Bloomfield Basement Traditional Detroit By Finished Basements Plus Houzz Ie

Install Drop Ceiling Modern Basement Philadelphia By Ah Contracting Llc Houzz Ie
Related Posts