How to Cut Ceiling Crown Molding Corners on Walls
Crown molding is a classic decorative element that can add a touch of elegance to any room. It is typically installed where the wall meets the ceiling, and it can be used to create a variety of different looks. Crown molding is available in a variety of materials, including wood, plaster, and polyurethane. It can also be purchased in a variety of different styles, such as traditional, contemporary, and ornate.
Cutting crown molding corners on walls can be a bit tricky, but it is definitely possible to do it yourself. With the right tools and a little bit of patience, you can achieve professional-looking results. Here is a step-by-step guide on how to cut ceiling crown molding corners on walls:
Step 1: Gather Your Tools and Materials
You will need the following tools and materials to cut crown molding corners on walls:
- Miter saw
- Crown molding
- Measuring tape
- Pencil
- Safety glasses
- Dust mask
Step 2: Measure and Mark the Crown Molding
The first step is to measure and mark the crown molding. You will need to determine the length of the molding that you need for each wall. Once you have measured the length, mark the molding with a pencil. You will also need to mark the angles for the corners. To do this, place the molding on the wall and mark the point where the molding meets the wall. Then, use a miter saw to cut the molding at a 45-degree angle. Repeat this process for the other side of the corner.
Step 3: Cut the Crown Molding
Once you have marked the crown molding, you can cut it using a miter saw. Be sure to wear safety glasses and a dust mask when you are using the saw. To cut the molding, place it on the saw table and align the mark with the saw blade. Then, slowly lower the saw blade onto the molding and cut through the molding. Repeat this process for the other side of the corner.
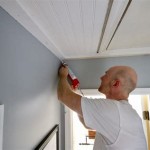
Step 4: Install the Crown Molding
Once you have cut the crown molding, you can install it on the wall. To do this, apply a bead of caulk to the back of the molding. Then, press the molding into place on the wall. Use a level to make sure that the molding is level. Once the molding is in place, you can secure it with nails or screws.
Step 5: Finish the Crown Molding
Once the crown molding is installed, you can finish it by painting or staining it. You can also add decorative elements, such as rosettes or medallions. With a little bit of effort, you can achieve professional-looking results that will add a touch of elegance to your home.

How To Cut Crown Moulding The Home Depot

How To Cut Install Crown Moulding

How To Install Crown Molding Using A Sawset Protractor Miter Bevel

How To Install Crown Molding Using A Sawset Protractor Miter Bevel

How To Cut A Bullnose Outside 90º Corner

How To Cut Inside Corner For Crown Molding Like A Pro

How To Cut Crown Molding Inside Corners 15 Steps With Pictures

How To Cut Crown Molding Using Easy Templates Sawdust Girl

How To Cut Crown Molding Inside And Outside Et Painters

How To Cut An 90 Degree Crown Molding Corner Myfull Decor
Related Posts