How To Build A Coffered Ceiling With Box Beams In Revit
Revit, a Building Information Modeling (BIM) software, offers powerful tools for designing and documenting architectural projects. Creating a coffered ceiling with box beams in Revit requires a strategic approach, leveraging the software's modeling capabilities to achieve a visually appealing and accurate representation of the design. This article will outline the process, providing guidance on the key steps involved in constructing a coffered ceiling using Revit.
Before beginning the modeling process, it is essential to plan the coffered ceiling's layout and dimensions. This includes determining the size and spacing of the coffers, the depth and width of the box beams, and the overall ceiling height. A preliminary sketch or CAD drawing can be beneficial in visualizing the design and ensuring that the proposed layout aligns with the architectural style of the room. Consider the structural limitations of the building and ensure that the proposed coffered ceiling design does not compromise the building's integrity.
Setting Up the Revit Project
The initial step involves setting up a new Revit project or opening an existing one. Ensure that the project template is appropriate for the building type and that the units of measurement are correctly configured. Define the levels for the project, particularly the ceiling level, which will serve as the reference point for the coffered ceiling. If the project already exists, verify that the level definitions are accurate and that the building model is properly aligned.
Next, create the architectural ceiling. This can be done using the 'Ceiling' tool under the 'Architecture' tab. Choose the appropriate ceiling type, such as a 'Generic' ceiling, which can be customized later. Sketch the boundary of the ceiling within the room, ensuring that it aligns with the walls. Adjust the ceiling height offset to match the desired level. The architectural ceiling will serve as the base upon which the coffered ceiling elements will be placed.
Creating the Box Beams
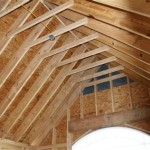
The core of the coffered ceiling lies in the box beams. These can be created using different Revit families, with the 'Beam' family and the 'Model In-Place' method being two common approaches. Using the 'Beam' family allows you to create structural elements with specific profiles, while the 'Model In-Place' method is more flexible for creating custom shapes. Both methods have their advantages and disadvantages, and the choice depends on the complexity of the design and the level of control required.
To create box beams using the 'Beam' family, navigate to the 'Structure' tab and select 'Beam'. Load a beam profile family, such as a rectangular profile, and adjust its dimensions to match the desired width and depth of the box beams. Alternatively, create a custom beam profile family using the 'Profile' template. This allows for the creation of more intricate beam shapes with moldings or other decorative elements. Place the beams along the grid lines that define the coffer layout, ensuring that they are properly aligned. If the 'Beam' family is used, ensure that the beam usage is set to "non-structural" in its properties to avoid affecting structural analysis.
For more complex or customized box beams, the 'Model In-Place' method is often preferred. Under the 'Architecture' tab, select 'Component' and then 'Model In-Place'. Choose the 'Ceilings' category to ensure that the component is properly categorized and scheduled. Use the 'Extrusion' tool to create the box beam profiles. Sketch the shape of the box beam on a vertical plane, defining its width, depth, and any decorative features. Extrude the profile along the length of the beam. Repeat this process for each beam, carefully aligning them according to the planned layout. The 'Model In-Place' method offers greater flexibility in creating complex shapes but requires more manual input and careful attention to detail.
Regardless of the method used, the box beams should be accurately positioned and aligned. Use the 'Align' tool to ensure that the beams are parallel and perpendicular to each other. Adjust the beam heights to ensure that they are flush with the architectural ceiling. Pay close attention to the corners and intersections, ensuring that the beams join seamlessly. The accuracy of the beam placement is crucial for achieving a professional and realistic-looking coffered ceiling.
Creating the Coffer Panels
The coffer panels fill the spaces between the box beams, completing the coffered ceiling design. These panels can be created using various Revit families, including the 'Ceiling' family, the 'Panel' family, or the 'Model In-Place' method. The choice of family depends on the desired level of detail and the complexity of the panel design.
Using the 'Ceiling' family, create a new ceiling type that matches the dimensions of the coffer panels. Sketch the boundary of each panel within the spaces defined by the box beams. Adjust the panel height to ensure that it is flush with the bottom of the box beams. The 'Ceiling' family is a straightforward approach for creating simple, flat coffer panels.
For more detailed coffer panels, the 'Panel' family or the 'Model In-Place' method may be more suitable. The 'Panel' family allows for the creation of custom panels with specific materials and finishes. The 'Model In-Place' method, as with the box beams, offers the greatest flexibility in creating complex shapes. Create an extrusion or a sweep to define the panel's profile and then copy or array this panel to fill all the coffer spaces. Remember to set the category to 'Ceilings' when using the 'Model In-Place' method to maintain correct scheduling and visibility.
Consider adding decorative elements to the coffer panels, such as moldings, carvings, or recessed lighting. These details can enhance the visual appeal of the coffered ceiling and create a more sophisticated design. Use the 'Void' tool to create recessed areas for lighting fixtures or other features. Pay attention to the material assignments, ensuring that the panels and the box beams have appropriate finishes. Consider the lighting implications of the coffered ceiling, ensuring that the design provides adequate illumination for the room. Add lighting fixtures to the Revit model and adjust their settings to achieve the desired lighting effect. Consider indirect lighting techniques, such as uplighting the coffer panels, to create a soft and ambient atmosphere.
Material Application and Detailing
Once the box beams and coffer panels are in place, the next step is to apply materials and add detailing to enhance the realism of the coffered ceiling. Revit offers a wide range of materials that can be applied to different elements, allowing for accurate representation of finishes and textures. Select appropriate materials for the box beams and coffer panels, considering the architectural style and the desired aesthetic. For example, wood materials can be applied to the box beams to simulate a natural wood finish, while paint materials can be applied to the coffer panels to create a smooth and even surface. Adjust the material properties, such as the color, texture, and reflectivity, to achieve the desired look.
Detailing the coffered ceiling involves adding subtle elements that enhance its visual appeal and realism. This can include adding moldings to the edges of the box beams or the coffer panels, creating reveals or grooves, or adding decorative carvings or ornaments. Revit offers various tools for creating these details, such as the 'Sweep' tool for creating moldings and the 'Void' tool for creating reveals. Use the 'Join Geometry' tool to seamlessly connect the box beams and coffer panels, eliminating any visible gaps or seams. Pay attention to the scale of the details, ensuring that they are proportionate to the overall size of the coffered ceiling. Consider adding crown molding to the perimeter of the ceiling to create a more finished and elegant look.
Furthermore, consider the impact of lighting on the appearance of the materials. Adjust the material properties to respond realistically to different lighting conditions. Experiment with different lighting schemes to see how they affect the colors, textures, and shadows of the coffered ceiling. The interplay of light and shadow can significantly enhance the visual appeal of the design. Correct material application and meticulous detailing are crucial for creating a realistic and visually compelling coffered ceiling in Revit that will elevate the overall project design.

Classical Coffered Ceiling In Revit Tutorial

Classical Coffered Ceiling In Revit Tutorial

Classical Coffered Ceiling In Revit Tutorial

Classical Coffered Ceiling In Revit Tutorial

Revit Dropped Coffered Ceiling In A Small Conference Room

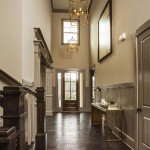
5 Things You Need To Know About Coffered Ceilings Intrim Mouldings

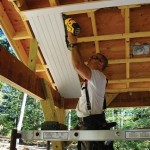
Craftsman Moldings Box Beam Ceiling Windsorone

5 Things You Need To Know About Coffered Ceilings Intrim Mouldings

6 Types Of Ceilings Modeled In Revit Tutorial Ceiling

Ariston Coffered Ceiling Windsorone
Related Posts