How Much To Charge To Install Beadboard Ceiling
Determining the appropriate price to charge for beadboard ceiling installation requires careful consideration of various factors. Accurate pricing is crucial for profitability, attracting clients, and ensuring fair compensation for the work involved. A well-defined pricing strategy takes into account material costs, labor expenses, overhead, and desired profit margins. Ignoring even one of these elements can lead to financial losses or difficulty securing projects.
This article provides a comprehensive overview of the elements that contribute to the overall cost of beadboard ceiling installation, offering guidance on how to accurately estimate and charge for these services. The aim is to equip contractors and installers with the knowledge needed to develop competitive and profitable pricing models.
Understanding the Scope of the Project
Before determining a price, a thorough assessment of the project's scope is essential. This involves evaluating several key aspects, including the size of the ceiling area, the existing ceiling condition, and any potential challenges that may arise during installation. A detailed assessment allows for a more accurate estimation of materials and labor required.
The square footage of the ceiling directly impacts the amount of beadboard material needed. Measuring the length and width of the room and multiplying these dimensions provides the total area. This figure is crucial for calculating material costs. In addition to the ceiling area, consider any alcoves, soffits, or other architectural features that may require additional beadboard.
The condition of the existing ceiling plays a significant role in the installation process. If the existing ceiling is uneven, damaged, or contains popcorn texture, additional preparation work may be necessary. Leveling the ceiling, repairing cracks, or removing existing textures adds to the labor hours and material costs. A visual inspection and possibly a moisture test can help identify any underlying issues that need to be addressed before installing the beadboard.
Potential challenges can include the presence of pipes, wiring, or ductwork. These obstructions necessitate careful planning and potentially require custom cuts or modifications to the beadboard. Accessibility to the ceiling is another critical consideration. High ceilings may require scaffolding or specialized equipment, increasing both labor time and equipment rental costs. Electrical considerations, such as the relocation or replacement of light fixtures, add to the complexity of the project and should be accounted for in the overall estimate.
Calculating Material Costs
Material costs constitute a substantial portion of the overall project expenses. A detailed breakdown of the materials required, along with accurate pricing, is crucial for creating a reliable estimate. This section outlines the primary materials required for beadboard ceiling installation and offers guidance on calculating their associated costs.
Beadboard panels or planks are the primary material. These are available in various materials, including wood, MDF (Medium-Density Fiberboard), and PVC. The choice of material impacts both the cost and the installation process. Wood beadboard offers a classic appearance but may be more expensive and require more maintenance. MDF is a cost-effective option that is easy to paint, while PVC is moisture-resistant and suitable for bathrooms or kitchens. The price per panel or plank varies depending on the material, thickness, and size. Obtain current prices from local suppliers to ensure accurate costing.
Adhesive is necessary to secure the beadboard to the ceiling, especially if the installation involves directly applying the beadboard to the existing surface. The type and quantity of adhesive depend on the beadboard material and the ceiling surface. Construction adhesive is typically used for wood and MDF beadboard, while specialized PVC adhesive is required for PVC panels. Calculate the amount of adhesive needed based on the manufacturer's recommendations and the square footage of the ceiling. Factor in the cost per tube or gallon of adhesive.
Fasteners, such as nails or screws, provide additional support for the beadboard. These are particularly important when installing beadboard over furring strips or when the adhesive alone is insufficient. The type and size of fasteners depend on the thickness of the beadboard and the material of the ceiling joists. Galvanized nails or screws are recommended to prevent rust. Calculate the quantity of fasteners needed based on the spacing recommendations and the size of the ceiling. Add the cost per box or pound of fasteners to the material list.
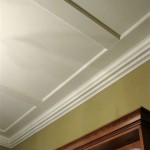
Trim and molding are used to finish the edges of the beadboard ceiling and create a polished look. These include crown molding, base molding, and corner trim. The type and style of trim depend on the desired aesthetic and the architectural features of the room. Wood trim is a common choice and can be stained or painted to match the beadboard. Measure the perimeter of the ceiling to determine the length of trim needed. Calculate the cost per linear foot of trim and add it to the material list.
Paint or stain provides a protective finish and enhances the appearance of the beadboard. The type of paint or stain depends on the beadboard material and the desired color. Latex paint is suitable for MDF and primed wood beadboard, while oil-based paint offers better durability. Stain is used to highlight the natural grain of wood beadboard. Calculate the amount of paint or stain needed based on the square footage of the beadboard and the number of coats required. Factor in the cost per gallon of paint or stain.
Other materials may include furring strips (if leveling is required), joint compound (for filling gaps), sandpaper (for smoothing surfaces), and primer (for preparing the surface for paint). These items, although often less expensive individually, contribute to the overall material cost and should be included in the estimate.
Estimating Labor Costs
Labor costs represent a significant portion of the total project cost. Accurately estimating labor requires considering the time involved in each stage of the installation process, the skill level of the installers, and the prevailing labor rates in the area. A detailed breakdown of labor hours and rates is crucial for creating a profitable and competitive bid.
Preparation work involves tasks such as removing existing ceiling textures, repairing cracks or damage, and leveling the ceiling surface. The time required for preparation depends on the condition of the existing ceiling. Removing popcorn texture can be labor-intensive and may require specialized equipment. Repairing cracks or damage involves patching and sanding, which also adds to the preparation time. Leveling the ceiling involves installing furring strips and shimming, which requires precision and attention to detail. Estimate the number of hours required for preparation based on the complexity of the tasks and the size of the ceiling.
The installation process itself involves cutting, fitting, and securing the beadboard panels or planks to the ceiling. The time required for installation depends on the size of the ceiling, the complexity of the layout, and the skill of the installers. Cutting beadboard around obstructions, such as light fixtures or pipes, requires precision and can be time-consuming. Securing the beadboard with adhesive and fasteners involves careful alignment and attention to detail. Estimate the number of hours required for installation based on the square footage of the ceiling and the complexity of the design.
Finishing work includes tasks such as installing trim and molding, filling gaps, sanding surfaces, and painting or staining. The time required for finishing depends on the type of trim and molding used, the number of gaps to be filled, and the number of coats of paint or stain required. Installing trim and molding involves precise cutting and fitting to create a seamless transition. Filling gaps with joint compound requires careful application and sanding. Painting or staining involves applying multiple coats and allowing sufficient drying time. Estimate the number of hours required for finishing based on the complexity of the tasks and the desired level of finish.
Consider the skill level of the installers when estimating labor rates. Experienced installers typically work faster and produce higher-quality results, but their hourly rates may be higher. Less experienced installers may require more time to complete the same tasks, but their hourly rates may be lower. Balance the cost of labor with the desired level of quality and efficiency. Research the prevailing labor rates in the area to ensure that the pricing is competitive.
Add a contingency factor to the labor estimate to account for unexpected delays or complications. This contingency should be a percentage of the total labor cost, typically between 5% and 10%. This buffer helps to cover any unforeseen issues that may arise during the project.
Factor in any travel time and transportation costs associated with the project. If the job site is located far from the installer's base of operations, additional time and fuel expenses may be incurred. Include these costs in the labor estimate to ensure that they are covered.
Overhead and Profit Margin
Overhead expenses are the indirect costs associated with running a business. These include items such as insurance, rent, utilities, and advertising. Profit margin is the percentage of revenue that remains after deducting all costs. Both overhead and profit margin are essential components of a sustainable and profitable pricing strategy.
Calculate overhead expenses by reviewing all business expenses over a specific period, such as a year. These expenses can be categorized as fixed or variable. Fixed expenses are those that remain relatively constant regardless of the volume of work, such as rent and insurance. Variable expenses are those that fluctuate with the volume of work, such as fuel and materials. Divide the total overhead expenses by the total number of labor hours worked during the same period to determine the overhead rate per labor hour. This rate should be added to the labor cost to ensure that overhead expenses are covered.
Determine a desired profit margin based on the level of risk involved in the project and the competitive landscape. A higher-risk project may warrant a higher profit margin to compensate for the increased potential for losses. A highly competitive market may necessitate a lower profit margin to attract clients. A typical profit margin for construction projects ranges from 10% to 20%. Multiply the total cost of the project (including material, labor, and overhead) by the desired profit margin to determine the profit amount. Add this amount to the total cost to arrive at the final price.
Consider offering discounts or incentives to attract clients or secure larger projects. These may include discounts for repeat customers, bundled services, or seasonal promotions. However, ensure that any discounts offered do not erode the profit margin to an unacceptable level.
Regularly review and adjust the pricing model to reflect changes in material costs, labor rates, and overhead expenses. This ensures that the pricing remains competitive and profitable. Track project costs and compare them to the estimated costs to identify areas for improvement.
Communicate the pricing clearly and transparently to clients. Provide a detailed breakdown of the costs involved and explain the value they are receiving for their investment. This helps to build trust and avoid misunderstandings.

How Much Does It Cost To Install A Beadboard Ceiling 2024 Data Angi

How To Install A Beadboard Ceiling Pine And Prospect Home

How To Install A Beadboard Ceiling Pine And Prospect Home

How To Install Beadboard Panels On A Ceiling And Why We Ll Never Do It Again The Lake Land

How To Install A Beadboard Ceiling Pine And Prospect Home

How To Install Beadboard Panels On A Ceiling And Why We Ll Never Do It Again The Lake Land

How To Install A Beadboard Ceiling Pine And Prospect Home

Here S How Install An Attractive Beadboard Ceiling

How To Install Beadboard Panels On A Ceiling And Why We Ll Never Do It Again The Lake Land

Why Beadboard On The Ceiling Is Nothing At All Like Dancing Space Between
Related Posts