How Do You Wire a Remote Control Ceiling Fan?
Installing a remote-controlled ceiling fan offers convenience and enhanced control over room temperature and airflow. While the process may seem daunting, understanding the wiring and following a systematic approach makes it a manageable task for those comfortable with basic electrical work. This article provides a comprehensive guide to wiring a remote control ceiling fan.
Safety Precautions: Before commencing any electrical work, prioritize safety. Always turn off the power to the circuit at the breaker box. Double-check the power disconnection using a non-contact voltage tester. If unsure about any aspect of the wiring, consult a qualified electrician.
Understanding the Components: A remote-controlled ceiling fan system typically involves several key components: the fan motor, the receiver unit, the remote control, and the house wiring. The receiver unit is housed within the fan's mounting bracket and controls the fan's speed and light functions. The remote communicates wirelessly with the receiver.
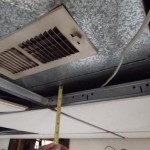
Preparing the Wiring at the Ceiling: The electrical box in the ceiling should contain wires for power (black, often labeled "hot"), neutral (white), and ground (green or bare copper). Identify each wire clearly. If your existing wiring doesn't include a grounding wire, consult an electrician to ensure proper grounding.
Installing the Mounting Bracket: Securely attach the mounting bracket provided with the fan to the electrical box, ensuring it's properly grounded. The bracket will typically have designated openings for the wires to pass through.
Wiring the Receiver Unit: The receiver unit has several labeled wires, usually black, white, blue, and green. The black wire from the receiver connects to the black (hot) wire from the house wiring. The white wire from the receiver connects to the white (neutral) wire from the house wiring. The green wire from the receiver connects to the ground wire (green or bare copper) from the house wiring. The blue wire from the receiver is for the light kit, if included.
Connecting the Fan Motor to the Receiver: The fan motor also has several labeled wires, typically black, white, and blue. Connect the fan's black wire to the black wire from the receiver marked “Fan.” Connect the fan's white wire to the white wire from the receiver. If your fan includes a light kit, connect the fan's blue wire to the blue wire from the receiver.
Securing the Connections: Use wire nuts to secure all wire connections. Ensure the wire nuts are tightly fastened and that no bare wire is exposed. Carefully tuck the wired connections and the receiver unit into the mounting bracket.
Attaching the Fan Blades and Light Kit (if applicable): Following the manufacturer's instructions, attach the fan blades to the motor housing. If your fan includes a light kit, wire the light kit to the designated wires on the fan and receiver, typically blue for the light and white for the neutral. Attach the light kit components according to the manufacturer's instructions.
Installing the Fan to the Mounting Bracket: Carefully lift the assembled fan and attach it to the mounting bracket, following the manufacturer's instructions. Ensure the fan is securely fastened.
Restoring Power and Testing: Turn the power back on at the breaker box. Test the fan and light functions using the remote control. The remote may require pairing or syncing with the receiver; refer to the manufacturer's instructions for specific pairing procedures. Verify that all speeds and light functions operate correctly.
Troubleshooting: If the fan doesn't function correctly, double-check all wiring connections. Ensure the batteries in the remote control are fresh. Refer to the troubleshooting section of the manufacturer's instructions for specific issues.
Variations in Wiring: While the general wiring principles remain consistent, specific wire colors and connections may vary slightly between different fan models. Always consult the manufacturer's instructions provided with your specific fan for detailed wiring diagrams and instructions.
Importance of Following Manufacturer’s Instructions: The wiring process can differ slightly between fan manufacturers. It is crucial to consult the specific instructions provided with your fan model. These instructions will provide detailed diagrams and steps tailored to your specific fan, ensuring correct installation and optimal performance.

How To Install A Ceiling Fan With Remote Control

How To Wire A Ceiling Fan Control Using Dimmer Switch

How To Install A Ceiling Fan With Remote Control

Converting An Existing Ceiling Fan To A Remote Control Wiring With Hunter

Ceiling Fan Wiring Diagram

Universal Ceiling Fan And Light Remote Control Kit Add A No In Wall Wiring Required Switch Sd Timming On Off Scene With Receiver Plate

How To Wire And Install A Ceiling Fan With Remote Control Light Fixture Removal

3 Way Wiring Ceiling Fan With Remote For Two Wire Diy Home Improvement Forum

Ceiling Fan Remote Conversion Final Connections Wiring With

I Am Installing A Remote To Ceiling Fan Where Does The Red Wire Go Quora
Related Posts