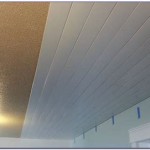
Removing a popcorn ceiling is a messy but rewarding project. Popcorn ceilings are often outdated and can be difficult to clean, so replacing them with a new finish can be a great way to update the look of your home. This step-by-step guide will show you how to remove a popcorn ceiling quickly and safely.
Step 1: Prepare the Room
Before beginning any project like this, it’s important to properly prepare the room. This includes removing any furniture and other items from the room, taping off the floor and walls with plastic sheeting, and putting on safety equipment like goggles and a dust mask.
Step 2: Test for Asbestos
Popcorn ceilings were popular in the 1970s, and some of them contain asbestos. Asbestos is a hazardous material and must be handled safely, so it’s important to have your ceiling tested for asbestos before beginning the removal process. If your popcorn ceiling contains asbestos, you may need to hire a professional to remove it.
Step 3: Spray the Ceiling with Water
Once you’ve determined that the popcorn ceiling doesn’t contain asbestos, it’s time to begin the removal process. An easy way to do this is to spray the ceiling with water. This will cause the popcorn texture to soften, making it easier to remove.
Step 4: Scrape Off the Softened Texture
Once the texture has softened, you can use a putty knife or drywall taping knife to gently scrape off the texture. It’s important to be careful not to gouge the drywall underneath. Once the texture has been removed, use a damp cloth to wipe down the ceiling and remove any remaining dust.
Step 5: Sand the Ceiling
Once the popcorn texture has been removed, the next step is to sand the ceiling. This will help to smooth out any imperfections and create a better surface for the new finish. A hand sander works best for this step, but you can also use sandpaper if necessary.
Step 6: Apply a Primer
Once the ceiling is sanded, you’ll need to apply a primer before painting or installing a new finish. This will help protect the drywall and provide a better surface for the new finish. Make sure to allow the primer to dry completely before moving on to the next step.
Step 7: Apply a New Finish
The final step is to apply a new finish to the ceiling. This can be paint, wallpaper, or any other type of finish you’d like. Make sure to follow the manufacturer’s instructions for proper application.
Conclusion
Removing a popcorn ceiling is a messy but rewarding project. With the right tools and preparation, you can easily remove a popcorn ceiling and update the look of your home. Follow the steps outlined in this guide for a successful popcorn ceiling removal.


![Top 8 Questions Answered About Popcorn Ceiling Removal [2023] Drywall Repair, Popcorn removal](https://i2.wp.com/melbournedrywallrepair.com/wp-content/uploads/2021/05/PopcornCeilingRemoval-1024x682.jpeg)


Related Posts

