How to Install Crown Molding on a Vaulted Ceiling in Revit
Revit, a Building Information Modeling (BIM) software by Autodesk, offers comprehensive tools for designing and documenting architectural projects. One common architectural detail, crown molding, adds elegance and sophistication to interior spaces. Installing crown molding on a vaulted ceiling presents unique challenges compared to a standard flat ceiling. This article details the process of accurately modeling and installing crown molding on a vaulted ceiling within a Revit project.
Successfully installing crown molding in Revit hinges on understanding the software's capabilities and employing appropriate techniques to address the complexities of angled surfaces. The process involves several steps, including creating a profile family, loading it into the project, and utilizing sweeps and other modeling tools to conform the molding to the vaulted ceiling's geometry. Careful attention to detail and precise execution are crucial for achieving a realistic and visually appealing result.
Key Point 1: Creating the Crown Molding Profile Family
The foundation of accurate crown molding representation lies in developing a precise profile family. This family defines the shape and dimensions of the molding, which will be used to generate the 3D model within the project. To create the profile family, begin by starting a new family in Revit. Select the "Profile" family template. This template provides a predefined plane for sketching the profile.
Using the line and arc tools within the family editor, carefully draw the cross-sectional shape of the crown molding. Ensure the dimensions are accurate and correspond to the desired size of the molding. Consider the complexity of the profile. Intricate designs may require more detail and refinement. Pay attention to any curves, fillets, or other decorative elements. Close the profile loop to create a continuous shape. This is crucial for Revit to properly generate the 3D geometry.
Once the profile is drawn, assign parameters to critical dimensions such as height, width, and projection. This allows flexibility in adjusting the molding size within the project without having to recreate the entire profile. Parameters also facilitate consistency across multiple instances of the molding. Label the parameters descriptively for easy identification and modification. Save the profile family with a descriptive name that reflects its function and size. For example, "CrownMolding_5inch_Profile."
Consider adding material properties to the profile family. This allows the molding to be rendered with the desired material, such as paint, wood, or plaster. Assign a material parameter to the profile and load it into the project. In the project environment, the material can be modified as needed. Material properties add realism to the model and facilitate accurate rendering and visualization.
Key Point 2: Implementing Sweeps for Vaulted Ceiling Application
After creating and loading the crown molding profile family, the next step involves using the "Sweep" command to apply the profile along the edges of the vaulted ceiling. The sweep tool extrudes the profile along a specified path, creating the 3D representation of the molding. This technique is particularly useful for complex geometries like vaulted ceilings, where the path is not a straight line.
Before initiating the sweep, ensure the vaulted ceiling geometry is accurately modeled. The sweep path will follow the edges of the ceiling, so any inaccuracies in the ceiling model will be reflected in the molding. Use the "Model Line" or "Reference Line" tools to define the path along which the crown molding will be swept. These lines should precisely follow the intersection of the ceiling and the wall at the desired location of the crown molding.
When using the sweep command, select the previously created crown molding profile family. Then, choose the path that was created using model or reference lines. Ensure that the profile is oriented correctly with respect to the path. The profile can be rotated or flipped as needed to achieve the desired alignment. This is crucial for the molding to be positioned correctly on the ceiling.
For vaulted ceilings with varying angles or complex curves, it may be necessary to segment the sweep path into multiple sections. This allows for finer control over the molding's alignment and avoids distortion. Create separate sweeps for each segment of the path, ensuring that the segments are seamlessly joined. The "Align" tool can be used to ensure precise alignment between the segments. Consider using in-place families for complex shapes, as they allow for more flexibility in modeling.
After creating the sweep, review the geometry in 3D view to ensure that the molding is correctly positioned and aligned with the ceiling. Make any necessary adjustments to the profile's orientation or the sweep path. Pay particular attention to the corners and intersections, where the molding may require additional trimming or mitering. Use the "Modify" tools to refine the geometry and ensure a seamless connection.
Key Point 3: Addressing Transitions and Mitering Corners
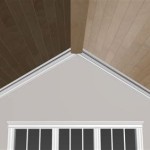
One of the most challenging aspects of installing crown molding on a vaulted ceiling is handling the transitions between different ceiling planes and mitering the corners where the molding meets. Accurate representation of these details is critical for achieving a realistic and visually appealing result. Revit offers several tools and techniques to address these challenges.
At the corners where two sections of crown molding meet, a mitered joint is typically required. This involves cutting the molding at an angle so that the two pieces fit together seamlessly. In Revit, this can be achieved by creating a custom mitered profile or by using the "Cut Geometry" tool to trim the molding at the desired angle. The specific angle will depend on the angle of the corner.
For complex transitions where the vaulted ceiling meets a flat ceiling or a wall, it may be necessary to create custom transition pieces. These pieces can be modeled as separate families or as part of the crown molding family. The key is to carefully analyze the geometry of the transition and create a model that accurately reflects the desired appearance. Use reference planes and parameters to control the dimensions and alignment of the transition piece.
The "Join Geometry" tool can be used to seamlessly connect adjacent segments of crown molding. This tool merges the geometry of the two elements, creating a smooth transition between them. This can eliminate visible seams or gaps between the segments. However, be careful when using this tool, as it can sometimes create unexpected results. Always review the geometry after joining to ensure that the result is satisfactory.
Consider using in-place families for modeling complex transitions or custom mitered joints. In-place families allow for direct manipulation of the geometry within the project environment, providing greater flexibility and control. However, in-place families can also increase the file size and complexity of the project. Use them judiciously and only when necessary.
After modeling all the transitions and mitered corners, thoroughly review the geometry in 3D view to ensure that the crown molding is accurately represented. Pay attention to the details and make any necessary adjustments to refine the model. Accurate modeling of these details is crucial for achieving a realistic and visually appealing result. Perform rendering tests to examine how the lighting interacts with the crown molding and make further adjustments as needed.
Using a combination of profile families, sweeps, and custom modeling techniques, Revit enables accurate and detailed representation of crown molding on vaulted ceilings. By carefully following these steps and paying attention to detail, designers and architects can create realistic and visually appealing models that accurately reflect the intended design.
Solved Crown Sweep Angle On Vaulted Ceiling Autodesk Community

Classical Coffered Ceiling In Revit Tutorial

Classical Coffered Ceiling In Revit Tutorial

Custom Ceiling In Revit Tutorial

Sloped Vaulted Ceiling In Revit Tutorial

Solved Crown Sweep Angle On Vaulted Ceiling Autodesk Community

Ceiling Floor And Wall Trim In Revit Cornice Skirting Tutorial Intermediate Course 11

Solved Crown Sweep Angle On Vaulted Ceiling Autodesk Community

Sloped Vaulted Ceiling In Revit Tutorial

Ceilings In Revit Tutorial Sloped Ceiling Arc Floor Integrated
Related Posts


