Hanging a Ceiling Fan on a Sloped Ceiling: A Comprehensive Guide
Installing a ceiling fan can significantly improve air circulation and energy efficiency within a room. However, hanging a ceiling fan on a sloped or angled ceiling presents unique challenges compared to a standard flat ceiling. The process requires careful planning, specialized hardware, and a thorough understanding of electrical codes to ensure safety and functionality. This article provides a detailed guide on the process of installing a ceiling fan on a sloped ceiling, covering the essential steps and considerations involved.
Determining Ceiling Slope and Fan Compatibility
The initial step involves accurately determining the degree of slope of the ceiling. This measurement is crucial for selecting the appropriate mounting hardware and ensuring the fan’s proper operation. The slope is typically expressed as a rise over run ratio (e.g., 4/12) or as an angle in degrees. Several methods can be used to measure the slope. A simple protractor and level can provide a relatively accurate measurement. Specialized angle finders or digital levels offer greater precision, which is particularly important for steeper slopes.
Once the ceiling slope is determined, it's essential to verify the ceiling fan's compatibility with the slope. Ceiling fan manufacturers typically specify the maximum slope angle for which their fans are designed to operate effectively. This information can be found in the fan’s product specifications or installation manual. Exceeding the manufacturer’s recommended slope angle can lead to several issues, including reduced airflow, increased motor stress, and potential safety hazards. It is vital to select a fan rated for the specific slope to avoid these problems.
Fans designed for sloped ceilings often incorporate features that allow the fan to hang plumb, even when mounted on an angle. These features may include a ball-and-socket mounting system or an adjustable downrod. These components allow the fan motor to remain level with the floor, which is essential for optimal performance and stability. Standard ceiling fans are generally not suitable for sloped ceilings unless used with specific adapters.
Selecting the Appropriate Mounting Hardware
The mounting hardware is a critical element in ensuring the safe and secure installation of a ceiling fan on a sloped ceiling. The choice of hardware depends on several factors, including the ceiling slope, the weight of the fan, and the existing electrical box. For sloped ceilings, a specially designed sloped ceiling adapter or mounting bracket is generally required.
Sloped ceiling adapters are designed to provide a level mounting surface for the fan's downrod, even when the ceiling is angled. These adapters typically consist of a bracket and a ball-and-socket joint that allows the downrod to hang vertically. Adapters are available for various ceiling slopes, and it's important to select one that matches the measured slope of the ceiling. Some adapters are adjustable, offering more flexibility in installation.
The existing electrical box must be capable of supporting the weight of the fan. Standard plastic electrical boxes are generally not suitable for ceiling fans, especially on sloped ceilings where the weight is distributed unevenly. A heavy-duty metal electrical box specifically rated for ceiling fans is essential. This box should be securely attached to a structural member of the ceiling, such as a joist or a blocking brace. If the existing electrical box is not rated for ceiling fans, it must be replaced before proceeding with the installation.
Furthermore, the length of the downrod is an important consideration. The downrod is the metal pipe that connects the fan motor to the mounting bracket. The appropriate downrod length depends on the height of the ceiling and the desired clearance between the fan blades and the floor. For sloped ceilings, a longer downrod may be necessary to ensure adequate blade clearance and prevent the fan from hitting the ceiling. As a general rule, the fan blades should be at least 7 feet above the floor. A longer downrod will also enhance airflow in rooms with higher ceilings.
Step-by-Step Installation Process
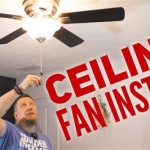
Before commencing the installation, it is imperative to turn off the power to the circuit at the circuit breaker. This prevents the risk of electrical shock during the installation process. Use a non-contact voltage tester to verify that the power is indeed off before touching any wires.
The first step involves removing the existing light fixture or ceiling fan, if present. Carefully disconnect the wiring, making sure to note the color coding of the wires (black for hot, white for neutral, and green or bare copper for ground). Place wire connectors on the exposed ends of the wires to prevent accidental contact.
Next, install the sloped ceiling adapter or mounting bracket, following the manufacturer's instructions. Ensure that the bracket is securely attached to the electrical box and the ceiling joist or blocking brace. Use appropriate screws or bolts to provide a strong and stable connection. Pay close attention to the orientation of the bracket, ensuring that it is properly aligned with the slope of the ceiling.
Prepare the ceiling fan for installation by attaching the fan blades to the motor housing. Most ceiling fans require some assembly before they can be mounted. Follow the manufacturer's instructions carefully, ensuring that all screws and bolts are tightened securely. Connect the wiring from the fan motor to the corresponding wires in the electrical box, using wire connectors to create secure connections. Match the colors of the wires (black to black, white to white, and green or bare copper to green or bare copper).
Carefully lift the ceiling fan into position and slide the downrod through the sloped ceiling adapter. Secure the downrod to the adapter using the appropriate hardware, such as a cotter pin or set screw. Ensure that the fan is hanging plumb and that the downrod is securely locked into place. Double-check all connections to ensure they are tight and secure.
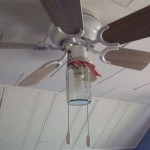
Once the fan is securely mounted, install the fan's light kit, if applicable. Connect the wiring for the light kit according to the manufacturer's instructions. Install the light bulbs and the light fixture cover.
Finally, restore power to the circuit at the circuit breaker. Test the ceiling fan to ensure that it is operating correctly. Check that the fan blades are rotating smoothly and that the light kit is functioning properly. If there are any issues, such as the fan wobbling or the light not working, troubleshoot the problem and make any necessary adjustments.
After the installation is complete, carefully inspect the fan and the surrounding area to ensure that everything is safe and secure. Clean up any debris or tools that may have been left behind. The ceiling fan is now ready to provide increased comfort and energy efficiency in the room.
Addressing Common Challenges and Troubleshooting
Several common challenges can arise during the installation of a ceiling fan on a sloped ceiling. One common issue is fan wobble. Wobbling can be caused by several factors, including unbalanced fan blades, loose screws, or an improperly installed mounting bracket. To address fan wobble, first ensure that all screws on the fan blades and the motor housing are tightened securely. Next, check the balance of the fan blades. Most ceiling fans come with a balancing kit that includes small weights that can be attached to the blades to correct any imbalances. Follow the instructions in the balancing kit to balance the fan blades. If the wobble persists, check the mounting bracket to ensure that it is securely attached to the electrical box and the ceiling joist or blocking brace.
Another common challenge is difficulty connecting the wiring. The wiring can be tight or difficult to access, especially in older homes. To make the wiring easier to connect, use wire strippers to expose more of the wire. If the wires are damaged or frayed, replace them with new wires. Use wire connectors to create secure and reliable connections. Ensure that the wire connectors are properly sized for the gauge of the wire.
Sometimes, the ceiling fan may not operate after installation. This could be due to a variety of issues, such as a tripped circuit breaker, a loose wire connection, or a faulty fan motor. First, check the circuit breaker to ensure that it has not tripped. If the circuit breaker has tripped, reset it. Next, check all wire connections to ensure that they are secure. Use a non-contact voltage tester to verify that power is reaching the fan motor. If the fan motor is not receiving power, check the wiring from the circuit breaker to the electrical box. If the fan motor is receiving power but the fan is still not operating, the fan motor may be faulty and require replacement.
In some cases, the downrod may be too short or too long. A downrod that is too short can cause the fan blades to hit the ceiling, while a downrod that is too long can make the fan hang too low. If the downrod is too short, replace it with a longer downrod. If the downrod is too long, it may be possible to shorten it by cutting it with a hacksaw. However, be careful not to damage the wiring inside the downrod. An alternative to shortening the downrod is to purchase a shorter downrod.
If any difficulties or uncertainties arise during the installation process, consulting a qualified electrician is always recommended. An electrician can ensure that the installation is performed safely and correctly, minimizing the risk of electrical hazards or damage to the ceiling fan.

How To Choose A Ceiling Fan For Vaulted Ceilings Lightology

How To Install A Ceiling Fan On Sloped Lemon Thistle

How To Install A Ceiling Fan On Sloped Lemon Thistle

How To Choose A Ceiling Fan For Vaulted Ceilings Lightology

Ensuring Proper Ceiling Fan Installation With Vaulted Ceilings

Ceiling Fans For Angled Ceilings

Fans On An Angle Installing Ceiling Angled Or Raked

Vaulted Ceiling Fans Sloped Lightology

Fan Types For Every Room

Hunter Vaulted Ceiling Fan Mount 22170 The Home Depot
Related Posts