Hampton Bay Ceiling Fan Remote User Manual
This article provides a comprehensive guide to understanding and using Hampton Bay ceiling fan remotes. It covers various aspects from basic operations to troubleshooting common issues, aiming to equip users with the knowledge necessary for optimal fan control and functionality.
Basic Operation
Most Hampton Bay ceiling fan remotes operate on similar principles. They typically control the fan speed, light fixture (if applicable), and sometimes additional features like reversing the fan direction.
Understanding the Buttons
Familiarizing oneself with the remote's buttons is crucial for effective operation. Common buttons include: *
Fan On/Off Button:
This button controls the power to the fan motor. *Speed Control Buttons:
These buttons regulate the fan's rotational speed, typically offering three or more settings (Low, Medium, High). *Light Button:
If the fan includes a light fixture, this button controls its power. *Dimmer Button:
Some models include a dimmer function for adjusting the light intensity. *Reverse Button:
This button changes the direction of fan rotation, useful for optimizing airflow during different seasons.Pairing the Remote
Many Hampton Bay ceiling fans utilize radio frequency (RF) technology for remote operation. This requires pairing the remote with the fan's receiver unit. The pairing process usually involves: *
Locating the Learn Button:
The learn button is typically found on the fan's motor housing or receiver unit. *Powering the Fan:
Ensure the fan is connected to power and switched on. *Activating Learning Mode:
Press and hold the learn button on the fan. *Pressing a Button on the Remote:
While holding the learn button on the fan, press any button on the remote. This should pair the two devices. *Confirmation:
Successful pairing is often indicated by a flash of the fan’s light or a change in the fan’s operation.Troubleshooting Common Issues
Several common issues can arise with ceiling fan remotes and their solutions include: *
Remote Unresponsive:
Check the batteries and replace if necessary. Ensure the remote is within range of the receiver. Try re-pairing the remote with the fan. *Fan Light Not Working:
Check the light bulb. Ensure the light button on the remote is functioning correctly. Verify the connection between the fan and the light fixture. *Fan Not Changing Speeds:
Ensure the speed control buttons are functioning correctly. Try re-pairing the remote. Check for any obstructions within the fan motor. *Remote Working Intermittently:
This could indicate weak batteries, interference from other devices, or a faulty receiver. Try replacing the batteries, moving the fan away from potential interference sources, or consulting a qualified electrician.Battery Replacement
Most Hampton Bay ceiling fan remotes use standard batteries. Replacing batteries involves: *
Locating the Battery Compartment:
The battery compartment is typically located on the back of the remote, accessed by sliding a cover or removing screws. *Identifying Battery Type:
Note the battery type required (e.g., AA, AAA). *Inserting New Batteries:
Install new batteries, observing the correct polarity. *Testing the Remote:
After replacing the batteries, test the remote’s functionality.Advanced Features
Some Hampton Bay ceiling fan remotes offer advanced features, including: *
Multi-Fan Control:
The ability to operate multiple fans from a single remote. *Timer Function:
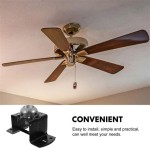
Programmable timers for automatic fan and light operation. *Wall Cradle:
A wall-mounted cradle to hold the remote when not in use.Wall Control Options
For users who prefer wall-mounted controls, Hampton Bay offers compatible wall control units. These units can replace or supplement remote control operation: *
Compatibility:
Ensure the wall control is compatible with your specific fan model. *Installation:
Wall controls typically require wiring into the fan's electrical circuit. Consult a qualified electrician if necessary. *Functionality:
Wall controls typically offer the same functionality as the remote, including fan speed, light control, and direction reversal.Safety Precautions
When operating a Hampton Bay ceiling fan and its remote, observe the following safety precautions: *
Do not overload the electrical circuit.
*Ensure the fan is properly installed and secured.
*Do not attempt to repair the fan or remote yourself unless qualified to do so. Consult a qualified electrician if necessary.
*Keep the remote away from water and excessive heat.
*Dispose of batteries properly.
Consulting the Manual
While this article provides general guidance, it’s crucial to consult the specific user manual that came with your Hampton Bay ceiling fan and remote for detailed instructions and model-specific information. This manual often offers tailored troubleshooting tips and explanations of unique features not covered in this general overview. The manual serves as the definitive resource for understanding and optimizing the operation of your particular fan and remote combination.

Troubleshooting Your Remote Controls Step By Hampton Bay Ceiling Fans Lighting

Hampton Bay 98139 3 Sd Universal Ceiling Fan Wireless Wall Control User Guide

Hampton Bay Thermostatic Remote Control User Guide

Hampton Bay 70830 Instructions Assembly Manualzz

Ceiling Fan Remote Control Replacement For Hampton Bay Uc7078t With Light Dimmer

Troubleshooting Your Remote Controls Step By Hampton Bay Ceiling Fans Lighting

Reversing Ceiling Fan Remote Control For Hampton Bay Hunter Uc7078t Chq7078t

Remote Control Dip Switch Settings Hampton Bay Ceiling Fans Lighting

Hampton Bay 3 Sd Universal Ceiling Fan Thermostatic Remote Control With Lcd Display 98001 The Home Depot

Hampton Bay Universal Smart Wi Fi 4 Sd Ceiling Fan White Remote Control For Use Only With Ac Motor Fans Powered By Hubspace 76278 The Home Depot
Related Posts


