DIY Tray Ceiling Ideas: Elevating Your Home's Interior Design
Tray ceilings, also known as inverted or recessed ceilings, represent a decorative architectural feature that can significantly enhance the aesthetic appeal of a room. Instead of a flat, uniform surface, a tray ceiling incorporates a central area that is set higher than the surrounding ceiling, creating a "tray-like" impression. This design element offers several advantages, including adding height to a room, creating a focal point, and providing opportunities for unique lighting and decorative treatments. For homeowners seeking to personalize their living spaces, a DIY tray ceiling project presents a cost-effective solution compared to professional installation.
Before embarking on a DIY tray ceiling project, careful planning and preparation are essential. This involves assessing the existing ceiling structure, determining the desired dimensions and shape of the tray, and acquiring the necessary materials and tools. Safety precautions are paramount throughout the entire process. Accurate measurements, precise cuts, and secure installation are crucial for achieving a professional-looking result. The following sections delve into various DIY tray ceiling ideas, providing guidance on design considerations, material selection, installation techniques, and finishing touches.
Design Considerations for DIY Tray Ceilings
The design of a tray ceiling should complement the overall style and proportions of the room. Factors such as room size, ceiling height, and existing architectural details should all influence the design choices. In smaller rooms, a simple, shallow tray might be more appropriate to avoid overwhelming the space. Conversely, larger rooms with higher ceilings can accommodate more elaborate designs, such as multi-tiered trays or trays with intricate moldings.
The shape of the tray is another significant design consideration. While rectangular or square trays are the most common, other options include oval, circular, or even custom shapes. The shape should ideally echo or complement other design elements in the room, such as the shape of the windows or the layout of the furniture. The depth of the tray, or the vertical distance between the lower and upper ceiling levels, also plays a crucial role. A deeper tray will create a more dramatic effect, while a shallower tray will be more subtle.
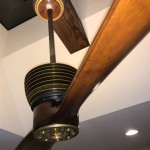
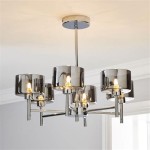
Lighting is an integral aspect of tray ceiling design. Recessed lighting fixtures can be strategically placed within the tray to provide general illumination or to highlight specific areas of the room. Accent lighting, such as LED strip lights or spotlights, can be used to illuminate the perimeter of the tray, creating a soft, ambient glow and accentuating the architectural details. Chandeliers or pendant lights can be suspended from the center of the tray to serve as a focal point and provide task lighting for the space below.
Furthermore, consider the existing architectural style of the home. A modern home might benefit from a clean, minimalist tray ceiling design, while a more traditional home could incorporate ornate moldings and decorative details. The color scheme should also be carefully chosen to complement the existing décor and to enhance the overall aesthetic appeal of the room. Lighter colors can make a room feel larger and brighter, while darker colors can create a more intimate and cozy atmosphere.
Material Selection and Installation Techniques
The materials used for constructing a DIY tray ceiling will significantly impact the cost, durability, and aesthetic appeal of the finished project. The most common materials include drywall, wood framing, and various types of trim and molding. Drywall is relatively inexpensive and easy to work with, making it a popular choice for the main surfaces of the tray. Wood framing provides the structural support for the tray and allows for the creation of complex shapes and designs.
The first step in the installation process is to create a detailed plan and layout. This involves accurately measuring the dimensions of the room and marking the location of the tray ceiling on the existing ceiling. It is crucial to use a level to ensure that the tray is perfectly horizontal. The wood framing is then constructed according to the plan, using screws or nails to securely fasten the pieces together. The framing should be strong enough to support the weight of the drywall and any additional lighting fixtures.
Once the framing is complete, the drywall is cut to size and attached to the framing using drywall screws. It is important to stagger the seams of the drywall to prevent cracking. After the drywall is installed, the joints are taped and mudded to create a smooth, seamless surface. Multiple coats of mud may be required to achieve a perfect finish. Sanding is then performed to smooth out any imperfections.
Trim and molding are then added to the edges of the tray to conceal the drywall seams and to add decorative detail. A wide variety of trim and molding options are available, ranging from simple, plain styles to ornate, decorative designs. The trim and molding can be attached using nails, screws, or adhesive. It is important to carefully align the trim and molding to create a professional-looking finish.
Installing electrical wiring for lighting fixtures should be done prior to installing the drywall. Ensure all electrical work complies with local building codes and regulations. Disconnect the power supply before working with electrical wiring. Consider hiring a licensed electrician if you are not comfortable performing electrical work yourself.
DIY Tray Ceiling Project Ideas and Enhancements
Beyond the basic construction of a tray ceiling, several creative enhancements can be incorporated to personalize the design and further enhance its aesthetic appeal. These enhancements can range from simple painting techniques to more elaborate decorative treatments.
One popular idea is to paint the inside of the tray a different color than the surrounding ceiling. This can create a striking contrast and draw attention to the architectural detail of the tray. Lighter colors can make the tray feel larger and more open, while darker colors can create a more intimate and dramatic effect. Metallic paints or textured finishes can also be used to add visual interest.
Another option is to install decorative panels or tiles inside the tray. These panels can be made from a variety of materials, such as wood, metal, or fabric. They can be painted, stained, or upholstered to match the existing décor. Decorative panels can add texture, depth, and visual interest to the tray ceiling.
Adding crown molding to the perimeter of the tray can significantly enhance its elegance and sophistication. Crown molding is available in a wide range of styles and sizes, allowing homeowners to customize the look of their tray ceiling to match their personal preferences. The molding can be painted, stained, or gilded to complement the existing décor.
Integrating backlighting behind the crown molding is another effective way to create a soft, ambient glow and accentuate the architectural details of the tray. LED strip lights are a popular choice for backlighting, as they are energy-efficient, long-lasting, and easy to install. The color of the LED lights can be changed to create different moods and effects.
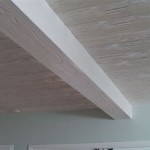
For a more rustic or industrial look, consider using reclaimed wood to construct the tray ceiling. Reclaimed wood adds character and warmth to a room and can create a unique and visually appealing focal point. The wood can be left in its natural state or stained or painted to match the existing décor.
Stenciling a design onto the inside of the tray ceiling is a relatively inexpensive and easy way to add a personal touch. A wide variety of stencils are available, ranging from simple geometric patterns to intricate floral designs. The stencil can be applied using paint, metallic leaf, or other decorative mediums.
Finally, consider the addition of a ceiling medallion at the center of the tray, particularly if a chandelier or pendant light is being suspended. A ceiling medallion provides a decorative focal point and can enhance the overall elegance of the design. Medallions are available in a wide range of styles and materials, from simple plaster designs to ornate, hand-carved pieces.

Superb Tray Ceiling Designs For Your Living Spaces

Inexpensive Diy Herringbone Wood Ceiling Using Pallets Remodelaholic

Easy Diy Coffered Ceiling Idea Simple Low Profile Design Steps And Dining Room

How To Add Diy Wood Beams Around A Tray Ceiling Thrifty Decor And Organizing

Faux Coffered Ceiling Confessions Of A Serial Do It Yourselfer

I Love This Beautiful Diy Vaulted Tray Ceiling Idea Using Trim Molding Abbotts At Home

18 Amazing Painted Ceiling Ideas

Pin By Patti Kappauf On Diy Dining Room Ceiling Modern Cupboard Design Tray Ideas

How To Make Your Tray Ceiling Feel Like Home

Easy Diy Coffered Ceiling Idea Simple Low Profile Design Steps And Abbotts At Home
Related Posts