Transform Your Ceiling: DIY Beadboard over Popcorn
Are you tired of your dated popcorn ceiling? Give your living space a modern and sophisticated makeover with a DIY beadboard ceiling. Transforming your popcorn ceiling into a stunning beadboard aesthetic is easier than you think, and this detailed guide will provide you with all the steps necessary to achieve a professional-looking result.
Materials You'll Need:
- Beadboard panels (size and thickness as desired)
- Furring strips (1x3 or 1x4)
- Adhesive nails
- Liquid nails
- Caulk gun and caulk
- Primer
- Paint (optional)
- Sandpaper (150-grit)
- Stud finder
- Safety glasses
Safety Precautions:
Before beginning any work, don safety glasses to protect your eyes from dust and debris. Ensure there is adequate ventilation by opening windows or using a fan.
Step 1: Remove Popcorn Ceiling
If you have an existing popcorn ceiling, you must remove it before installing the beadboard. Follow the manufacturer's instructions for the safe removal of popcorn ceilings.
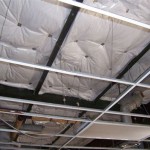
Step 2: Install Furring Strips
Using a stud finder, locate the ceiling joists. Place the furring strips perpendicular to the joists, approximately 16 inches apart. Use adhesive nails to secure the strips to the joists.
Step 3: Install Beadboard Panels
Apply a generous bead of liquid nails to the back of the beadboard panel and press it firmly into place against the furring strips. Use adhesive nails to further secure the panel. Continue installing the panels in rows, ensuring a snug fit.
Step 4: Fill Gaps and Caulk
Once all the beadboard panels are in place, use caulk to fill any gaps between the panels and around the edges of the ceiling. Smooth out the caulk using your finger or a caulk tool.
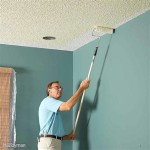
Step 5: Prime and Paint
After the caulk has dried, apply a coat of primer to the entire ceiling. This will help ensure even paint coverage. Once the primer has dried, paint the ceiling in your desired color. Allow the paint to dry completely.
Step 6: Finishing Touches
Once the paint is dry, gently sand any rough edges or imperfections using 150-grit sandpaper. Vacuum the ceiling to remove any dust and debris.
Enjoy a Refreshed Ceiling!
You've successfully transformed your popcorn ceiling into an elegant beadboard masterpiece. Your living space will feel brighter and more inviting with its new, modern look. Enjoy your refreshed ceiling and take pride in your DIY accomplishment.

The Best Way To Cover Popcorn Ceilings With Beadboard Shoe Makes New

How To Cover Popcorn Ceilings With Beadboard

Diy Beadboard Ceiling Tutorial Easy And Inexpensive Custom Treatment

How To Cover Popcorn Ceiling With Beadboard Planks Diy Tutorial

Diy Beadboard Ceiling Tutorial Easy And Inexpensive Custom Treatment

How To Cover Popcorn Ceilings With Beadboard

Diy Bead Board Ceiling To Hide An Ugly Popcorn Lehman Lane Beadboard

How To Cover Popcorn Ceilings With Beadboard

How To Cover Popcorn Ceiling With Beadboard Planks Diy Covering

How Much Does It Cost To Install A Beadboard Ceiling 2024 Data Angi
Related Posts