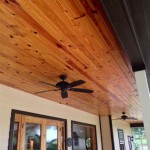
If you are looking to give your home a unique and beautiful look, installing crown molding on a vaulted ceiling is one of the best ways to do it. Crown molding is the decorative trim that runs along the top of the walls and ceiling and helps to create a more inviting, finished look. However, installing crown molding on a vaulted ceiling is not a simple task. It requires special tools and techniques to ensure the job is done correctly.
What is a Vaulted Ceiling?
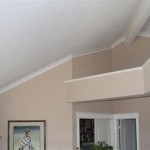
A vaulted ceiling is a type of ceiling that is higher than a traditional flat ceiling. It is usually seen in larger spaces, such as a living room or great room. The vaulted ceiling is often used to create a more open, airy feel in the room. Vaulted ceilings can be constructed with various materials, including wood, drywall, plaster, and metal.
Preparing to Install Crown Molding on a Vaulted Ceiling
Before you begin the installation, it is important that you take the time to properly measure and prepare the area. This will ensure that your crown molding is cut to the correct size and that you have the right tools and materials on hand. Here are some tips for preparing to install crown molding on a vaulted ceiling:
- Measure the height and width of the area you are installing the crown molding on.
- Measure the angles of the walls and ceiling so you can accurately cut the crown molding.
- Purchase the right type of crown molding for your ceiling. Make sure you have enough material to cover the entire area.
- Gather the tools you will need for the installation, such as a miter saw, a level, a power drill, and a stud finder.
Installing Crown Molding on a Vaulted Ceiling
Once you have the area prepared and the right tools and materials on hand, you can begin the installation. Here is a step-by-step guide for installing crown molding on a vaulted ceiling:
- Use a stud finder to locate the ceiling joists. Mark the locations with a pencil.
- Measure the length of the crown molding and mark the spots where you will need to make cuts.
- Use a miter saw to cut the crown molding at the marked spots. Make sure the angles are accurate.
- Position the crown molding on the ceiling, making sure it is level and firmly attached to the joists.
- Secure the crown molding in place with nails or screws.
- Use caulk and putty to fill in any gaps or imperfections.
- Paint or stain the crown molding to match the decor of the room.
Conclusion
Installing crown molding on a vaulted ceiling can add a unique and beautiful touch to your home. With a little preparation and the right tools and materials, you can achieve a professional-looking result. Now that you know the steps involved, you can begin the process of creating a beautiful space with crown molding on your vaulted ceiling!


Related Posts

