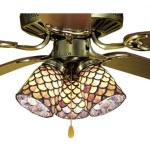
Are you looking to replace the pull switch on your ceiling fan? If so, then you’ve come to the right place! Replacing a ceiling fan pull switch is a relatively simple task when you have the right tools. In this article, we’ll provide you with step-by-step instructions for replacing your ceiling fan pull switch.
Tools and Supplies Needed
Before you start the replacement process, make sure you have the following tools and supplies:
- Phillips head screwdriver
- Flathead screwdriver
- Replacement pull switch
- Wire cutters
- Electrical tape
Step-by-Step Instructions
Now that you have the necessary tools and supplies, you’re ready to begin replacing your ceiling fan’s pull switch.
- Turn off the power to the ceiling fan. You can do this by switching off the circuit breaker in your home’s electrical panel.
- Remove the screws that hold the pull switch assembly in place. Depending on your ceiling fan, you’ll need a Phillips head or flathead screwdriver.
- Disconnect the wires from the old pull switch. Use wire cutters to disconnect the wires from the switch.
- Connect the wires to the new pull switch. Make sure the connections are secure.
- Secure the new pull switch in place. Use the screws you removed in step 2.
- Turn the power back on and test the switch. Make sure it is working properly before you use the ceiling fan.
Conclusion
Replacing a ceiling fan pull switch is a relatively simple task. All you need is the right tools and supplies, and you can do the job in just a few easy steps. If you’re still having trouble, then it might be best to call a professional electrician.


Related Posts


