Can You Spray Paint A Ceiling Fan?
Spray painting a ceiling fan can be a cost-effective way to update a room's aesthetic or revitalize an older fixture. However, the process requires careful preparation and execution to achieve a professional-looking finish. This article will provide a comprehensive guide to spray painting a ceiling fan, covering necessary materials, preparation steps, painting techniques, and safety precautions.
Key Considerations Before Painting
Several factors should be considered before embarking on this project. Evaluating these points will ensure a successful outcome and prevent potential problems.
- Fan Material: Different materials require different types of paint. Ensure the chosen paint is compatible with the fan's composition (e.g., metal, plastic, wood).
- Existing Finish: A glossy finish may require sanding or priming for proper paint adhesion. Heavily textured or rusted surfaces will need more extensive preparation.
- Location: The fan's location will dictate the appropriate paint type. Exterior fans require weather-resistant paint, while indoor fans benefit from low-VOC formulas.
Necessary Materials
Gathering the correct materials beforehand streamlines the painting process and ensures a smooth, efficient workflow.
- Screwdrivers: Essential for disassembling the fan.
- Drop Cloths: Protects flooring and furniture from paint overspray.
- Painter's Tape: Creates clean lines and protects areas that should not be painted.
- Sandpaper (various grits): Used for smoothing and preparing the fan's surface.
- Primer (if needed): Enhances paint adhesion and provides a uniform base.
- Spray Paint: Choose a high-quality spray paint formulated for the fan's material and location.
- Safety Glasses and Mask: Protects eyes and lungs from paint fumes and particles.
- Gloves: Prevents paint from getting on hands and provides better grip.
- Cleaning Supplies: For cleaning the fan before and after painting.
Preparing the Ceiling Fan for Painting
Proper preparation is crucial for achieving a professional, durable finish. Skipping these steps can lead to uneven paint application and peeling.
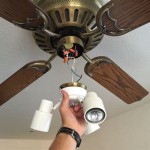
- Disassembly: Remove the fan blades, light kit, and any other removable parts. This allows for thorough cleaning and painting of each component.
- Cleaning: Thoroughly clean all surfaces with a suitable cleaner to remove dust, grease, and grime. This ensures proper paint adhesion.
- Sanding: Lightly sand all surfaces to be painted. This creates a slightly rough surface that promotes better paint adhesion. For glossy finishes, more aggressive sanding may be necessary.
- Taping: Protect any areas that should not be painted, such as screw holes or pull chain mechanisms, using painter's tape.
Spray Painting Techniques
Applying the paint correctly is essential for achieving a smooth, even finish. These techniques will help achieve professional-looking results.
- Priming (if needed): Apply a thin, even coat of primer, allowing it to dry completely before applying the paint. Primer is especially important for surfaces that are porous, stained, or glossy
- Thin Coats: Apply multiple thin coats of spray paint, allowing each coat to dry completely before applying the next. This prevents drips and runs and ensures a more durable finish.
- Even Strokes: Use smooth, overlapping strokes, keeping the spray can a consistent distance from the surface (typically 8-12 inches). This creates a uniform coat of paint.
- Rotation: Rotate the fan blades or other components as you paint to ensure all sides are evenly coated.
- Drying Time: Allow ample drying time between coats and before reassembling the fan. Refer to the paint manufacturer's instructions for specific drying times.
Safety Precautions
Safety should always be a priority when working with spray paint. Taking the necessary precautions will minimize potential risks.
- Ventilation: Work in a well-ventilated area or outdoors to avoid inhaling paint fumes.
- Respiratory Protection: Wear a respirator or mask designed for paint fumes.
- Eye Protection: Wear safety glasses to protect eyes from paint overspray.
- Skin Protection: Wear gloves to prevent paint from contacting skin.
- Fire Hazards: Keep spray paint away from open flames and heat sources, as it is flammable.
- Disposal: Dispose of empty spray paint cans and other materials properly according to local regulations.
Reassembling the Ceiling Fan
Once the paint is completely dry, the fan can be reassembled. Care should be taken during this process to avoid damaging the newly painted finish.
- Careful Handling: Handle the painted components with clean hands or gloves to avoid leaving fingerprints or smudges.
- Reverse Order: Reassemble the fan in the reverse order of disassembly.
- Tighten Screws: Ensure all screws are tightened securely, but avoid overtightening, which could damage the paint.
- Testing: After reassembling the fan, test its operation to ensure everything is working correctly.
By following these steps and taking the necessary precautions, individuals can successfully spray paint their ceiling fan, giving it a fresh, updated look.

Update A Ceiling Fan Using Spray Paint

Upcycling A Ceiling Fan With Spray Paint Happy Frugal Mama

Another Ceiling Fan Makeover And How Not To Paint A Nani S Notebook

Fixes Spray Paint Edition

Thrifty Diy Outdoor Fan Makeover Painting Ceiling Fans

Update A Ceiling Fan Using Spray Paint

Spray Paint Ceiling Fan

Another Ceiling Fan Makeover And How Not To Paint A Nani S Notebook

How To Update A Ceiling Fan Without Removing It Savvy Apron

Ceiling Fan Makeover An Easy Diy Tutorial
Related Posts