Can You Paint Ceiling Fan Blades White Again?
Restoring ceiling fan blades to their original white brilliance is a common home improvement project. Whether dealing with yellowed, discolored, or simply outdated blades, a fresh coat of paint can dramatically revitalize a room's aesthetic. This article will explore the process of repainting ceiling fan blades white, covering the necessary preparations, appropriate paint choices, and application techniques.
Key Preparations for Painting Ceiling Fan Blades
Preparation is crucial for achieving a smooth, professional-looking finish. Neglecting proper preparation can lead to peeling, chipping, and an uneven appearance. The following steps ensure the paint adheres correctly and provides long-lasting results.
1.
Turn off the power:
Before beginning any work, disconnect the power to the ceiling fan at the breaker box. This is a vital safety precaution to prevent accidents. 2.Remove the fan blades:
Carefully remove the fan blades from the motor housing. This allows for easier handling and more thorough painting. 3.Clean the blades:
Thoroughly clean the blades using a mild detergent and water solution to remove dust, grease, and grime. Rinse and allow them to dry completely. 4.Sand the blades:
Lightly sand the blades with fine-grit sandpaper (e.g., 220-grit) to create a slightly rough surface for better paint adhesion. This is especially important if the existing finish is glossy. 5.Apply painter's tape:
If the fan blades have hardware or areas that shouldn't be painted, carefully apply painter's tape to protect them. 6.Lay down drop cloths:
Protect the floor and surrounding area with drop cloths to catch any drips or spills.Choosing the Right Paint for Ceiling Fan Blades
Selecting the right paint is essential for a durable and attractive finish. The environment in which the fan operates, specifically temperature and humidity, should inform the paint choice.
1.
Acrylic-latex paint:
This type is generally recommended for ceiling fan blades due to its durability, flexibility, and resistance to moisture. 2.Oil-based paint:
Oil-based paints provide a hard, durable finish but require longer drying times and require specific cleaning solvents. 3.Spray paint:
Spray paint offers a convenient application method, especially for intricate blade designs. Ensure the spray paint is specifically formulated for use on metal or plastic, depending on the blade material. 4.Primer:
Consider using a primer, especially if the original finish is dark or stained, or when painting onto bare metal. Primer promotes better adhesion and color uniformity.Applying the Paint to Ceiling Fan Blades
Applying the paint evenly and smoothly is key to achieving a professional finish. Regardless of the application method chosen, patience and attention to detail are crucial.
1.
Thin coats:
Apply thin, even coats of paint to prevent drips and ensure proper drying. Multiple thin coats are preferable to one thick coat. 2.Brush application:
If using a brush, use smooth, even strokes in the direction of the blade's length. 3.Roller application:
A small foam roller can be used for flat blade surfaces, providing a smooth, even finish. 4.Spray application:
When using spray paint, hold the can a consistent distance from the blade and apply even, overlapping coats. 5.Drying time:
Allow ample drying time between coats, following the manufacturer's instructions on the paint can. 6.Second coat:
Once the first coat is dry, apply a second coat (and a third if needed) to achieve full coverage and opacity.Reassembling the Ceiling Fan
After the final coat of paint has thoroughly dried, the fan blades can be reassembled. Proper reassembly is important for the fan's balance and safe operation.
1.
Remove painter's tape:
Carefully remove any painter's tape while the paint is still slightly pliable to prevent pulling up the fresh paint. 2.Reattach the blades:
Reattach the fan blades to the motor housing, ensuring they are securely fastened according to the manufacturer's instructions. 3.Balance the fan:
If the fan wobbles after reassembly, a balancing kit can be used to correct the imbalance. 4.Restore power:
Once the fan is reassembled and balanced, restore the power at the breaker box.Maintaining Your Newly Painted Ceiling Fan Blades
Maintaining the newly painted finish will ensure the blades retain their bright white appearance for years to come.
1.
Regular dusting:
Dust the blades regularly with a soft cloth or duster to prevent the buildup of dust and grime. 2.Occasional cleaning:
Periodically clean the blades with a mild detergent and water solution to remove more stubborn dirt and grime. 3.Avoid harsh chemicals:
Avoid using harsh chemicals or abrasive cleaners, as these can damage the paint finish.Troubleshooting Common Issues
Occasionally, issues can arise during the painting process. Addressing these proactively can ensure a successful outcome.
1.
Drips and runs:
If drips or runs occur, gently smooth them out with a brush or roller while the paint is still wet. 2.Uneven coverage:
If the coverage appears uneven, apply additional thin coats of paint until the desired opacity is achieved. 3.Peeling paint:
If the paint begins to peel, it may be due to inadequate surface preparation. Remove the peeling paint, sand the surface, and reapply the primer and paint.
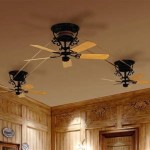
Update A Ceiling Fan Using Spray Paint

How To Paint Ceiling Fan Blades Sunshine And Rainy Days

Can Ceiling Fan Blades Be Stained Or Painted Life Should Cost Less

Update A Ceiling Fan Using Spray Paint

Ceiling Fan Makeover 100 Room Challenge The Palette Muse

Another Ceiling Fan Makeover And How Not To Paint A Nani S Notebook

Painted Fan Blades A Little Revamp In My Sewing Room

Another Ceiling Fan Makeover And How Not To Paint A Nani S Notebook

Ceiling Fan Makeover An Easy Diy Tutorial

Update A Ceiling Fan Using Spray Paint
Related Posts