Can You Paint a Ceiling Fan?
Ceiling fans, while functional, can become eyesores over time due to dust accumulation, discoloration, or simply outdated aesthetics. Painting offers a cost-effective way to refresh a fan's appearance and match it to updated decor. This article explores the process, considerations, and materials needed to successfully paint a ceiling fan.
Key Considerations Before Painting
Several factors should be considered before embarking on a ceiling fan painting project. Careful planning helps ensure a smooth process and satisfactory results.
*
Fan Material:
The fan's material dictates the appropriate paint type. Metal fans typically require metal primer and paint, while wooden fans benefit from wood primer and paint. Plastic fans often necessitate specialized plastic primer and paint for optimal adhesion. *Fan Location:
Fans located in bathrooms or kitchens encounter higher humidity levels, demanding moisture-resistant paint. *Existing Finish:
Glossy finishes require light sanding to create a better surface for paint adhesion. *Disassembly:
Disassembling the fan facilitates more thorough painting and reduces the risk of overspray.Necessary Materials and Tools
Gathering the required materials and tools beforehand streamlines the painting process.
*
Screwdrivers:
Essential for disassembling the fan. *Drop Cloths:
Protect flooring and furniture from paint splatters. *Painter's Tape:
Masks areas that should not be painted. *Sandpaper (Fine Grit):
Prepares surfaces for better paint adhesion, especially on glossy finishes. *Cleaning Solution:
Removes dust, grease, and grime. *Primer (Appropriate for Fan Material):
Provides a base for the paint and enhances adhesion. *Paint (Appropriate for Fan Material and Location):
Chosen to match the desired aesthetic and withstand environmental conditions. *Paintbrushes or Spray Paint:
For applying the primer and paint. *Gloves:
Protect hands during the cleaning and painting process. *Safety Glasses:
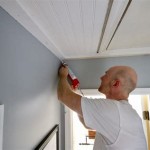
Shield eyes from paint particles and debris.Preparing the Fan for Painting
Proper preparation is crucial for achieving a professional-looking finish and long-lasting results.
*
Turn off the power:
Ensure the electricity to the fan is completely shut off at the breaker box. *Disassemble the fan:
Carefully remove the fan blades, light kit (if applicable), and any other removable components. *Clean the fan components:
Use a cleaning solution to thoroughly remove dust, grease, and grime. Rinse with clean water and allow to dry completely. *Sand glossy surfaces (if necessary):
Lightly sand glossy finishes to create a slightly rough surface for improved paint adhesion. Wipe away any sanding dust. *Mask areas that should not be painted:
Use painter's tape to cover areas like screw holes, pull chains, and any other parts that shouldn't be painted.Painting the Fan
Careful application of the primer and paint ensures a smooth and even finish.
*
Apply primer:
Apply a thin, even coat of primer to all surfaces to be painted. Allow the primer to dry completely according to the manufacturer's instructions. *Apply paint:
Apply thin, even coats of paint, allowing each coat to dry completely before applying the next. Multiple thin coats provide a smoother and more durable finish than one thick coat. *Spray painting (optional):
Spray painting offers a faster and often smoother finish. Ensure adequate ventilation and follow the manufacturer's instructions for spray paint application.Reassembling the Fan
Once the paint has fully cured, the fan can be reassembled.
*
Ensure complete drying:
Allow the paint to cure completely according to the manufacturer's instructions before reassembling the fan. *Reassemble the fan:
Carefully reattach the fan blades, light kit, and other components in the reverse order of disassembly. *Inspect for proper function:
Once reassembled, turn the power back on and test the fan to ensure it operates correctly.Choosing the Right Paint
Selecting the appropriate paint type is crucial for achieving a durable and aesthetically pleasing finish.
*
Metal fans:
Use a metal primer and paint formulated for metal surfaces. *Wooden fans:
Opt for a wood primer and paint designed for wood. *Plastic fans:
Employ a specialized plastic primer and paint to ensure proper adhesion to plastic. *High-humidity locations:
Choose a moisture-resistant paint for fans located in bathrooms or kitchens.Tips for a Successful Outcome
Following these tips can enhance the final result and extend the life of the paint job.
*
Thin coats:
Multiple thin coats of paint provide a smoother and more durable finish compared to one thick coat. *Proper ventilation:
Ensure adequate ventilation when painting, especially when using spray paint. *Quality materials:
Using high-quality primer and paint contributes to a longer-lasting finish. *Patience:
Allow ample drying time between coats and before reassembly.Safety Precautions
Observing safety precautions is paramount when undertaking any painting project.
*
Eye protection:
Always wear safety glasses to protect eyes from paint particles and debris. *Hand protection:
Wear gloves to protect skin from paint and cleaning solutions. *Ventilation:
Ensure adequate ventilation, especially when using spray paint. *Electrical safety:
Turn off power at the breaker box before starting any work on the fan.
Update A Ceiling Fan Using Spray Paint

Another Ceiling Fan Makeover And How Not To Paint A Nani S Notebook

Painted Fan Blades A Little Revamp In My Sewing Room

Upcycling A Ceiling Fan With Spray Paint Happy Frugal Mama

Thrifty Diy Outdoor Fan Makeover Painting Ceiling Fans

Ceiling Fan Makeover Distressed Chalk Or Latex Paint No Sanding How To A

Another Ceiling Fan Makeover And How Not To Paint A Nani S Notebook

How To Paint A Ceiling Fan 13 Steps With Pictures Wikihow

Another Ceiling Fan Makeover And How Not To Paint A Bedroom Painting Fans

Diy Ceiling Fan Makeover With Chalk Paint
Related Posts