Removing acoustic ceiling tiles is a process that requires careful planning, safety precautions, and the right tools. If you’re looking to update your home or office with a new ceiling, this guide will provide you with all the information you need to safely and effectively remove your existing acoustic ceiling tiles.
What is an Acoustic Ceiling Tile?
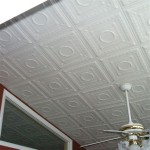
An acoustic ceiling tile is a type of ceiling material that is made up of a soft, porous material with a honeycomb-like construction. This construction helps reduce noise and provides sound absorption in a room. Acoustic ceiling tiles are commonly used in commercial and industrial settings, but they can also be found in many residential homes.
Safety Considerations Before Removing Acoustic Ceiling Tiles
Before you begin the process of removing acoustic ceiling tiles, it is important to take safety precautions. Make sure you have the necessary safety equipment, such as safety glasses and gloves, and be aware of the potential for dust, debris, and sharp edges. In addition, it is important to make sure that the area is well ventilated and that you are wearing a dust mask.
Tools Needed for Removing Acoustic Ceiling Tiles
The tools you will need for removing acoustic ceiling tiles depend on the type of tiles you have installed. If you have a ceiling grid system, you will need a pair of pliers, a utility knife, and a screwdriver. If you have a suspended ceiling, you will need a pair of pliers, a utility knife, a hammer, and a putty knife.
Step-by-Step Guide to Removing Acoustic Ceiling Tiles
1. Before you begin, make sure that you have the necessary safety equipment and that the room is well-ventilated. 2. To start, use the pliers to loosen the screws that are holding the ceiling tiles in place. 3. Use the utility knife to carefully cut the tiles into smaller sections. 4. If you have a ceiling grid system, use the screwdriver to remove the screws from the grid. 5. If you have a suspended ceiling, use the hammer to gently break the tiles into smaller pieces. 6. Once the tiles have been removed, use the putty knife to scrape off any adhesive that may have been used to attach the tiles. 7. Finally, use a vacuum to clean up any dust or debris.
Conclusion
Removing acoustic ceiling tiles is a process that requires careful planning, safety precautions, and the right tools. With this guide, you should now have all the information you need to successfully remove your existing acoustic ceiling tiles and make room for a new ceiling.


Related Posts


