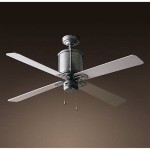
Replacing ceiling fan blades can be an easy and inexpensive way to give your home a fresh, new look. Whether you’re replacing existing blades that are worn out or simply giving your fan a style upgrade, replacing the blades is a relatively easy task. Here, we’ll walk you through the steps of replacing your fan blades and provide tips on how to choose the right set for your needs.
Steps for Replacing Ceiling Fan Blades
Changing out the blades on your ceiling fan is relatively straightforward. All you need is a ladder, screwdriver, and the new blades. Here are the steps for replacing the blades:
- Turn off the power to the fan. Unplug the fan or switch off the circuit breaker.
- Carefully remove the blades. Unscrew the screws holding the blades to the fan, and keep track of the hardware.
- Attach the new blades to the fan. Most ceiling fan blades attach with two screws, but it’s a good idea to check the manufacturer’s instructions for your particular fan.
- Plug in the fan or turn on the circuit breaker.
- Enjoy your new fan blades. Sit back and admire your handiwork!
Choosing the Right Ceiling Fan Blades
When choosing your new fan blades, there are a few things to consider. First, make sure to measure the blade span of your fan. This will help you find blades that are the right size for your particular fan. You’ll also want to consider the style of your fan and choose blades that complement its look. Lastly, make sure that your blades are rated for the wattage of your fan. This will help ensure that the fan runs safely and efficiently.
Conclusion
Replacing ceiling fan blades is an easy and inexpensive way to give your home a new look. Just be sure to turn off the power, keep track of the hardware, and make sure the new blades are the right size and wattage for your fan. With a few simple steps, you can have a brand new fan in no time!


Related Posts


