Can You Wallpaper Over Drop Ceiling Tiles? A Comprehensive Guide
Drop ceilings, also known as suspended ceilings, are a common feature in commercial spaces and some residential settings. They offer benefits such as concealing wiring and ductwork, improving acoustics, and providing easy access for maintenance. However, the aesthetic of standard drop ceiling tiles can be perceived as bland or outdated. This often leads to the question: can you wallpaper over drop ceiling tiles to enhance their appearance? While technically possible, wallpapering drop ceiling tiles presents a number of considerations that must be carefully evaluated before undertaking such a project. This article provides a comprehensive guide to the feasibility, process, and potential drawbacks of wallpapering drop ceiling tiles.
Understanding the Challenges of Wallpapering Drop Ceiling Tiles
Before attempting to wallpaper drop ceiling tiles, it's crucial to understand the inherent challenges involved. These challenges stem primarily from the materials used to construct the tiles and the nature of drop ceiling systems themselves.
First, many drop ceiling tiles are made from mineral fiber or fiberglass. These materials are porous and absorbent, meaning they can soak up wallpaper paste unevenly. This can lead to problems with adhesion, resulting in bubbles, peeling, and ultimately, a failed wallpaper application. The porous nature also makes it difficult to achieve a smooth, consistent surface, as the texture of the tile may show through the wallpaper.
Second, the lightweight nature of the tiles can be problematic. Applying wallpaper introduces significant weight, potentially straining the suspension grid and causing the tiles to sag or even fall. This is particularly true if a heavy or thick wallpaper is used.
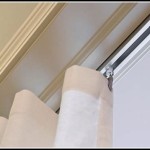
Third, access to the tiles is often limited. Because they are installed within a grid system, removing and handling the tiles can be awkward. Furthermore, wallpapering the tiles in place, while seemingly easier, can result in messy grout lines in the grid. Precise measurements and careful cutting are required to achieve a professional finish.
Fourth, moisture is a significant concern. Wallpaper paste introduces moisture, which can warp or damage some types of ceiling tiles. It can also promote the growth of mold or mildew, especially in areas with high humidity. Proper ventilation is essential during and after the wallpapering process.
Finally, fire safety is paramount. Standard drop ceiling tiles often have a fire-resistance rating. Wallpapering them could potentially compromise this rating, violating building codes and creating a safety hazard. It is essential to choose a wallpaper that meets fire safety standards and to verify that applying it will not void the tile's fire rating.
Preparing Drop Ceiling Tiles for Wallpaper
If, after considering the challenges, wallpapering drop ceiling tiles remains the desired option, proper preparation is essential for maximizing the chances of success. The preparation process involves several key steps.
Cleaning: Begin by thoroughly cleaning the tiles. Use a soft brush or vacuum cleaner with a brush attachment to remove dust, dirt, and any loose debris. Avoid using harsh cleaning agents or water, as these can damage the tiles. If there are stubborn stains, try gently blotting them with a slightly damp cloth.
Priming: Priming is a critical step in preparing porous ceiling tiles for wallpaper. Use a high-quality, oil-based primer specifically designed for porous surfaces. Apply the primer in thin, even coats, allowing each coat to dry completely before applying the next. Two or three coats may be necessary to create a smooth, sealed surface that will accept the wallpaper paste. The primer will help to prevent the wallpaper paste from being absorbed unevenly, improving adhesion and preventing bubbling.
Sizing (Optional): Sizing is another optional but recommended step. Sizing creates a slightly tacky surface that further enhances the adhesion of the wallpaper. Apply a thin, even coat of wallpaper sizing over the primed surface and allow it to dry completely. Be sure to follow the manufacturer's instructions for application and drying time.
Tile Removal (Optional): Removing the tiles from the grid system can simplify the wallpapering process. This allows you to work on a flat surface, making it easier to apply the wallpaper smoothly and accurately. However, removing the tiles can be delicate, as some tiles are brittle and can break easily. Handle the tiles carefully and support them fully to prevent damage.
Workspace Preparation: Prepare a clean, well-lit workspace before you begin wallpapering. Cover the work surface with a drop cloth to protect it from paste and spills. Gather all the necessary tools and materials, including the wallpaper, wallpaper paste, measuring tape, cutting tools, smoothing tools, and a sponge.
Applying Wallpaper to Drop Ceiling Tiles
The application process for wallpapering drop ceiling tiles is similar to wallpapering any other surface, but requires extra care and precision due to the tile's unique properties.
Measuring and Cutting: Measure the dimensions of each tile precisely. Cut the wallpaper slightly larger than the tile to allow for trimming. When cutting, use a sharp utility knife or wallpaper scissors to ensure clean, straight lines. If the wallpaper has a pattern, be sure to match the pattern across adjacent tiles for a seamless look.
Pasting: Apply wallpaper paste to the back of the wallpaper according to the manufacturer's instructions. Use a pasting brush to ensure an even coat of paste across the entire surface. Avoid applying too much paste, as this can cause the wallpaper to become soggy and difficult to handle.
Applying the Wallpaper: Carefully position the wallpaper on the tile, aligning it precisely. Use a smoothing tool, such as a plastic smoothing brush or a seam roller, to smooth out any bubbles or wrinkles. Work from the center of the tile outwards, applying gentle pressure to ensure good adhesion. Be careful not to tear or damage the wallpaper during this process.
Trimming: Once the wallpaper is applied and smoothed, use a sharp utility knife or wallpaper trimmer to trim the excess wallpaper around the edges of the tile. Use a metal straightedge as a guide to ensure clean, straight cuts. Take your time and be precise to achieve a professional finish.
Cleaning: After trimming, use a damp sponge to wipe away any excess paste from the surface of the wallpaper and the edges of the tile. Be careful not to saturate the wallpaper with water, as this can cause it to peel or bubble. Dry the tile thoroughly with a clean cloth.
Reinstallation: Allow the wallpapered tiles to dry completely before reinstalling them in the drop ceiling grid. This may take several hours or even overnight, depending on the humidity and temperature. Handle the tiles carefully during reinstallation to avoid damaging the wallpaper. Ensure the tiles are properly seated in the grid to prevent sagging or falling.
Alternative Solutions to Wallpapering Drop Ceiling Tiles
Given the challenges and potential drawbacks of wallpapering drop ceiling tiles, it's worth considering alternative solutions that may offer a more straightforward and less risky way to enhance the appearance of a drop ceiling.
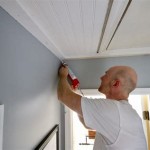
Painting: Painting drop ceiling tiles is a common and relatively simple alternative. Use a paint specifically designed for ceiling tiles to avoid damaging the material. Apply the paint in thin, even coats using a roller or brush. Painting allows you to change the color of the tiles and can even be used to create patterns or designs.
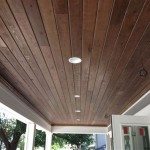
Decorative Ceiling Tiles: Replacing the existing tiles with decorative ceiling tiles is another option. Decorative tiles come in a variety of materials, styles, and colors, allowing you to create a customized look. Some decorative tiles are designed to simply lay into the existing grid, while others require more extensive installation.
Ceiling Medallions: While not a direct replacement for ceiling tiles, ceiling medallions can be added to the drop ceiling to create a focal point and enhance the overall aesthetic. Medallions are typically made from lightweight materials and can be easily attached to the grid system.
Fabric Panels: Fabric panels can be hung below the drop ceiling to create a softer, more inviting atmosphere. Fabric panels are available in a wide range of colors, patterns, and textures, allowing you to customize the look of the space. They can also help to improve acoustics and reduce noise.
Decorative Grids: Consider replacing the standard metal grid with a decorative grid system. These grids come in a variety of finishes and styles, adding visual interest to the ceiling without requiring any alterations to the tiles themselves.

Ceiling Makeover Nesting With Grace

Wallpapered Drop Ceiling Update Ceilings With L And Stick Wallpaper

Ceiling Makeover Nesting With Grace

Wallpaper On Drop Ceiling Tiles This Might Look Good With Patterned White

How To Cover Drop Ceiling Tiles Decorative Inc

Creative Drop Ceiling Ideas B4 And Afters

My Next Project I Our Dropped Ceiling Tiles Cover Ugly Drop Panels With Textured Wallpaper And Then Spray Paint Paper Grids

Creative Drop Ceiling Ideas B4 And Afters

11 Ways To Cover A Hideous Ceiling That Anyone Can Do

Beadboard Ceiling Tiles B4 And Afters A Drop Alternative
Related Posts