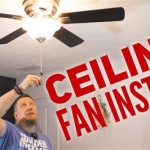
Replacing a Ceiling Fan Glass Bowl Shade in Hampton Bays
Ceiling fans are a staple in many Hampton Bays homes, providing a cool breeze during the summer months and helping to circulate air year-round. The glass bowl shade, often a decorative element, can become damaged over time, requiring replacement. This article will provide a step-by-step guide on how to replace a ceiling fan glass bowl shade, ensuring a safe and efficient process.
Safety First: Understanding the Risks
Before starting, it's crucial to understand the potential hazards associated with working with electricity. Always disconnect power to the ceiling fan at the circuit breaker before attempting any repairs or replacements. This prevents accidental electrocution, a serious safety concern.
Additionally, be mindful of the height of the ceiling fan and take appropriate precautions to avoid falling. If the fan is high, consider using a sturdy ladder or a step stool with a wide base.
Choosing the Right Replacement Shade
Selecting the correct replacement shade requires understanding the existing fan's design and specifications. The new shade should:
- Match the size: Measure the diameter of the existing shade to ensure the new one fits properly.
- Match the shape: The new shade should be compatible with the fan's mounting hardware.
- Match the style: Consider the overall aesthetic of the room when choosing the style and color of the replacement shade.
Step-by-Step Replacement Process
Once you have a new shade and have taken necessary safety measures, follow these steps to replace the glass bowl shade:
- Turn off the power: Locate the circuit breaker that controls the ceiling fan and turn it off. To confirm the power is off, test the fan with a non-contact voltage tester.
- Remove the old shade: Depending on your fan's model, the shade may be secured with screws or clips. Carefully remove the old shade, taking note of how it was attached.
- Clean the mounting assembly: Use a soft cloth and mild cleaning solution to wipe away any dust or debris from the mounting assembly on the fan. This will ensure a secure connection for the new shade.
- Install the new shade: Align the new shade with the mounting assembly and secure it using the same method as the old shade. If screws are used, ensure they are tightened securely but not overtightened to avoid damaging the shade.
- Restore power: Before powering on the fan, carefully inspect the new shade's connection to the mounting assembly to ensure it is secure. Once satisfied, turn the power back on at the circuit breaker.
Additional Tips
Here are some additional tips to ensure a successful replacement:
- Wear gloves: When handling glass, wear gloves to protect your hands from cuts or scratches.
- Ask for help: If you are unsure about any step or feel uncomfortable working with electricity, contact a qualified electrician.
- Regular maintenance: After replacing the glass bowl shade, it's a good practice to inspect the ceiling fan regularly for any wear or tear. This can help prevent future issues and ensure the fan operates safely and efficiently.

Hampton Bay Springview 52 In White Ceiling Fan Replacement Frosted Glass Bowl G14921 The Home Depot

Hampton Bay Everbilt Frosted Replacement Glass G14927 1 The Home Depot

Hampton Bay Andross 48 In Oil Rubbed Broe Ceiling Fan Replacement Tea Stain Glass Bowl G14919 The Home Depot

Hampton Bay Everbilt Frosted Replacement Glass G14927 1 The Home Depot

Hampton Bay Replacement Glass For Arctic Sky 54 In Brushed Nickel Ceiling Fan G34021 The Home Depot

Hampton Bay Ceiling Fan Replacement Globes Shades Four

Private Brand Unbranded Windward Iv Ceiling Fan Replacement Glass Bowl 082392053475

Hampton Bay 1yw2 Ceiling Fan Lamp Shades White Marble Glass Globe Replacement

Hampton Bay Replacement Glass For Escape 68 In Indoor Outdoor Brushed Nickel Ceiling Fan G04314 The Home Depot

Hampton Bay Ceiling Fan Replacement 4 Globes Shades Milk Glass Bottom Flair For
Related Posts