How To Wire a Ceiling Fan With Two Switches and a Remote
Installing a ceiling fan controlled by two switches and a remote offers convenience and flexibility in managing airflow and lighting. This setup allows users to operate the fan and light independently from two different wall switches while also utilizing a remote for added control. While seemingly complex, wiring a ceiling fan with this configuration can be accomplished by following a systematic approach and adhering to safety precautions.
Safety First
Working with electrical wiring requires strict adherence to safety protocols. Before commencing any electrical work, always disconnect power to the circuit at the breaker box. Verify the power is off using a non-contact voltage tester. If unsure about any aspect of the wiring process, consulting a qualified electrician is recommended.
Understanding the Wiring
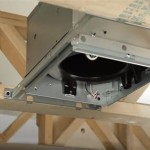
Ceiling fans with remote control capabilities typically include a receiver unit housed within the fan's canopy. This receiver contains the necessary components to interpret signals from the remote and control the fan's motor and light kit. Understanding the wiring connections between the fan, the receiver, and the two switches is crucial for successful installation.
The fan typically has separate wires for the fan motor (often black and blue) and the light kit (often black and white). The receiver unit also has corresponding wires for these functions, along with wires for power input (black/hot) and neutral (white). The two wall switches will each connect to the receiver and provide switched power to either the fan or the light.
Preparing the Switches and Wiring
Typically, two single-pole switches are used for this configuration. Ensure the switches are rated for the fan's electrical load. Prepare the wires at both switch locations and at the fan’s ceiling box by stripping approximately ½ inch of insulation from the ends. Use wire strippers designed for this purpose to avoid damaging the wires.
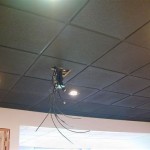
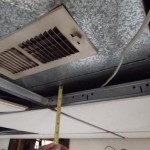
Connecting the Wires at the Fan
Inside the ceiling fan's electrical box, carefully connect the house hot wire (usually black) to the receiver's black (hot) wire using a wire nut. Connect the house neutral wire (usually white) to both the receiver's white (neutral) wire and the fan's white (neutral) wire using a wire nut. Connect the fan's motor wires (typically black and blue) to the corresponding wires from the receiver. Similarly, connect the light kit wires (typically black and white) to the corresponding wires on the receiver. Secure all wire connections with appropriately sized wire nuts.
Connecting the Wires at the Switches
At the first switch location, connect one of the switch's wires to the black (hot) wire coming from the fan/receiver location. Connect the other switch wire to one of the wires designated for fan control from the receiver (often identified in the fan's instructions). At the second switch location, connect one of the switch's wires to the black (hot) wire coming from the fan/receiver location. Connect the other switch wire to one of the wires designated for light control from the receiver (often identified in the fan's instructions). Use wire nuts to secure all connections.
Completing the Installation
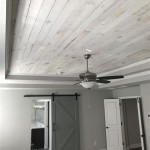
Once all wiring connections are completed and secured, carefully tuck the wires into the ceiling fan's electrical box and the switch boxes. Mount the fan to the ceiling bracket according to the manufacturer's instructions. Attach the light kit and fan blades. Restore power to the circuit at the breaker box. Test the fan and light operation using both wall switches and the remote control.
Troubleshooting
If the fan or light does not function correctly after installation, double-check all wiring connections to ensure they are secure and correct. Refer to the fan's instruction manual for specific wiring diagrams and troubleshooting tips. If issues persist, consult a qualified electrician.
Choosing the Right Fan and Remote
Select a ceiling fan and remote control system that are compatible with each other and suitable for the room's size and application. Consider factors such as blade span, airflow (measured in CFM), and lighting options. Ensure the fan is rated for outdoor use if installing in a covered outdoor area.

How To Install A Ceiling Fan Two Wall Switches What Bb Built

Ceiling Fan Wiring Diagram Two Switches

Graphic Ceiling Fan Wiring With Light Switch

Ceiling Fan Switch Wiring Electrical 101

Converting An Existing Ceiling Fan To A Remote Control

Ceiling Fan Remote With 2 Wires Doityourself Com Community Forums

How To Wire A Ceiling Fan Control Using Dimmer Switch

Ceiling Fan Switch Wiring Electrical 101

How To Wire A Harbor Breeze Fan And Light 2 Switches Quora

How To Wire A Ceiling Fan For Separate Control Fo The And Light
Related Posts