Troubleshooting a Westinghouse Ceiling Fan Light When It Fails to Illuminate
A malfunctioning light fixture on a Westinghouse ceiling fan can be a frustrating issue. Several factors can contribute to this problem, ranging from simple fixes to more complex electrical concerns. This article provides a comprehensive guide to diagnosing and addressing common causes of a non-functional Westinghouse ceiling fan light.
Examining the Light Bulb and Socket
The first step in troubleshooting a Westinghouse ceiling fan light that isn't working involves a basic inspection of the light bulb and socket. Often, the issue stems from a simple, easily rectified problem.
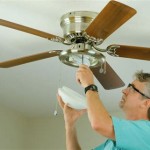
Begin by ensuring the light bulb is securely screwed into the socket. A loose bulb can prevent the electrical connection from being properly established, resulting in no light. Tighten the bulb, making sure not to overtighten, which could damage the socket. It is crucial to disconnect the power to the fan at the circuit breaker before physically handling the bulb or accessing the socket.
Next, test the bulb itself. The bulb may be burned out, even if it appears visually intact. Replace the bulb with a new one known to be functional. Ensure the replacement bulb is of the correct wattage and type specified for the ceiling fan. Using an incorrect wattage can damage the fan's light fixture or create a fire hazard.
If replacing the bulb doesn't resolve the issue, inspect the socket for any signs of damage or corrosion. Corrosion can impede the electrical connection. Use a dry cloth or a small wire brush to gently clean the socket. In cases of severe corrosion or visible damage, the socket may need to be replaced. Replacement sockets are typically inexpensive and readily available at hardware stores.
Furthermore, check the center contact point inside the socket. This small metal tab needs to be making contact with the base of the bulb. Over time, this tab may become bent or flattened, preventing proper contact. Using a non-metallic tool, such as a plastic toothpick or a small piece of wood, gently bend the contact point upward to ensure it will make contact with the bulb. Again, ensure the power is disconnected before performing this step.
Finally, consider the type of bulb being used. Some ceiling fans, particularly those with dimmer functions, may not be compatible with certain types of bulbs, such as some LEDs. Consult the fan's manual or manufacturer’s website to verify the compatibility of the bulb being used with the fan's light fixture.
Investigating Wiring Connections and the Light Kit
If the bulb and socket are functioning correctly, the next area of investigation involves the wiring connections within the ceiling fan and the light kit itself.
Start by disconnecting power to the ceiling fan at the circuit breaker. This is paramount for personal safety. Once the power is off, carefully remove the fan's light kit cover, exposing the wiring connections. Use a voltage tester to confirm that the power is indeed off before proceeding.
Visually inspect all wiring connections within the light kit. Look for loose wires, frayed insulation, or signs of burning. Loose wire connections are a common cause of lighting problems. If any loose connections are found, carefully re-secure them using wire connectors, ensuring they are tightly fastened. When re-connecting wires, follow the color codes: black to black (hot), white to white (neutral), and green or bare copper to green or the grounding screw (ground).
Check the wire connectors themselves for any signs of damage or corrosion. If the connectors appear damaged, replace them with new ones. Inferior or damaged wire connectors can create resistance and prevent proper electrical flow.
Examine the wires running from the fan's motor housing to the light kit. These wires can sometimes be pinched or damaged during installation or over time due to the fan's movement. If any wires appear damaged, they will need to be replaced. This may require disassembling the fan to access the wiring within the motor housing.
If the fan has a pull chain switch for the light, inspect the switch itself. Pull chain switches can wear out over time or become damaged. Test the switch using a multimeter to check for continuity. If the switch is not functioning properly, it will need to be replaced. Replacement pull chain switches are readily available and relatively easy to install.
For fans with remote controls, the receiver unit inside the fan's motor housing could be the culprit. The receiver unit controls the fan's speed and light functions. A malfunctioning receiver unit can prevent the light from working. Try replacing the batteries in the remote control. If that doesn't work, you may need to reprogram the remote to the receiver. Consult the owner’s manual for specific instructions on how to reprogram the remote. If the remote continues to not work it may need to be replaced.
Examining the Circuit Breaker and House Wiring
If the problem persists after examining the light bulb, socket, and wiring connections within the fan, the issue may lie in the circuit breaker or the house wiring.
First, check the circuit breaker that controls the ceiling fan. A tripped circuit breaker will cut off power to the fan and its light fixture. Locate the circuit breaker in the electrical panel and ensure it is in the "on" position. If the breaker has tripped, reset it by first switching it completely off and then back on. If the breaker trips again immediately or shortly after being reset, there may be a short circuit in the wiring, requiring further investigation by a qualified electrician.
If the circuit breaker is not tripped, use a voltage tester to check the voltage at the ceiling fan's wiring. If there is no voltage present, the problem likely lies in the wiring between the electrical panel and the fan's location. This could be due to a loose connection, a damaged wire, or a faulty switch. Tracing the wiring and identifying the problem can be complex and potentially dangerous; it is recommended to consult a qualified electrician for this task.
Consider the possibility of a faulty wall switch controlling the ceiling fan and light. The wall switch may be malfunctioning, preventing power from reaching the fan. Test the switch using a multimeter to check for continuity. If the switch is not functioning correctly, replace it with a new one.
In some cases, the problem may be a grounding issue. A proper ground is essential for the safe and reliable operation of electrical devices. Ensure the ceiling fan is properly grounded according to local electrical codes. A loose or missing ground wire can cause various electrical problems, including a non-functional light fixture. If you suspect a grounding issue, consult a qualified electrician.
Finally, consider the possibility of electromagnetic interference (EMI). EMI from other electronic devices can sometimes interfere with the operation of ceiling fan remote controls and light functions. Try moving other electronic devices away from the ceiling fan to see if this resolves the issue. If EMI is suspected, consider using shielded wiring or installing a filter to reduce the interference.
Addressing a non-functional Westinghouse ceiling fan light requires a systematic approach, starting with the simplest potential causes and progressing to more complex electrical issues. Safety is paramount: always disconnect power before working on electrical components. If the problem persists after attempting these troubleshooting steps, it is advisable to consult a qualified electrician to diagnose and repair the issue safely.

Ceiling Fans Support Faq

Repair And Upgrade Westinghouse Ceiling Fan With Light

Ceiling Fans Support Faq

Westinghouse Stella Mira 52 In Led Indoor Brushed Nickel Ceiling Fan With Light Fixture And Remote Control 7305700 The Home Depot

Westinghouse 7221500 Indoor Ceiling Fan With Led Light Fixture 42 In Lightingnbeyond Com

Westinghouse

Comet 52 Indoor Ceiling Fan By Westinghouse Marvel Lighting
4 Reasons Your Ceiling Fan Light Isn T Working Hunker

Westinghouse 7215800 30 Antique Brass Indoor Ceiling Fan With Light Kit Com

Westinghouse 7234100 Comet 52 Inch Brushed Pewter Ceiling Fan With Led Light Delmarfans Com
Related Posts

