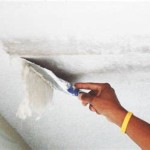
Texturing a ceiling is a great way to give your home a unique and attractive look. Whether you are looking to paint or simply add a layer of texture to your ceiling, this guide will help you get the job done right. In this article, we’ll cover the basics of texturing a ceiling, the tools and materials you’ll need, and the best techniques for achieving the perfect finish. Read on to learn everything you need to know about texturing a ceiling.
What Is Ceiling Texturing?
Ceiling texturing is the process of applying a layer of texture to your ceiling. This texture can be achieved with a variety of techniques and materials, including paint, wallpaper, or a textured plaster. The main purpose of texturing a ceiling is to give it a unique look and feel, while also helping to hide any imperfections or flaws. Texturing a ceiling can also help to reduce sound echoing in the room, making it more comfortable.
Tools and Materials Needed for Texturing a Ceiling
In order to texture a ceiling, you’ll need the following tools and materials:
- Paint
- Textured Plaster
- Wallpaper
- Roller
- Paint Tray
- Paint Brush
- Drop Cloths
- Sandpaper
- Tape Measure
- Masking Tape
Preparation
Before you begin texturing your ceiling, it’s important to prepare the area. First, move any furniture out of the room, and cover it with drop cloths. Next, inspect the ceiling for any imperfections, such as cracks or holes. If there are any, repair them before texturing. Lastly, use a tape measure and masking tape to mark off the area you plan to texture.
Texturing a Ceiling
Once you have prepared the room and gathered your materials, you can begin texturing your ceiling. Depending on the type of texture you want to achieve, the process may vary slightly. Here, we will cover the basics of texturing a ceiling with paint or textured plaster.
Texturing with Paint
Texturing a ceiling with paint is a relatively straightforward process. First, use sandpaper to lightly scuff the surface of the ceiling. This will help the paint to adhere better. Next, mix the paint according to the manufacturer’s instructions, and pour it into a paint tray. Then, roll the paint onto the ceiling in a criss-cross pattern, creating the texture you desire. Once the paint is dry, you can apply a second coat if necessary.
Texturing with Textured Plaster
Texturing a ceiling with textured plaster is a bit more involved than texturing with paint. First, mix the plaster according to the manufacturer’s instructions. Then, use a roller to apply it to the ceiling in a criss-cross pattern. Let the plaster dry completely before applying a second coat. Once the second coat is dry, you can use a paint brush or sponge to add additional texture to the surface. Finally, let the plaster dry completely before painting over it if desired.
Conclusion
Texturing a ceiling is a great way to give your home a unique and attractive look. Whether you choose to use paint or textured plaster, the process is relatively straightforward. Just make sure to gather the right tools and materials, and prepare the area before you start. With these tips, you’ll be able to successfully texture any ceiling in no time.


Related Posts


