Styrofoam ceiling tiles are a popular and affordable option for home renovation projects. They are lightweight, easy to install, and come in a variety of colors and patterns. They can also be painted or textured to match the decor of any room. This guide will explain the benefits of installing styrofoam ceiling tiles and provide step-by-step instructions for an easy and successful installation.
Benefits of Styrofoam Ceiling Tiles
Styrofoam ceiling tiles offer a number of benefits for homeowners. They are lightweight and easy to install, which makes them ideal for DIY projects. They are also an affordable option, as they can be purchased for as little as $2 per tile. They are also durable, as they will not warp or crack over time. Finally, they are available in a variety of colors and patterns, making it easy to find the perfect option for any home.
Preparation and Installation
Before beginning the installation, it is important to properly prepare the area. Make sure the ceiling is free of dust, dirt, and debris. Then, measure the area and purchase the necessary number of tiles. It is also important to use the correct adhesive for the type of ceiling tiles being installed.
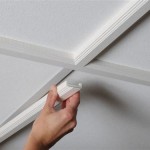
Once the area is prepared and the tiles are purchased, the installation can begin. Start by laying out the entire project on the floor. This will help to ensure that everything is lined up correctly. Then, use the adhesive to secure the tiles to the ceiling. Finally, complete the project by filling in any gaps with caulk or spackle.
Conclusion
Installing styrofoam ceiling tiles is a great way to update the look of any room. They are lightweight, easy to install, and available in a variety of colors and patterns. They are also an affordable option, as they can be purchased for as little as $2 per tile. With proper preparation and installation, homeowners can enjoy the look and feel of new ceiling tiles in no time.


Related Posts


