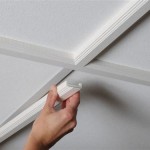
Replacing ceiling tiles can be a daunting task, but with the right tips and tricks, you can easily complete the job and take pride in the professional results. From prepping the area to putting up the new tiles, this guide will walk you through the process of replacing ceiling tiles in a few simple steps.
Step 1: Gather Your Materials
Before you begin, be sure to have all the necessary materials on hand. You’ll need a ladder, a flathead screwdriver, a utility knife, a measuring tape, a pencil, and of course, the ceiling tiles. Make sure you have enough tiles to cover the entire area, taking into account the extra space you’ll need for trimming.
Step 2: Prep the Area
Once you have your materials, the next step is to prep the area. Start by removing any existing tiles, taking care to not damage the ceiling. Once all the old tiles are out, use a vacuum to get any leftover dust and debris. Finally, inspect the area for any damage, such as cracks or holes, and make any necessary repairs before putting up the new tiles.
Step 3: Measure and Mark
Now that the area is prepped, it’s time to measure and mark the area. Use a measuring tape to measure the length and width of the ceiling. Once you have the measurements, mark off the area with a pencil. This will be your guideline when you’re placing the new tiles.
Step 4: Install the Tiles
Once the area is marked, it’s time to install the tiles. Start with the first tile and press it into place. Make sure the edges line up with the mark you made earlier. Then use a flathead screwdriver to secure the tile to the ceiling. Continue this process until all the tiles are installed.
Step 5: Trim the Tiles
Once the tiles are all in place, you can trim the excess. Use a utility knife to carefully trim away any extra tile. Be sure to go slow and take your time, as it’s easy to accidentally cut too much. Finally, use a vacuum to get rid of any remaining dust and debris.
Conclusion
Replacing ceiling tiles is a relatively easy job when you know what you’re doing. Just make sure to take your time and follow the steps outlined in this guide. With a little patience and the right materials, you can have your ceiling looking like new in no time.


Related Posts


