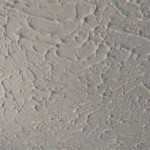
When it comes to home renovation projects, removing ceiling texture can be one of the most challenging tasks. Not only does it require a certain level of skill and precision, but it can also be time-consuming and potentially hazardous. Fortunately, there are some tips and tricks that can make the process easier and safer. In this guide, we’ll provide you with the information you need to remove ceiling texture quickly and easily.
Things You’ll Need
Before you begin, it’s important to gather the right supplies and tools. These items will make the job easier and help ensure that your results are professional-looking.
- Drop cloths
- Safety goggles
- Dust mask
- Scraper
- Putty knife
- Sandpaper
- Sponge
- Vacuum
Step 1: Prepare the Room
Before you start removing the texture from the ceiling, it’s important to properly prepare the room. Start by laying down drop cloths to protect the floor, furniture, and other items in the area. Next, put on safety goggles and a dust mask to protect your eyes and lungs from any debris that may become airborne. Finally, remove any furniture and other items that may be in the way.
Step 2: Remove the Texture
Once the room is prepared and you’ve gathered the necessary supplies, you can begin the process of removing the texture. Start by using a scraper to gently scrape away the texture. Be sure to move slowly and carefully to avoid damaging the ceiling. If you’re having trouble removing the texture, you can use a putty knife or sandpaper to help loosen it. If you’re dealing with a large area, it may be easier to rent a special scraper for the job.
Step 3: Clean the Ceiling
Once you’ve removed all the texture from the ceiling, you’ll need to clean up the area. Start by using a damp sponge to wipe away any residue that may remain. Next, use a vacuum to remove any dust or debris that may have been created during the process. Finally, take a few moments to inspect the area and make sure that all the texture has been removed.
Step 4: Apply a New Texture
Once the ceiling has been properly cleaned and all the texture has been removed, you may want to apply a new texture to the area. This will help create a clean, professional-looking finish. Depending on the type of texture you’re using, the process may vary. Be sure to follow the manufacturer’s instructions carefully to ensure the best results.
Conclusion
Removing ceiling texture can be a challenging task, but with the right supplies and the proper preparation, it’s possible to achieve professional results. By following the steps outlined in this guide, you’ll be able to quickly and easily remove the texture and apply a new finish to the ceiling. With a little bit of patience and effort, you can transform the look of any room in your home.


Related Posts

