If you’re looking to update your home, one of the first steps might be to remove the old, dated popcorn ceiling. But what do you do if it’s painted? Don’t worry, with the right preparation and materials, you can easily remove a painted popcorn ceiling.
Step 1: Gather Supplies
Before you begin, you’ll need to gather the supplies necessary to complete the project. You’ll need a ladder, a drop cloth, a putty knife, a spray bottle, a large plastic tarp, a screwdriver, a pair of safety glasses, a respirator, and some protective clothing. You’ll also need a chemical stripper, some spackle, a putty knife, sandpaper, and a paintbrush.
Step 2: Prep the Area
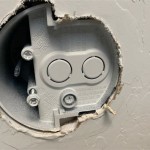
Once you have all the necessary supplies, you’ll need to prepare the area. Start by covering the floor and any furniture with a drop cloth. Next, use a screwdriver to remove any light switches, outlet covers, and light fixtures. Then, use a pair of safety glasses and a respirator to protect yourself from any airborne particles.
Step 3: Apply Chemical Stripper
Now it’s time to apply the chemical stripper. Using a putty knife, spread the stripper evenly over the ceiling. Make sure to get all the nooks and crannies. Once the stripper has been applied, cover the ceiling with a large plastic tarp and let it sit for at least four hours.
Step 4: Scrape the Ceiling
When the stripper has had time to work, it’s time to scrape the ceiling. Use a putty knife to scrape the popcorn away. As you scrape, make sure to wear protective clothing and safety glasses. When you’re done scraping, vacuum up the debris and dispose of it properly.
Step 5: Patch the Ceiling
Once the popcorn has been removed, you’ll need to patch any holes or cracks in the ceiling. Use spackle and a putty knife to fill in any gaps. Once the spackle is dry, sand it smooth and apply a coat of paint to the ceiling. You can then replace any light fixtures or outlet covers that you removed.
Conclusion
Removing a painted popcorn ceiling doesn’t have to be a daunting task. With the right preparation and supplies, you can easily get the job done. Just make sure to take all the necessary safety precautions and you’ll have a beautiful, updated ceiling in no time.


Related Posts

